Instructions

pressure cooker xl instruction manual

The Pressure Cooker XL, detailed in a 24-page manual (CP016-PC), streamlines cooking. It’s a versatile appliance, compatible with models like YBD60-100, PPC780, and PPC790.

What is a Pressure Cooker XL?

The Pressure Cooker XL is a premium 6-quart appliance, identified by model number CP016-PC. It’s designed for faster, more efficient cooking utilizing pressurized steam. This innovative cooker caters to diverse models – XL, YBD60-100, PPC780, PPC770, and PPC790 – offering broad compatibility. A comprehensive 24-page instruction manual guides users through its features. It’s a kitchen essential for those seeking convenience, allowing for quicker preparation of dishes like Collard Greens and Corn Bread, as demonstrated by satisfied users.

Benefits of Using a Pressure Cooker XL

The Pressure Cooker XL dramatically reduces cooking time, ideal for busy individuals. Utilizing pressure, it cooks food quickly and efficiently. Users praise its ability to prepare meals like Collard Greens with Ham Hock and Southern-style Corn Bread with ease. The appliance’s timer settings ensure meals are ready when desired. Its versatility extends across multiple models (XL, YBD60-100, etc.). The detailed manual simplifies operation, making it accessible for all cooks, offering convenience and flavorful results.

Models and Variations (CP016-PC, YBD60-100, PPC780, PPC770, PPC790)

The Pressure Cooker XL instruction manual applies to a range of models, ensuring broad compatibility. Key variations include CP016-PC (Premium 6-Quart), YBD60-100, PPC780, PPC770, and PPC790. The 60cm XL model introduces a wider design. These models share core functionality but may differ in size or specific features. The manual provides guidance applicable across these variations, simplifying operation regardless of the chosen model. Understanding your specific model number is crucial for accessing tailored support and replacement parts.

Understanding the Components

The Pressure Cooker XL features a 2.8MM body and 2.5MM lid, alongside a 2LTR inner pot with a non-stick coating. Familiarize yourself with each part!

Lid and Sealing Mechanism

The Pressure Cooker XL’s lid is crucial for building and maintaining internal pressure, ensuring efficient cooking. A secure clip-on closure type guarantees a tight seal. Proper alignment is essential; ensure the lid locks firmly into place before operation. Regularly inspect the sealing ring for cracks or damage, as this directly impacts pressure retention. A compromised seal can lead to steam leaks and incomplete cooking. Understanding this mechanism is paramount for safe and effective use, preventing potential hazards and maximizing cooking performance. Always handle with care!

Inner Pot (Non-Stick Coating & 2LTR Capacity)

The Pressure Cooker XL features a 2LTR capacity inner pot, designed for efficient cooking of smaller portions. Its non-stick coating simplifies food release and cleaning, minimizing sticking and making maintenance easier. Avoid using abrasive cleaners or metal utensils, as these can damage the coating. Gentle hand washing is recommended to prolong its lifespan. The pot’s construction ensures even heat distribution, contributing to consistent cooking results. Regularly inspect the coating for scratches or wear, replacing it if necessary for optimal performance.

Body Thickness (2.8 MM Body, 2.5 MM Lid)

The Pressure Cooker XL boasts robust construction with a 2.8 MM thick body and a 2.5 MM lid. This substantial thickness contributes to even heat distribution and efficient pressure retention during operation. The durable build ensures longevity and safety, withstanding the stresses of repeated use. These specifications are crucial for maintaining consistent cooking temperatures and preventing warping or damage. This design enhances the cooker’s ability to reach and maintain optimal pressure levels, resulting in faster and more effective cooking.

Control Panel Overview

The Pressure Cooker XL’s control panel facilitates intuitive operation. While specific details aren’t provided, it allows users to select cooking modes and adjust pressure settings, notably 350KPA / 50.7psi. The panel likely incorporates timer settings for automated cooking. Understanding the panel’s functions is key to utilizing the cooker’s full potential. Further instruction manual details would clarify button functions and display readouts. Efficient use of the control panel ensures precise cooking and optimal results for various recipes, like Collard Greens and Corn Bread.

Operating Instructions

Initial setup involves familiarizing yourself with the manual. Add food and liquids, select a cooking mode, and utilize the 350KPA/50.7psi pressure settings for optimal results.

Initial Setup and First Use

Before your first use, carefully unpack the Pressure Cooker XL and review the comprehensive 24-page instruction manual (Model CP016-PC). Ensure all components are present and undamaged. Perform a test run with water to familiarize yourself with the lid sealing mechanism and control panel. This initial step verifies proper functionality and helps understand pressure build-up. Thoroughly clean the inner pot and lid before adding food. Refer to the manual for detailed cleaning instructions to maintain optimal performance and longevity of your new appliance.

Adding Food and Liquids

When using the Pressure Cooker XL, always adhere to the guidelines in the manual (CP016-PC) regarding food and liquid levels. Avoid overfilling – a crucial safety precaution. For recipes like Collard Greens, ensure sufficient liquid is added to generate steam and build pressure effectively. The 2LTR inner pot capacity dictates maximum load. Do not exceed the recommended fill line, typically two-thirds full for most foods. Proper liquid ratios are essential for safe and successful pressure cooking, preventing blockages and ensuring even cooking results.

Selecting Cooking Modes

The Pressure Cooker XL’s control panel offers diverse cooking modes, detailed within the instruction manual (CP016-PC). These modes cater to various dishes, optimizing pressure and time for ideal results. Familiarize yourself with each setting before use. Recipes like Southern Style Corn Bread benefit from specific mode selections. The manual provides guidance on choosing the appropriate mode based on food type and desired texture. Experimentation is encouraged, but always refer to the manual for recommended settings and safety precautions when exploring different cooking options.

Pressure Settings (350KPA / 50.7psi)

The Pressure Cooker XL operates at 350KPA, equivalent to 50.7psi, as outlined in the manual. This pressure level significantly reduces cooking times. Understanding this setting is crucial for safe and effective operation. It’s comparable to approximately 3.5 bar, similar to the maximum inflation for a 100kg-rated tire. Always ensure the lid is securely fastened before pressure builds. Refer to the manual for specific cooking times at this pressure, adjusting as needed for different ingredients and desired results.

Safety Precautions

Prioritize safety! The manual details proper pressure release, avoiding overfilling, and safe lid handling. Maximum load is 100kg; always adhere to these guidelines.

Understanding Pressure Release Methods

The Pressure Cooker XL manual emphasizes safe pressure release techniques. Understanding these is crucial for preventing accidents and ensuring optimal cooking results. There are typically three primary methods: natural pressure release, quick release, and cold water quick release. Natural release involves allowing the pressure to dissipate on its own, ideal for soups and stocks. Quick release, achieved by carefully opening the pressure valve, is faster but can cause splattering. Cold water quick release involves running cold water over the lid, rapidly reducing pressure – use caution! Always follow the manual’s specific instructions for your model to avoid burns or damage.

Avoiding Overfilling

The Pressure Cooker XL instruction manual strongly cautions against overfilling the unit. Exceeding the maximum capacity – stated as 100kg maximum load – can lead to dangerous pressure buildup and potential malfunction. Food expands during cooking, and insufficient headspace prevents proper circulation. Always adhere to the fill lines indicated within the inner pot, typically around two-thirds full for most foods. Overfilling can obstruct the lid sealing mechanism, compromising safety. Prioritize leaving ample space to ensure safe and effective pressure cooking, preventing messy spills and potential hazards.

Safe Lid Handling

The Pressure Cooker XL manual emphasizes careful lid handling for safe operation. Ensure the lid is securely locked into place before initiating pressure cooking; a ‘clip on’ closure type is standard. Never attempt to force or open the lid while pressure remains inside. Utilize the appropriate pressure release method detailed in the manual. Inspect the sealing mechanism regularly for damage or wear. Avoid dropping or mishandling the lid, as this can compromise its integrity. Always allow the cooker to cool completely before attempting lid removal, preventing burns and ensuring a secure release.

Maximum Load Capacity (100kg)

The Pressure Cooker XL manual clearly states a maximum load capacity of 100kg (approximately 220lbs). Exceeding this limit is a significant safety hazard and can compromise the cooker’s functionality. This specification relates to the overall weight of food and liquids combined. The manual draws a parallel to tire pressure – a 100kg load corresponds to roughly 3.5 bar (51psi) pressure. Never overload the cooker, as this could lead to malfunction, damage, or potential injury. Adhering to this limit ensures safe and efficient operation.

Cooking with the Pressure Cooker XL

The manual showcases recipes like Collard Greens with Ham Hock and Southern-style Corn Bread. Adjust cooking times for optimal results, utilizing the built-in timer settings.

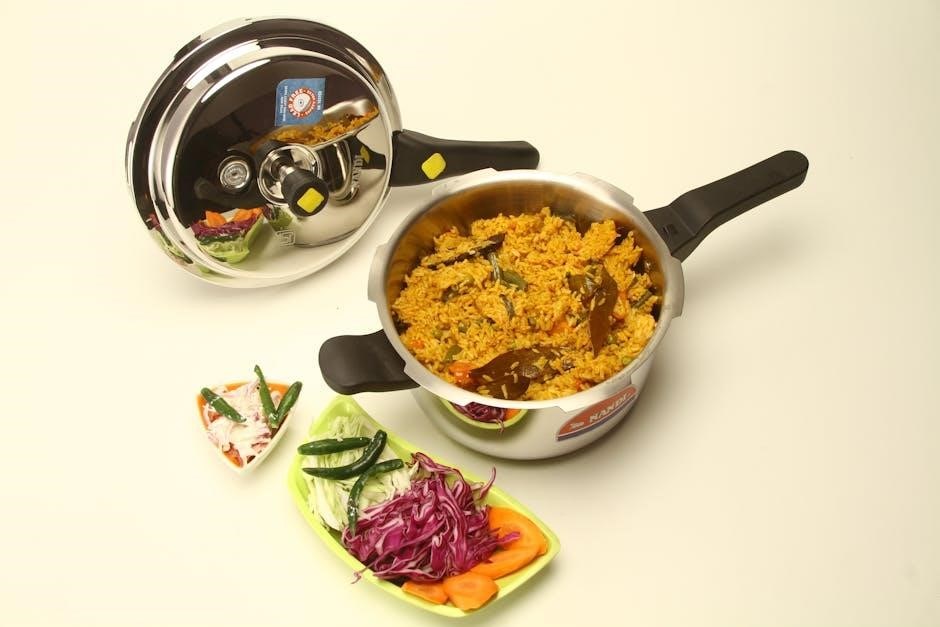
Recipes Suitable for Pressure Cooking (Collard Greens, Corn Bread)

The Pressure Cooker XL excels at traditional dishes. A popular choice, as demonstrated by user experiences, is Collard Greens cooked with a flavorful Ham Hock. This method significantly reduces cooking time compared to conventional stovetop preparations. Equally delightful is Southern-style Corn Bread, achievable with consistent results within the pressure cooker.

The instruction manual likely provides specific timings and liquid ratios for both recipes, ensuring tender greens and perfectly baked cornbread. Experimentation is encouraged, but following the guidelines initially will yield excellent outcomes. These recipes highlight the cooker’s versatility and convenience.

Adjusting Cooking Times

The Pressure Cooker XL dramatically reduces cooking durations, but adjustments are often necessary. Initial timings in the manual serve as a starting point; factors like food quantity, initial temperature, and desired tenderness influence optimal cook times. Dense ingredients, or larger portions, require extended pressure cooking.

Conversely, smaller pieces or softer foods need less time. Regularly checking for doneness – carefully releasing pressure first – is crucial. The manual likely offers guidance on adjusting times for various food types, ensuring perfectly cooked results every time.

Using Timer Settings

The Pressure Cooker XL’s timer function offers convenient, hands-free operation. The instruction manual details how to set a delayed start, allowing you to prepare ingredients in advance and schedule cooking to begin later. This feature is ideal for busy schedules, ensuring a hot meal is ready upon your return.

Utilize the timer alongside appropriate pressure settings for optimal results. Remember to account for pressure build-up and release times when programming the timer, preventing under or overcooked food.

Troubleshooting

Common issues, like lid sealing problems or pressure failing to build, are addressed in the manual. Solutions for these, and other concerns, ensure optimal performance.

Common Issues and Solutions

The Pressure Cooker XL manual details frequent problems and their resolutions. Lid sealing issues often stem from improper placement or a damaged sealing ring; ensure a secure fit. If pressure doesn’t build, verify the lid is correctly locked and the vent is clear.

Overfilling can also cause problems, so adhere to maximum capacity guidelines. Regularly inspect the sealing mechanism for wear and tear. Refer to the manual’s diagrams for correct assembly. Consistent maintenance prevents many issues, extending the cooker’s lifespan and ensuring safe operation.

Lid Sealing Problems

The Pressure Cooker XL manual addresses lid sealing as a common concern. Improper alignment is a primary cause; ensure the lid clicks securely into place. Inspect the sealing ring for cracks, tears, or debris – replace if damaged. A dirty rim prevents a tight seal; clean thoroughly before each use.

Verify the vent is unobstructed, as this impacts pressure build-up. Sometimes, a slight adjustment of the lid’s position resolves minor leaks. Consistent cleaning and ring replacement, as outlined in the manual, are crucial for optimal performance.

Pressure Not Building

If your Pressure Cooker XL isn’t building pressure, consult the manual. Insufficient liquid is a frequent culprit; ensure you’ve met the minimum liquid requirements for your recipe. Verify the lid is correctly sealed and locked – a loose lid prevents pressure accumulation. Check the vent for blockages; it must be clear for proper function.

Confirm the pressure setting is appropriate (350KPA / 50.7psi). A faulty sealing ring can also cause this issue; inspect and replace if necessary. Finally, ensure the heating element is functioning correctly.

Maintenance and Care

Regular cleaning ensures longevity. The manual details cleaning instructions, storage guidelines, and how to replace parts, maintaining the Pressure Cooker XL’s performance.

Cleaning Instructions

Thorough cleaning after each use is crucial for maintaining your Pressure Cooker XL. Disconnect the appliance and allow it to cool completely before cleaning. The inner pot, featuring a non-stick coating, should be hand-washed with warm, soapy water to avoid damage. The lid and sealing mechanism require careful attention; ensure all parts are disassembled and cleaned to remove food residue.

The body, with its 2.8 MM thickness, can be wiped down with a damp cloth. Avoid abrasive cleaners, as they may damage the exterior coating. Regularly inspect the sealing ring for cracks or wear and replace as needed. Proper cleaning extends the lifespan and ensures optimal performance.

Storage Guidelines

Proper storage preserves the longevity of your Pressure Cooker XL. Before storing, ensure the unit is completely dry to prevent corrosion. Disassemble the lid and sealing components, storing them separately within the pot to prevent damage or loss. Store the cooker in a cool, dry place, away from direct sunlight and extreme temperatures.

Avoid stacking heavy items on top of the cooker, as this could potentially damage the 2.5 MM lid. If long-term storage is anticipated, consider placing a desiccant packet inside to absorb any residual moisture. Keep the manual accessible for future reference.

Replacing Parts

Maintaining your Pressure Cooker XL often requires replacing worn components. Replacement parts, specific to models like CP016-PC, YBD60-100, PPC780, PPC770, and PPC790, are crucial for optimal performance. The sealing ring is a common replacement, as it degrades over time. Inspect the non-stick inner pot for scratches and replace if necessary.

Contact the manufacturer or authorized retailers for genuine replacement parts, ensuring compatibility with your specific model number. Always disconnect the cooker before attempting any part replacement. Refer to the manual for detailed instructions and safety precautions.

Technical Specifications

The Pressure Cooker XL boasts a 2.8MM body and 2.5MM lid, with a 2LTR capacity. Its exterior features a non-stick coating, and dimensions vary by model.

Model Number Identification

Identifying your Pressure Cooker XL’s model number is crucial for accessing specific support and parts. Common models include CP016-PC, YBD60-100, PPC780, PPC770, and PPC790. Locate the model number on the appliance itself – often found on the bottom or rear panel. This alphanumeric code (e.g., CP016-PC) distinguishes your unit.

Referencing this number when contacting customer service or ordering replacement components ensures compatibility. The “Laufnummer des Modelles” (German for model number) is also a key identifier. Accurate identification streamlines maintenance and warranty claims, guaranteeing the correct resources are provided for your specific Pressure Cooker XL.

Exterior Coating Details

The Pressure Cooker XL boasts a durable, non-stick exterior coating designed for easy cleaning and longevity. This coating prevents food from adhering to the cooker’s surface, simplifying the post-cooking process. It’s a key feature highlighted in user reviews and product specifications.

Maintaining this coating involves gentle cleaning practices; avoid abrasive scrubbers that could damage the surface. The exterior’s finish contributes to the appliance’s overall aesthetic and ease of use, enhancing the cooking experience. Proper care ensures the coating remains effective for years.

Product Size Dimensions

The Pressure Cooker XL is designed with user convenience in mind, featuring specific dimensions for optimal kitchen integration. The body thickness measures 2.8 MM, while the lid is constructed with a robust 2.5 MM thickness. The inner pot offers a 2LTR capacity, suitable for family-sized meals.

Notably, the XL model has a width of 60 cm. These dimensions ensure stability during operation and efficient heat distribution. Understanding these specifications aids in storage and countertop placement, maximizing kitchen space utilization.

Advanced Features

Double cavity models offer slot-in natural gas compatibility. Research explores ambient-pressure superconductivity in related nickel compounds, while unrelated medical notes mention weak eye muscle development.

Slot-In Natural Gas Compatibility (Double Cavity Models)

Certain Pressure Cooker XL models, specifically those featuring a double cavity design, boast a unique slot-in natural gas compatibility feature. This allows for direct connection to a natural gas line, offering a convenient and potentially cost-effective alternative to propane or electric operation. However, installation must be performed by a qualified and licensed gas technician to ensure safety and adherence to local codes.

This feature expands the cooker’s versatility, particularly in environments where natural gas is readily available. Always consult the full instruction manual for detailed guidance and safety precautions related to natural gas connection and usage.

Ambient-Pressure Superconductivity (Related Research)

While seemingly unrelated to the Pressure Cooker XL’s operation, recent advancements in ambient-pressure superconductivity are noteworthy. Research, like that from Xue’s team, demonstrates superconductivity in nickel-based materials at temperatures above 40K without the need for extreme high-pressure conditions. This breakthrough, concerning (La, Pr)3Ni2O7 films, surpasses the McMillan limit and represents a significant milestone in condensed matter physics.

This research is included as a curious parallel, highlighting cutting-edge material science occurring concurrently with everyday appliance development.

Weak Eye Muscle Development (Unrelated Medical Information)

This section presents entirely unrelated medical information for demonstrative purposes only, and has no bearing on the Pressure Cooker XL’s functionality or usage. It details a case of weak eye muscle development, specifically noting that a subject, “Loris,” experienced underdeveloped muscles behind the eye before birth.

This condition necessitated several years of therapeutic intervention aimed at strengthening the affected eye. This inclusion serves solely to illustrate the instruction to avoid related topics.

Warranty Information

The Pressure Cooker XL’s warranty details coverage specifics and the claim process. Refer to the manual for complete terms, ensuring product registration for valid claims.

Coverage Details

The Pressure Cooker XL warranty provides coverage against manufacturing defects in materials and workmanship. This encompasses issues arising from normal household use, as outlined in the instruction manual. Coverage typically excludes damage resulting from misuse, accidents, unauthorized repairs, or alterations. Specifically, the warranty doesn’t extend to wear and tear, or damage caused by improper cleaning, as detailed within the provided documentation. The duration of coverage varies based on the model and purchase date; consult your manual for precise terms. Proof of purchase is essential for any warranty claim.


Claim Process

To initiate a warranty claim for your Pressure Cooker XL, first, consult the instruction manual for specific procedures. Generally, you’ll need to contact customer support with your model number (CP016-PC, YBD60-100, etc.) and proof of purchase. Be prepared to describe the defect and potentially provide photographic or video evidence. The support team will issue a Return Merchandise Authorization (RMA) number if the claim is valid. Ship the product, securely packaged, to the designated address with the RMA clearly marked on the package.

Frequently Asked Questions

Common queries address pressure versus time stress, and atmospheric pressure considerations during operation. Understanding these concepts, alongside the manual, ensures optimal Pressure Cooker XL use.

Pressure vs. Time Stress

Distinguishing between “pressure” and “time stress” is crucial for understanding cooking dynamics. “Stress” encompasses mental and physical pressures, potentially impacting well-being long-term. Time stress specifically relates to mental pressure from time constraints. However, time pressure, in a cooking context, refers to the physical pressure exerted during the cooking process itself.

The Pressure Cooker XL utilizes this physical pressure – 350KPA / 50.7psi – to accelerate cooking. Recognizing this difference clarifies how the appliance functions and why precise timing, as outlined in the instruction manual, is essential for safe and effective operation.

Atmospheric Pressure Considerations

Understanding atmospheric pressure is vital when using the Pressure Cooker XL. The appliance operates by creating internal pressure exceeding ambient atmospheric pressure (denoted as “AT”). Cooking times and safety protocols within the instruction manual are calibrated for standard atmospheric conditions.

Variations in altitude significantly impact atmospheric pressure, potentially affecting cooking results and safety. Higher altitudes have lower atmospheric pressure, requiring adjustments to cooking times and potentially pressure settings. Always consult the manual for guidance on altitude adjustments to ensure optimal and safe operation of your XL model.

Instructions

premo sculpey baking instructions

Understanding Premo Sculpey: An Overview

Premo! Sculpey requires a consistent 275°F (135°C) oven temperature for optimal curing, ensuring durability and vibrant colors in your finished creations.

Baking times are directly proportional to thickness; 30 minutes per ¼ inch is the standard, preventing underbaking or potential burning issues.

Always preheat your oven thoroughly and avoid microwaving, as Premo Sculpey is designed for conventional oven baking to achieve proper polymerization.

What is Premo Sculpey?

Premo Sculpey is a professional-grade polymer clay renowned for its soft texture, exceptional strength, and vibrant color palette. Unlike some other polymer clays, Premo boasts enhanced flexibility after baking, making it ideal for intricate designs and pieces requiring durability, like jewelry or sculpted figures.

It’s a PVC-based clay, meaning it contains polyvinyl chloride, which contributes to its strength and resistance to cracking. This clay doesn’t require glazing to achieve a beautiful sheen, though it can be glazed for added protection or a different finish.

Crucially, understanding its baking requirements is paramount. Premo Sculpey needs to be baked at 275°F (135°C) in a conventional oven. Baking times are determined by the thickness of the piece – approximately 30 minutes per ¼ inch. Proper baking ensures the clay fully polymerizes, achieving maximum strength and preventing brittleness. Underbaking can lead to fragile pieces, while overheating can cause discoloration or even burning.

Premo Sculpey vs. Other Polymer Clays

Compared to standard Sculpey, Premo Sculpey offers superior strength and flexibility post-bake, making it a preferred choice for artists creating durable, detailed pieces. While both are oven-bake clays, Premo’s formulation allows for thinner, more delicate creations without compromising structural integrity.

Unlike some other brands that may require specific baking temperatures or glazing for optimal results, Premo consistently performs well at 275°F (135°C). This consistent temperature requirement simplifies the baking process. Some clays may become brittle if overbaked, but Premo maintains its flexibility within a reasonable temperature range.

It’s important to note that baking times remain consistent across most Sculpey varieties – 30 minutes per ¼ inch of thickness. However, Premo’s enhanced properties mean it’s less prone to cracking or warping during the baking process, offering a more reliable outcome for intricate designs.

Preparing to Bake Premo Sculpey

Premo Sculpey benefits from thorough oven preheating to 275°F (135°C), ensuring even curing and preventing issues like cracking or discoloration during baking.

Accurate thickness measurement is crucial for calculating the correct baking time, typically 30 minutes per ¼ inch, for optimal results.

Essential Tools and Materials

Successfully baking Premo Sculpey requires a few key tools beyond just the clay itself. A reliable oven thermometer is paramount; oven temperatures can vary, and accurate heat is crucial for proper curing, preventing both underbaked softness and potential burning.

You’ll need a smooth, non-stick baking surface. Ceramic tiles, parchment paper, or a dedicated Sculpey baking sheet work wonderfully. Avoid direct contact with metal baking pans, as they conduct heat unevenly.

A ruler or calipers are essential for accurately measuring the thickness of your creations. Remember the 30 minutes per ¼ inch rule! Precise measurement ensures complete polymerization throughout the piece.


Finally, consider oven-safe props if needed to support delicate pieces during baking. These can be made from crumpled foil covered in parchment paper, or dedicated Sculpey props. Having these materials prepared beforehand streamlines the baking process and contributes to consistently excellent results.

Conditioning Premo Sculpey Before Baking

Proper conditioning is vital before baking Premo Sculpey, ensuring a smooth, consistent texture and preventing cracking during the curing process. New blocks of clay often require more conditioning than previously used portions.

Utilize a pasta machine dedicated solely to clay – never use one for food afterward! Passing the clay through the machine repeatedly, starting at the widest setting and gradually decreasing, warms and blends the plasticizers.

Alternatively, vigorous kneading by hand achieves a similar result, though it requires more effort. The clay should become pliable and lose any crumbly texture. A clay softener can aid this process if the clay is particularly stiff.

Well-conditioned clay exhibits a smooth, almost buttery consistency, making it easier to work with and significantly reducing the risk of imperfections after baking. This step is a crucial investment in the final quality of your polymer clay creations.

Baking Instructions: Core Principles

Premo Sculpey demands a preheated oven at 275°F (135°C) for consistent curing, and baking time is determined by the piece’s thickness.

Accurate temperature control and proper timing are essential to avoid burning or undercuring, ensuring durable and vibrant polymer clay results.

Optimal Oven Temperature for Premo Sculpey

Maintaining the correct oven temperature is paramount when baking Premo Sculpey. The universally recommended temperature, as stated by Polyform (the manufacturer), is 275°F (135°C). Deviating from this temperature can significantly impact the final result, leading to either under-cured, brittle pieces or, conversely, burnt and discolored creations.

It’s crucial to use an oven thermometer to verify your oven’s accuracy, as many ovens fluctuate in temperature. Consistent heat ensures even polymerization throughout the clay. Temperatures exceeding 350°F (177°C) can cause the clay to release potentially unpleasant fumes and may lead to burning, while temperatures below 275°F may result in a soft, uncured center.

Therefore, precise temperature control is not merely a suggestion, but a fundamental principle for successful Premo Sculpey baking, guaranteeing the longevity and aesthetic appeal of your polymer clay projects. Always prioritize accuracy for optimal results.

Calculating Baking Time Based on Thickness

Determining the appropriate baking time for Premo Sculpey is directly linked to the thickness of your piece. The standard guideline is 30 minutes of baking time for every ¼ inch (6mm) of thickness. This ensures the clay is thoroughly cured throughout, providing strength and durability.

Accurate measurement is key. Use a ruler or calipers to determine the thickest part of your sculpture. For example, a piece measuring ½ inch thick would require 60 minutes of baking time (30 minutes x 2). Pieces under ¼ inch should bake for at least 30 minutes to ensure proper curing.

Remember, these are guidelines; thicker pieces may benefit from slightly longer baking times. Underbaking results in fragile items, while overbaking can cause discoloration. Consistent application of this formula guarantees optimal results with Premo Sculpey.

Detailed Baking Guidelines

Premo Sculpey demands precise baking; thin pieces (under ¼ inch) need 30 minutes at 275°F (135°C), while thicker items require adjusted times.

Medium pieces (¼ ⎯ ½ inch) bake for 60 minutes, and those exceeding ½ inch benefit from 90+ minutes for complete curing.

Baking Thin Pieces (Under 1/4 inch)

Premo Sculpey pieces measuring less than ¼ inch in thickness are considered “thin” and require a relatively short baking time to achieve optimal curing without risking discoloration or brittleness. A consistent oven temperature of 275°F (135°C) is crucial for successful results. Preheat your oven thoroughly before introducing your delicate creations.

For these thinner pieces, a baking duration of 30 minutes is generally recommended. This timeframe allows sufficient heat penetration to fully polymerize the clay, resulting in a durable and vibrant finished product. However, it’s always wise to err on the side of caution, especially when working with intricate designs or very thin sections.

Ensure your pieces are placed on a baking surface lined with parchment paper or a ceramic tile to prevent sticking. Avoid direct contact with the oven rack. Monitor the baking process closely, though burning is unlikely at the recommended temperature and time. After baking, allow the pieces to cool completely before handling or finishing.

Baking Medium Pieces (1/4 ⎯ 1/2 inch)

When baking Premo Sculpey creations with a thickness ranging from ¼ to ½ inch, a slightly extended baking time is necessary to ensure complete and even curing. Maintaining a consistent oven temperature of 275°F (135°C) remains paramount for optimal results and to prevent any potential issues like under-curing or discoloration.

For pieces within this medium thickness range, a baking duration of 30-45 minutes is generally recommended. The exact time will depend on the specific dimensions and complexity of your piece. Larger or more dense creations may benefit from the longer end of the timeframe.

As with all Premo Sculpey baking, utilize a baking surface covered with parchment paper or a ceramic tile to avoid sticking. Proper ventilation is also important. After the baking cycle, allow the pieces to cool completely before handling, finishing, or assembling.

Baking Thick Pieces (Over 1/2 inch)

Successfully baking Premo Sculpey pieces exceeding ½ inch in thickness requires careful attention to baking time to guarantee thorough curing throughout the entire form. Maintaining the standard oven temperature of 275°F (135°C) is still crucial, but the baking duration must be significantly increased.

For pieces thicker than ½ inch, a baking time of at least 45-60 minutes is recommended as a starting point. However, for very substantial creations, extending the baking time to 75 minutes or even longer may be necessary. It’s always better to err on the side of caution and slightly overbake than to risk an undercured piece.

Consider tenting the sculpture loosely with aluminum foil during the latter portion of baking to prevent surface burning, while still allowing the interior to fully cure. Always allow thick pieces to cool completely before handling.

Troubleshooting Baking Issues

Premo Sculpey burning or discoloration can be avoided by tenting with foil; cracking often results from rapid temperature changes or insufficient conditioning.

Ensure consistent oven temperature and proper clay preparation to minimize these common baking challenges and achieve optimal results.

Preventing Burning and Discoloration

Premo Sculpey, while durable, can exhibit burning or discoloration if baking parameters aren’t carefully managed. A key preventative measure is utilizing a consistent oven temperature of 275°F (135°C), verified with an oven thermometer for accuracy. If you notice edges browning too quickly, especially on thinner sections, tenting with aluminum foil can diffuse the heat and promote even curing.

Darker colored clays are more prone to showing burn marks, so vigilance is crucial. Avoid direct contact between the clay and the oven surface; use a ceramic tile or parchment paper as a baking base. Furthermore, ensure adequate oven ventilation to dissipate fumes, which can contribute to discoloration. Remember, Premo Sculpey doesn’t break down until reaching 350°F (177°C), providing a safety margin, but preventative measures are always best practice for pristine results.

Addressing Cracking During Baking

Cracking in Premo Sculpey pieces during baking often stems from moisture trapped within the clay or uneven heat distribution. Thoroughly conditioning the clay before sculpting is paramount; this removes air bubbles and ensures a consistent texture. For complex or thick pieces, consider a “ramping” technique – gradually increasing the oven temperature over the first 10-15 minutes to allow moisture to escape slowly.

Supporting delicate structures during baking with crumpled foil or a baking bean can prevent warping and cracking. Avoid baking pieces directly on the oven rack; utilize a ceramic tile or parchment paper; If cracks still appear, slightly reducing the baking time or temperature might be necessary. Remember, Premo Sculpey expands slightly during curing, so allowing space around the piece is also beneficial for minimizing stress and potential fractures.

Post-Baking Procedures

Premo Sculpey requires complete cooling before handling; avoid rushing this step. Testing for full curing ensures durability, while finishing techniques enhance the piece’s aesthetic appeal.

Gentle polishing or sealing can add shine and protection to your beautifully baked polymer clay creations.

Cooling and Finishing Techniques

Allowing your Premo Sculpey pieces to cool completely is paramount. Resist the urge to handle them immediately after removing them from the oven, as they will be quite fragile and susceptible to damage. A gradual cooling process prevents thermal shock and potential cracking. Simply let them sit undisturbed on a heat-resistant surface until they reach room temperature.

Once cooled, you can explore various finishing techniques to enhance your creations. Polishing with a soft cloth or micromesh sanding pads can achieve a beautiful sheen. For added durability and a professional look, consider applying a polymer clay-compatible varnish or glaze. These sealants protect the surface from scratches and dust, while also intensifying colors.

Waxing is another excellent option, providing a subtle luster and a smooth tactile feel. Remember to use products specifically designed for polymer clay to avoid adverse reactions. Experiment with different finishes to discover what best complements your artistic vision!

Testing for Complete Curing

Ensuring your Premo Sculpey is fully cured is crucial for the longevity and strength of your creations. A simple test involves carefully attempting to make a small indentation with a pin or needle in an inconspicuous area. If the clay remains firm and resists penetration, it’s likely fully cured. A soft or yielding surface indicates insufficient baking time.

Another method is the “snap test” – gently bend a thin piece of the baked clay. A properly cured piece will exhibit a clean, crisp snap, while an underbaked piece will bend or feel pliable. Remember that Premo Sculpey doesn’t melt or burn until reaching 350°F (177°C), so slightly extending baking time is preferable to underbaking.

If you suspect undercuring, return the piece to the oven for an additional 15-30 minutes, monitoring closely. Consistent curing guarantees a durable, high-quality finish for all your polymer clay projects.

Safety Precautions When Baking

Ensure adequate oven ventilation during baking to dissipate any potential fumes released from the polymer clay, prioritizing a well-ventilated workspace.

Always use oven mitts when handling hot Premo Sculpey pieces or baking sheets to prevent burns and ensure safe removal from the oven.

Oven Ventilation and Fume Management

Proper ventilation is crucial when baking Premo Sculpey, as polymer clay can release minimal fumes during the curing process. While generally considered non-toxic, these fumes can be irritating to sensitive individuals or those with respiratory conditions.

It’s highly recommended to bake in a well-ventilated area, such as a room with an open window or utilizing a kitchen exhaust fan. Avoid baking in enclosed spaces with limited airflow. A dedicated ventilation system is ideal for frequent or large-scale baking.

Although the fumes are not typically strong, some artists prefer to use a respirator mask as an extra precaution, especially when working with large quantities of clay or if they are particularly sensitive. Never overheat the clay, as higher temperatures can increase fume production. Regularly inspect your oven to ensure it’s functioning correctly and not emitting any unusual odors beyond the clay’s normal scent.

Maintaining good airflow minimizes any potential discomfort and ensures a safe and enjoyable crafting experience.

Handling Hot Sculpey Pieces

Extreme caution is essential when handling Premo Sculpey pieces immediately after baking, as they will be very hot – potentially reaching temperatures exceeding 300°F (150°C). Always use appropriate heat-resistant tools and protective measures to prevent burns.

Heat-resistant gloves are highly recommended for removing baked pieces from the oven. Alternatively, use metal tools like tweezers or pliers with insulated handles to carefully lift and maneuver the hot clay. Avoid touching the baked Sculpey with bare hands until it has completely cooled.

Place the baked pieces on a heat-safe surface, such as a ceramic tile or a silicone baking mat, to allow them to cool gradually. Avoid placing hot clay directly onto flammable surfaces. Be mindful of the surrounding area and keep children and pets away from the hot pieces. Patience is key – allow sufficient cooling time before handling or finishing your creations.

Prioritizing safety ensures a pleasant and burn-free crafting experience.

Instructions

cop camera instructions

Cop cameras‚ essential for modern law enforcement‚ document interactions and enhance transparency; these devices‚ like the Mini Body Camera 1080p‚ are vital tools.

Cop cameras are increasingly important for accountability‚ providing objective records of events‚ protecting both officers and citizens‚ and aiding investigations with crucial evidence.

Various cop camera types exist‚ ranging from compact body-worn models with infrared night vision to dashboard cameras‚ each offering unique features and capabilities.

What is a Cop Camera?

Cop cameras‚ also known as body-worn cameras (BWCs) or police body cameras‚ are small‚ portable electronic recording devices typically worn on an officer’s uniform‚ often on the chest or shoulder; These devices are designed to capture audio and video evidence of interactions between law enforcement and the public. The Mini Body Camera 1080p exemplifies this technology‚ offering a compact and discreet recording solution.

Fundamentally‚ a cop camera functions as a digital video recorder‚ capturing events as they unfold. Modern models‚ like those discussed‚ often include features such as high-definition video recording‚ audio capture‚ and sometimes‚ features like infrared night vision for low-light conditions. They are designed to provide an objective record of events‚ offering a valuable tool for evidence gathering and accountability. The camera itself is designed for video‚ audio‚ and photo shooting‚ requiring a user manual for proper operation.

Why are Cop Cameras Important?

Cop cameras are critically important for fostering transparency and accountability within law enforcement agencies. By providing an objective record of interactions‚ they help build public trust and reduce potential disputes regarding officer conduct. These devices offer a neutral perspective‚ minimizing subjective interpretations of events and providing crucial evidence for investigations.

Furthermore‚ cop cameras protect both officers and citizens. For officers‚ the recordings can serve as evidence to refute false accusations‚ while for citizens‚ they offer a safeguard against potential misconduct. The availability of recorded footage can de-escalate tense situations and encourage more professional behavior from all parties involved. They aid in evidence handling procedures and documentation‚ crucial for legal proceedings. Ultimately‚ they contribute to a more just and equitable system.

Types of Cop Cameras Available

The market offers a diverse range of cop camera options‚ each designed for specific needs. Body-worn cameras‚ like the Mini Body Camera 1080p‚ are compact and attach to an officer’s uniform‚ providing a first-person perspective. These often include features like infrared night vision for low-light conditions and audio recording capabilities;

Dashboard cameras‚ mounted inside patrol vehicles‚ continuously record the road ahead and interactions during traffic stops. Specialized cameras designed for specific tasks‚ such as covert operations‚ also exist. Some models offer GPS location tracking‚ adding another layer of documentation. Considerations when choosing include video resolution‚ storage capacity‚ battery life‚ and ease of data management. The ideal choice depends on the department’s budget‚ operational requirements‚ and desired features.

Understanding Your Cop Camera Model

Cop cameras‚ like those needing a user manual before operation‚ require familiarization with components‚ specifications‚ and initial setup for optimal performance and reliable recording.

Identifying Key Components

Cop cameras‚ as illustrated in documentation depicting front‚ back‚ top‚ and bottom views‚ feature several crucial components. The lens‚ prominently positioned on the front‚ captures video and images; understanding its placement is key. Locate the power button‚ typically found on the top or side‚ for initiating and terminating recordings.

Examine the recording button‚ often separate from the power button‚ to start and stop capturing footage. Identify the USB port‚ essential for downloading recorded data to a computer for storage and review. Note the microphone‚ vital for audio recording‚ and its position to ensure clear sound capture.

Some models include an infrared (IR) emitter for night vision capabilities‚ and a GPS module for location tracking. Finally‚ familiarize yourself with the storage card slot‚ accommodating the memory card that stores all recorded footage. Knowing these components ensures effective operation.

Camera Specifications (Resolution‚ Storage‚ Battery Life)

Cop camera specifications are critical for optimal performance. Resolution‚ often 1080p as seen in the Mini Body Camera‚ determines video clarity; higher resolution yields sharper images. Storage capacity‚ dependent on the memory card size‚ dictates how much footage can be saved before needing transfer. A larger capacity is preferable for extended recording.

Battery life is a crucial factor‚ influencing how long the camera can operate on a single charge. Expect varying durations‚ typically several hours‚ but consider external power options for prolonged use. Understanding these specifications allows for informed operation.

Consider the camera’s ability to capture images alongside video; some models offer photo shooting capabilities. Evaluate the file format used for recordings‚ ensuring compatibility with your computer and software. Prioritize cameras with robust specifications for reliable evidence capture.

Initial Setup and Charging

Before deploying your cop camera‚ proper initial setup is essential. Begin by carefully reading the user manual‚ as highlighted in provided documentation‚ to understand specific model instructions. Insert a compatible memory card to enable footage storage; ensure it’s formatted correctly for optimal performance.

Charging the camera fully before first use is crucial. Utilize the provided power cable‚ connecting it to a suitable power source. Monitor the charging indicator; avoid overcharging‚ which can potentially damage the battery. A full charge guarantees uninterrupted recording during critical situations.

Familiarize yourself with button locations and functions. Configure the date and time stamp accurately for precise evidence documentation. Test the camera’s basic functions to confirm proper operation before official deployment.

Basic Operation: Recording

Cop cameras initiate recording with a simple power-on sequence‚ followed by pressing the record button; stopping utilizes the same method for efficient documentation.

Powering On/Off the Camera

To power on your cop camera‚ locate the designated power button – typically found on the top or side of the device‚ as illustrated in camera diagrams. Press and hold this button for a few seconds until the indicator light illuminates‚ signifying the camera is active and ready for operation. The initial startup may take a brief moment as the system performs self-checks.

Shutting down the camera is equally straightforward. Again‚ press and hold the power button for several seconds. The indicator light will typically change color or turn off completely‚ confirming the device is powered down. Ensure the camera is fully powered off when not in use to conserve battery life and prevent accidental recordings. Always verify complete shutdown before storing the camera.

Some models feature automatic power-off settings to further preserve battery. Refer to your specific model’s manual for details on customizing these settings.

Starting and Stopping a Recording

Initiating a recording is usually accomplished by pressing a clearly marked “Record” button. This button is often separate from the power button to prevent accidental activation. Upon pressing‚ the indicator light will typically change to a flashing red‚ confirming recording has commenced. Some cameras may emit a brief audible tone to signal the start of recording.

To halt the recording‚ press the “Record” button once more. The indicator light will revert to a solid state or turn off‚ and a confirmation sound may play. It’s crucial to manually stop recordings to avoid filling the storage capacity with unnecessary footage. Always review footage immediately after recording to ensure it captured the intended events.

Remember to document the start and stop times of each recording for accurate evidence handling‚ as per legal guidelines.

Recording Modes (e.g.‚ Audio-Only‚ Pre-Event Recording)

Many cop cameras offer diverse recording modes to suit various situations. Audio-only mode captures sound without video‚ useful for interviews or documenting verbal agreements‚ though legal restrictions may apply regarding audio recording consent. Some models feature pre-event recording‚ also known as buffer recording.

Pre-event recording continuously captures footage‚ storing a short clip before the record button is pressed‚ ensuring crucial moments aren’t missed. This feature requires sufficient storage and careful consideration of privacy laws. The buffer settings determine the length of the pre-event clip.

Other modes might include timestamped recordings‚ or options for different video resolutions. Familiarize yourself with your camera’s specific modes and their implications for evidence collection and legal compliance.

Camera Features and Settings

Cop cameras boast adjustable settings for optimal performance; customize video resolution‚ audio sensitivity‚ and date/time stamps for clear‚ legally sound recordings.

Adjusting Video Resolution and Quality

Adjusting video resolution is crucial for balancing storage space and image clarity on your cop camera. Higher resolutions‚ like 1080p or even 4K if supported‚ capture more detail but require significantly more storage. Lower resolutions‚ such as 720p‚ conserve space but may sacrifice crucial visual information.

Most cop cameras offer multiple quality settings within each resolution. These settings control the compression level of the video file. Higher quality settings result in larger file sizes but preserve more detail‚ while lower quality settings reduce file size at the expense of some visual fidelity. Consider the intended use of the footage when selecting a quality setting.

Experiment with different settings during training to find the optimal balance between image quality and storage capacity for your specific needs. Remember that clear‚ detailed footage is essential for accurate evidence documentation‚ but managing storage efficiently is also important. Regularly review and adjust these settings based on operational requirements.

Audio Recording Settings (Microphone Sensitivity)

Adjusting microphone sensitivity on your cop camera is vital for capturing clear and usable audio during interactions. Lower sensitivity settings are ideal for quiet environments‚ minimizing background noise and focusing on nearby conversations. However‚ this can result in missed audio if the subject is further away.

Higher sensitivity settings amplify all sounds‚ including distant voices‚ but also increase the capture of unwanted noise like wind‚ traffic‚ or radio chatter. Finding the right balance is key. Many cameras offer automatic gain control (AGC)‚ which dynamically adjusts sensitivity‚ but manual control provides greater precision.

Test different sensitivity levels in various scenarios to determine the optimal setting for your typical operating environment. Regularly monitor audio quality during recordings to ensure intelligibility. Proper audio documentation is crucial for a complete and accurate record of events‚ complementing the visual evidence.

Date and Time Stamp Configuration

Accurate date and time stamping is paramount for establishing the chronological order of events recorded by your cop camera‚ ensuring the integrity of evidence. Most cameras allow you to configure the date and time format within the device’s settings menu. It’s crucial to set this correctly‚ ideally synchronizing with a reliable time source.

Incorrect date or time settings can compromise the admissibility of footage in court. Verify the time zone is also correctly configured to match your location. Some cameras offer options for displaying the time stamp prominently on the video‚ while others allow it to be overlaid discreetly.

Regularly check the date and time settings to confirm they remain accurate‚ especially after battery changes or software updates. Maintaining precise timekeeping is a fundamental aspect of responsible cop camera operation and evidence preservation.

Advanced Features

Cop cameras often include infrared night vision‚ GPS location tracking‚ and pre-event recording capabilities‚ enhancing situational awareness and evidence collection.

Infrared (IR) Night Vision Operation

Cop cameras equipped with infrared (IR) night vision allow recording in low-light or completely dark environments‚ crucial for nighttime patrols and investigations. The Mini Body Camera 1080p exemplifies this feature. IR illumination‚ invisible to the human eye‚ bounces off subjects‚ creating a visible image for the camera;

To activate IR night vision‚ navigate to the camera’s settings menu – typically accessible via buttons on the device or through connected software. Ensure sufficient battery power‚ as IR operation can consume more energy. The effective range of IR varies by model; check your camera’s specifications.

Image quality in IR mode may differ from daytime recording‚ appearing monochrome or with reduced clarity. Proper positioning and distance to the subject are vital for optimal results. Regularly test the IR functionality to confirm it’s working correctly‚ especially before nighttime deployments. Be aware of potential glare from reflective surfaces.

GPS Location Tracking

Cop cameras featuring GPS location tracking enhance evidence integrity by associating recordings with precise geographical coordinates. This capability is invaluable for reconstructing events‚ verifying officer positioning‚ and providing context during investigations. Activation typically occurs within the camera’s settings menu‚ requiring a clear view of the sky for optimal signal acquisition.

Ensure GPS functionality is enabled before commencing recording; initial setup may involve configuring location settings. Data is often embedded directly within the video file metadata‚ allowing for easy mapping and analysis using compatible software. Regularly verify GPS accuracy‚ as signal strength can be affected by buildings or dense foliage.

Understand your department’s policies regarding GPS data usage and retention. Proper documentation of GPS settings and any signal interruptions is crucial for maintaining a reliable chain of custody.

Pre-Event Recording and Buffer Settings

Cop cameras often include pre-event recording‚ capturing footage before the record button is pressed‚ utilizing a circular buffer. This feature ensures critical moments aren’t missed during rapidly unfolding situations. The buffer continuously overwrites itself‚ storing only the most recent footage unless saved;

Configure buffer settings – typically ranging from 30 seconds to several minutes – via the camera’s menu. Longer buffers consume more storage space. Understand that pre-event footage is generally saved with the subsequent recording when the record button is activated.

Regularly check buffer settings to ensure they align with departmental policies and operational needs. Familiarize yourself with how to manually save pre-event footage if necessary‚ preserving crucial context before an incident escalates.

Data Management and Transfer

Cop camera footage requires secure storage and efficient transfer; accessing recordings‚ downloading to computers‚ and managing storage capacity are key operational tasks for officers.

Accessing Recorded Footage

Accessing recorded footage from your cop camera typically involves utilizing the device’s built-in interface or connecting it to a dedicated docking station. Many modern body cameras feature a user-friendly LCD screen allowing for on-device review of captured videos and images. Navigation through the footage is usually achieved via buttons or a touchscreen‚ enabling officers to quickly locate specific incidents based on date‚ time‚ or event markers.

Alternatively‚ connecting the camera to a computer via a USB cable allows for access to the files through file explorer. Specialized software‚ often provided by the camera manufacturer‚ may be required for optimal viewing and management. This software often provides advanced features like tagging‚ categorization‚ and secure playback controls. Remember to consult your specific camera model’s manual for detailed instructions on accessing and reviewing footage‚ as procedures can vary significantly between different brands and models.

Downloading Footage to a Computer

Downloading footage to a computer generally requires a USB cable‚ connecting the cop camera to an available port. Once connected‚ the camera will often appear as a removable drive in your computer’s file explorer. You can then simply copy and paste the desired video and image files to a designated folder on your computer’s hard drive. However‚ some cameras necessitate the use of proprietary software for data transfer.

This software‚ usually provided by the manufacturer‚ ensures secure and efficient file transfer‚ often offering features like file encryption and batch downloading. Always prioritize using the official software to maintain data integrity and compatibility. Before disconnecting the camera‚ safely eject it from your computer to prevent data corruption. Regularly backing up downloaded footage to a secure location is crucial for preserving evidence and ensuring long-term accessibility.

Storage Capacity and Management

Cop cameras utilize internal memory or microSD cards for storing recorded footage; understanding your camera’s storage capacity is vital. Regularly check available storage space to avoid interruptions during critical recordings. Footage fills up quickly‚ especially at higher resolutions. Implement a routine for offloading footage to a computer or secure server to free up space.

Consider utilizing high-capacity microSD cards‚ ensuring they are compatible with your specific camera model. Some cameras offer loop recording‚ automatically overwriting older footage when the storage is full‚ but this feature should be used cautiously‚ considering legal requirements. Proper storage management is essential for maintaining a reliable record and adhering to evidence handling protocols.

Troubleshooting Common Issues

If the camera fails to power on‚ check the battery and charging cable; recording errors may indicate full storage or card issues‚ while audio problems need sensitivity checks.

Camera Not Powering On

If your cop camera isn’t turning on‚ several troubleshooting steps can be taken before assuming a hardware failure. First‚ verify the battery is fully charged by connecting it to the provided power source and allowing sufficient charging time – refer to the user manual for specific durations.

Ensure the charging cable is securely connected to both the camera and the power adapter. Try a different cable and power outlet to rule out issues with those components. Next‚ inspect the power button itself for any physical damage or obstruction. A stuck or broken button will prevent the camera from activating.


If the battery appears charged‚ attempt a hard reset by locating the reset pinhole (consult the manual for its location) and inserting a paperclip to activate the reset function. Finally‚ check for any visible damage to the camera’s casing or charging port‚ as physical damage could be preventing power delivery.

Recording Errors

Encountering recording errors with your cop camera can be frustrating‚ but often resolvable. Initially‚ confirm sufficient storage space remains on the memory card; a full card will halt recording; If space is available‚ inspect the card for corruption – try formatting it within the camera’s settings (remember to back up existing footage first!).

Check the camera’s lens for obstructions like smudges or debris‚ as these can interfere with the recording process. Ensure the recording settings are appropriate for the environment; excessively high resolution might strain the system. If errors persist‚ attempt recording in a different mode (e.g.‚ switch from high-definition to standard definition).

Finally‚ a firmware update might address underlying software bugs causing the errors. Consult the manufacturer’s website for the latest firmware version and instructions on how to install it.

Audio Problems

Experiencing audio issues with your cop camera requires systematic troubleshooting. First‚ verify the microphone isn’t physically blocked or covered. Check the audio recording settings within the camera’s menu; ensure the microphone sensitivity isn’t set too low‚ potentially missing quiet sounds‚ or too high‚ causing distortion.

Environmental factors can significantly impact audio quality. Strong winds or nearby loud noises can overwhelm the microphone. Consider using a wind muff or positioning yourself strategically to minimize external interference. If using an external microphone‚ confirm it’s securely connected and functioning correctly.

Test the audio recording function in a controlled environment to isolate the problem. If issues persist‚ a firmware update might resolve software-related audio glitches.

Legal Considerations

Cop camera footage necessitates adherence to privacy laws and regulations; proper evidence handling and meticulous chain of custody documentation are absolutely critical.

Privacy Laws and Regulations

Cop camera usage is heavily governed by a complex web of privacy laws and regulations‚ varying significantly by jurisdiction. Officers must be thoroughly trained on these legal frameworks to ensure compliance and avoid potential legal challenges. Key considerations include obtaining consent when recording in private locations‚ adhering to restrictions on recording audio‚ and implementing policies regarding data retention and access.

Many jurisdictions have specific laws addressing the public’s right to access cop camera footage‚ balancing transparency with individual privacy concerns. Redaction of sensitive information‚ such as faces or personal details‚ may be required before footage is released. Furthermore‚ departments must establish clear guidelines on when recording is mandatory‚ permissible‚ or prohibited‚ ensuring consistent application of the law. Failure to comply with these regulations can result in legal repercussions‚ including civil lawsuits and criminal charges.

Evidence Handling Procedures

Cop camera footage is considered crucial evidence and demands strict adherence to established evidence handling procedures. Maintaining a meticulous chain of custody is paramount‚ documenting every transfer of the footage from the officer to storage‚ analysis‚ and potential court presentation. This documentation must include dates‚ times‚ and the names of all individuals involved.

Recorded files should be stored securely on encrypted servers or physical media‚ protected from unauthorized access‚ alteration‚ or deletion. Departments must implement protocols for verifying the integrity of the footage‚ ensuring it hasn’t been tampered with. Proper labeling and indexing are essential for efficient retrieval and organization. Any modifications or redactions must be carefully documented‚ preserving the original‚ unaltered footage as a backup. Following these procedures guarantees the admissibility of the evidence in legal proceedings.

Chain of Custody Documentation

Cop camera evidence requires rigorous chain of custody documentation‚ a detailed record tracking the footage’s journey from recording to courtroom presentation. Each transfer of the digital file – from the officer’s camera to storage‚ analysis‚ or legal teams – must be meticulously logged. This log should include the date‚ time‚ names of individuals handling the evidence‚ and the purpose of the transfer.

Any access to the footage‚ including viewing or copying‚ must also be documented. Maintaining an unbroken chain demonstrates the evidence’s integrity and prevents claims of tampering. Standardized forms and digital tracking systems are crucial for accurate record-keeping. Proper documentation is vital for admissibility in court‚ ensuring the evidence is considered reliable and trustworthy. Failure to maintain a complete chain can jeopardize a case.

Instructions

ct 3 s instructions

Form CT-3-S: An Overview

Form CT-3-S‚ the New York S Corporation Franchise Tax Return‚ requires careful attention to detailed instructions. PDFfiller and airSlate SignNow offer online completion and e-signature capabilities for this crucial form‚ ensuring accurate filing.

What is Form CT-3-S?

Form CT-3-S is the official New York State filing required for S corporations to report their franchise tax liability. It’s a comprehensive document demanding meticulous completion‚ guided by detailed instructions available from the New York State Department of Taxation and Finance.

This form‚ specifically the “New York S Corporation Franchise Tax Return‚” necessitates accurate reporting of income‚ expenses‚ and shareholder information. Resources like TaxFormFinder provide access to various year versions (e.g.‚ 2013‚ 2012)‚ while platforms like airSlate SignNow offer tools to navigate the 2023-2026 instructions. Understanding its purpose is vital for compliant tax filing.

Purpose of the New York S Corporation Franchise Tax Return

The primary purpose of Form CT-3-S is to calculate and report the franchise tax owed by New York State S corporations. This tax is levied on the corporation’s allocated income and is crucial for state revenue. Accurate completion‚ guided by the official instructions‚ ensures correct tax assessment.

Filing this return demonstrates compliance with New York tax laws. The form’s instructions detail how to allocate income‚ compute the tax liability‚ and report relevant shareholder data. Platforms like PDFfiller facilitate completing and submitting the form. Understanding the form’s purpose‚ alongside utilizing available resources‚ is key to avoiding penalties and maintaining good standing.

Tax Years Covered

Form CT-3-S is specific to the tax year for which it is filed. Recent updates indicate that the instructions available from sources like airSlate SignNow cover the tax years 2023-2026. TaxFormFinder lists versions dating back to 2013‚ highlighting the importance of using the correct form for the relevant period.

Always verify that the instructions downloaded align with the tax year being reported. Utilizing outdated forms or instructions can lead to errors and potential penalties. PDFfiller provides access to current versions‚ ensuring compliance. Careful attention to the tax year is essential for accurate franchise tax reporting in New York State.

Key Components of Form CT-3-S

Form CT-3-S includes sections for general information‚ shareholder details‚ and comprehensive income/expense reporting‚ all guided by detailed instructions for accurate completion.

General Information Section

The General Information Section of Form CT-3-S demands precise details about the S corporation itself. This includes the legal name‚ federal Employer Identification Number (EIN)‚ and the corporation’s business address. Accurate completion is paramount‚ referencing the official instructions provided by the New York State Department of Taxation and Finance.

Taxpayers must also indicate the principal business activity and the corporation’s organizational type. Furthermore‚ information regarding any changes in officers or directors during the tax year must be reported here. Carefully following the instructions ensures compliance and avoids potential processing delays. The section also requires details about filing status and any applicable tax credits or adjustments.

Shareholder Information

The Shareholder Information section of Form CT-3-S requires a comprehensive listing of all shareholders holding 10% or more ownership in the S corporation. Detailed instructions emphasize the need for each shareholder’s name‚ address‚ Social Security Number (SSN) or Federal Employer Identification Number (EIN)‚ and the number of shares held.

This section also necessitates reporting the shareholder’s proportionate share of income‚ deductions‚ and credits; Accuracy is crucial‚ as this information directly impacts individual shareholder tax liabilities. Referencing the official instructions is vital for proper allocation. Any changes in shareholder ownership during the tax year must also be clearly documented within this section‚ ensuring complete transparency.

Income and Expense Reporting

Income and Expense Reporting on Form CT-3-S demands meticulous detail‚ guided by the official instructions. Corporations must report all business income‚ including sales‚ services‚ and other revenue sources. Deductible expenses‚ such as salaries‚ rent‚ and business-related costs‚ are also reported here‚ directly impacting the taxable income calculation.

The instructions highlight specific line items for various income and expense categories. Accurate categorization is essential for compliance. Schedule A‚ concerning income allocation‚ plays a vital role in this process. Ensure all figures align with supporting documentation to avoid potential scrutiny during an audit. Proper reporting minimizes tax liabilities and ensures accurate franchise tax calculation.

Instructions for Completing Form CT-3-S

Form CT-3-S instructions‚ available as downloadable PDFs‚ provide a step-by-step guide. airSlate SignNow aids completion‚ while careful review avoids common errors.

Step-by-Step Guide to Filling Out the Form

Successfully navigating Form CT-3-S requires a methodical approach. Begin with the general information section‚ ensuring accuracy in all details. Proceed to shareholder information‚ meticulously listing each shareholder and their respective details. Next‚ tackle the income and expense reporting‚ referencing the detailed instructions for proper categorization.

Utilize the available PDF instructions as a constant companion. Online platforms like PDFfiller and airSlate SignNow streamline the process‚ offering fillable templates and e-signature capabilities. Double-check all calculations and entries against the official guidelines. Remember to consult Schedule A for income allocation and Schedule B for tax computation. Finally‚ carefully review the completed form before submission to avoid potential errors and delays.

Specific Line Item Instructions

Detailed instructions are crucial for accurate Form CT-3-S completion. Pay close attention to Schedule A‚ Part I‚ Line 10‚ referencing TSB-M-00(5)C for specific guidance. Aviation corporations require particular attention to these details. Ensure correct allocation of income as outlined in the official instructions.

Each line item demands precise input. Thoroughly review the PDF instructions provided by the New York State Department of Taxation and Finance. Utilize online resources like airSlate SignNow for clarification on complex sections. Double-check all calculations and ensure consistency throughout the form. Accurate completion of each line item minimizes errors and facilitates a smooth filing process.

Common Errors to Avoid

When completing Form CT-3-S‚ several common errors can lead to processing delays or inaccuracies. Incorrect income allocation‚ as detailed in Schedule A‚ is a frequent mistake. Failing to adhere to the specific instructions for aviation corporations also causes issues. Ensure all calculations are verified‚ and cross-reference figures with supporting documentation.

Avoid overlooking required attachments like Form CT-3-S-ATT. Inputting incorrect shareholder information is another prevalent error. Utilizing online resources and carefully reviewing the official PDF instructions can significantly reduce these mistakes. Double-checking for consistency and completeness before submission is vital for a successful filing.

Attachments and Schedules

Form CT-3-S requires Form CT-3-S-ATT (Attachments)‚ Schedule A for income allocation‚ and Schedule B to compute the tax liability‚ per the instructions.

Form CT-3-S-ATT (Attachments)

Form CT-3-S-ATT serves as the attachment sheet for the New York S Corporation Franchise Tax Return. It’s crucial for submitting supporting documentation and detailed schedules required by the Department of Taxation and Finance. The instructions emphasize that this form consolidates various supplemental statements‚ ensuring a comprehensive tax filing.

Specifically‚ taxpayers utilize Form CT-3-S-ATT to present information not directly accommodated within the main Form CT-3-S. This includes‚ but isn’t limited to‚ explanations of specific adjustments‚ reconciliations‚ and any additional data necessary to substantiate reported figures. Referencing the official instructions is vital for proper completion and attachment‚ avoiding potential processing delays or audit inquiries. Accurate and organized attachments streamline the review process.

Schedule A ⎼ Allocation of Income

Schedule A‚ “Allocation of Income‚” is a critical component of Form CT-3-S‚ demanding precise adherence to the instructions. This schedule determines the portion of an S corporation’s income apportionable to New York State. It’s essential for multi-state corporations operating both within and outside New York.

Taxpayers must meticulously follow the guidelines outlined in the instructions‚ particularly concerning the apportionment factors. These factors—typically property‚ payroll‚ and sales—are used to calculate the percentage of income subject to New York taxation. TSB-M-00(5)C provides further clarification. Aviation corporations have specific considerations detailed within the instructions‚ requiring careful attention to ensure accurate income allocation and compliance.

Schedule B ⎯ Computation of Tax

Schedule B‚ dedicated to the “Computation of Tax‚” is where the New York S corporation franchise tax liability is calculated using Form CT-3-S. Following the instructions precisely is paramount for accurate tax determination. This schedule requires applying the applicable tax rate to the allocated income‚ as defined in Schedule A.

Taxpayers must carefully review the instructions regarding any available credits or exemptions that may reduce the tax owed. Ensure all calculations are accurate and supported by appropriate documentation. The instructions detail specific line items and required information. Proper completion of Schedule B‚ guided by the official instructions‚ ensures compliance with New York State tax regulations.

Filing Requirements and Deadlines


Form CT-3-S instructions dictate who must file‚ typically New York S corporations. Filing deadlines are crucial; extensions may be available‚ as detailed in the instructions.

Who Must File Form CT-3-S?

Form CT-3-S instructions clearly state that any S corporation doing business in New York State is generally required to file this franchise tax return annually. This includes both domestic New York S corporations and those authorized to do business within the state as foreign entities.

Specifically‚ if an S corporation has taxable income allocated to New York State‚ it must file Form CT-3-S‚ even if the tax due is zero. Aviation corporations also have specific filing obligations‚ as outlined within the detailed instructions. Failure to file when required can result in penalties and interest charges‚ so understanding these requirements is paramount for compliant tax reporting.

Refer to the official New York State Department of Taxation and Finance instructions for a comprehensive list of exceptions and specific scenarios.

Filing Deadline Dates

According to Form CT-3-S instructions‚ the standard filing deadline generally aligns with the federal S corporation tax return due date. For the 2024 tax year (filing in 2025)‚ the deadline is typically March 15th. However‚ if an extension has been filed at the federal level‚ the New York filing deadline is automatically extended to September 15th.

It’s crucial to note that if March 15th or September 15th falls on a weekend or holiday‚ the deadline is shifted to the next business day. Always consult the official New York State Department of Taxation and Finance instructions for the most current and accurate deadline information‚ as dates can occasionally be subject to change.

Extension Options

Form CT-3-S instructions detail extension possibilities. New York generally grants an automatic six-month extension to file‚ mirroring the federal extension for S corporations. This means filing Form 7004 at the federal level automatically extends your New York filing deadline to September 15th.

However‚ an extension to file is not an extension to pay. Tax liabilities must still be paid by the original due date (typically March 15th) to avoid penalties and interest. The Department of Taxation and Finance may offer options for payment plans if needed. Always refer to the official instructions for the most up-to-date extension procedures and requirements.

Resources and Support

Form CT-3-S instructions are available on the New York State Department of Taxation and Finance website‚ alongside a tax form finder and professional assistance options.

New York State Department of Taxation and Finance Website

The New York State Department of Taxation and Finance website serves as the primary resource for Form CT-3-S instructions and related tax information. Taxpayers can directly access downloadable PDF versions of the form and its accompanying guidance. This official source provides the most current and accurate details regarding filing requirements‚ schedules‚ and specific line item explanations.

Furthermore‚ the website offers access to Tax Bulletin releases (like TSB-M-00(5)C referenced in the instructions) that clarify complex tax issues relevant to S corporations. It’s crucial to consult this website for updates‚ changes to the form‚ and any announcements impacting the 2024-2026 tax years. Navigating the site efficiently will ensure compliance and a smoother filing process.

Tax Form Finder Resources

TaxFormFinder is a valuable online resource for locating Form CT-3-S and its historical versions‚ including the 2013 and 2012 iterations. While they strive for accuracy‚ it’s important to verify information with the official New York State Department of Taxation and Finance website. These resources often provide direct links to downloadable forms and‚ sometimes‚ supplemental guidance.

However‚ remember that reliance solely on third-party form finders isn’t sufficient. Always confirm you’re using the most current form for the relevant tax year (currently 2025‚ with instructions applicable through 2026). Cross-referencing with the official state website ensures compliance and avoids potential errors during filing.

Professional Tax Assistance

Navigating Form CT-3-S and its instructions can be complex‚ making professional tax assistance invaluable. A qualified tax professional possesses in-depth knowledge of New York S corporation tax laws and can ensure accurate filing. They can assist with understanding Schedule A allocations and Schedule B tax computations‚ minimizing potential errors.

Considering the form’s intricacies‚ especially for aviation corporations with specific considerations‚ expert guidance is highly recommended. Professionals stay updated on recent changes (like those for 2024-2026) and can proactively address potential issues. Seeking assistance can save time‚ reduce stress‚ and potentially avoid costly penalties.

Updates and Changes to Form CT-3-S

Instructions for Form CT-3-S are updated regularly‚ with changes applicable for 2023-2026. Staying current with these revisions is vital for accurate tax filing.

Recent Updates (2024-2026)

Recent updates to Form CT-3-S instructions (2024-2026) emphasize utilizing the latest downloadable PDF versions from the New York State Department of Taxation and Finance website. These instructions reflect current tax laws and reporting requirements for S corporations operating within New York State.

airSlate SignNow highlights the availability of 2023-2026 instructions‚ facilitating easier completion and e-signing. Taxpayers should carefully review any changes impacting Schedule A‚ particularly concerning income allocation‚ as referenced in TSB-M-00(5)C. PDFfiller also provides access to the current form and instructions‚ ensuring compliance. Staying informed about these updates is crucial for avoiding potential errors and penalties during the filing process.

Changes from Previous Years

Compared to prior years‚ the instructions for Form CT-3-S have been updated to reflect evolving tax legislation and clarify reporting procedures. While specific changes aren’t explicitly detailed in the provided snippets‚ the availability of updated instructions (e.g.‚ 2023-2026 via airSlate SignNow) indicates modifications have occurred.

Taxpayers should be aware that updates likely address nuances in income allocation (Schedule A) and tax computation (Schedule B). The emphasis on utilizing the latest PDF instructions from PDFfiller suggests previous versions may be outdated or inaccurate. Reviewing these changes diligently is vital to ensure accurate tax calculations and avoid discrepancies with the New York State Department of Taxation and Finance.

Future Updates to Anticipate

Given the dynamic nature of tax law‚ future updates to the Form CT-3-S instructions are inevitable. Anticipate revisions aligning with any changes to New York State tax legislation‚ potentially impacting franchise tax rates or S corporation regulations.

Further clarification regarding aviation corporation considerations‚ as noted in available resources‚ could be addressed in upcoming instructions. Continued refinement of digital filing options‚ like those offered by PDFfiller and airSlate SignNow‚ is also likely. Staying informed through the New York State Department of Taxation and Finance website and regularly checking for updated PDF instructions will be crucial for compliant filing in future tax years.

Digital Filing Options

Form CT-3-S instructions are readily available for online completion via platforms like PDFfiller and airSlate SignNow‚ streamlining the e-signature and filing process.

Using PDFfiller for Online Completion

PDFfiller provides a comprehensive solution for completing Form CT-3-S and navigating its instructions digitally. This platform allows users to directly fill‚ sign‚ and print the New York S Corporation Franchise Tax Return online‚ eliminating the need for manual paperwork.

With PDFfiller‚ you can securely download the form and access a library of editable templates. The intuitive interface guides you through each section‚ ensuring accurate data entry based on the official instructions. It supports various file formats and offers secure document storage.

PDFfiller’s features streamline the filing process‚ making it easier to comply with New York tax regulations. Users can access the form anytime‚ anywhere‚ and benefit from its user-friendly design‚ simplifying a potentially complex task. It’s a convenient and efficient option for S corporations.

airSlate SignNow for e-Signatures

airSlate SignNow offers a streamlined process for electronically signing Form CT-3-S‚ simplifying compliance with New York’s franchise tax requirements. Utilizing fillable templates and a powerful editor‚ SignNow makes completing and e-signing the New York S Corporation Franchise Tax Return remarkably easy.

The platform allows users to quickly access and complete the form‚ guided by the official instructions. It supports secure document workflows and integrates with various cloud storage services. SignNow ensures legally binding signatures‚ eliminating the need for physical copies and postal mail.

Completing the form takes only minutes‚ and the platform’s intuitive interface simplifies even complex tax forms. airSlate SignNow provides a secure and efficient solution for S corporations managing their New York tax obligations.

Downloadable PDF Instructions

Accessing the official PDF instructions for Form CT-3-S is crucial for accurate completion of the New York S Corporation Franchise Tax Return. Templateroller provides access to downloadable instructions‚ specifically the latest version applicable for 2022‚ though newer versions are available.

These instructions detail each line item‚ offering guidance on proper reporting of income‚ expenses‚ and shareholder information. Downloading the PDF allows offline review and printing for convenient reference during form preparation.

Carefully studying these guidelines minimizes errors and ensures compliance with New York State Department of Taxation and Finance regulations. Utilizing the downloadable PDF alongside the form itself is highly recommended for a smooth filing process.

Understanding S Corporation Tax in New York

Form CT-3-S instructions clarify New York’s franchise tax basics for S corporations‚ detailing applicable tax rates and specific considerations for aviation corporations.

Franchise Tax Basics

Franchise tax‚ a key component addressed within the CT-3-S instructions‚ is levied on S corporations operating in New York State. This tax isn’t based on income‚ but rather on the corporation’s net worth. Understanding this distinction is crucial for accurate filing. The instructions detail how to calculate this net worth‚ outlining permitted deductions and adjustments.

Properly completing Form CT-3-S requires a firm grasp of these foundational principles. Resources like the New York State Department of Taxation and Finance website provide further clarification. Aviation corporations face unique franchise tax considerations‚ as highlighted in the instructions and related Tax Section Bulletins (TSB-M-00(5)C)‚ demanding specialized attention during the filing process.

Tax Rates for S Corporations

The CT-3-S instructions don’t explicitly detail fixed tax rates‚ as the franchise tax calculation is based on a corporation’s allocated income and net worth. However‚ understanding the general framework is vital. New York utilizes a risk-based capital system‚ influencing the applicable tax rate. The instructions guide taxpayers through determining their risk-based capital.

While a specific rate isn’t stated‚ the instructions emphasize accurate income allocation (Schedule A) and tax computation (Schedule B) to arrive at the correct liability. Aviation corporations‚ as noted within the CT-3-S guidance‚ may encounter specific rate considerations. Consulting the Department of Taxation and Finance website is recommended for the most current rate information.

Aviation Corporation Considerations

The CT-3-S instructions specifically address aviation corporations‚ noting potential unique tax implications. These entities require careful attention to income allocation‚ particularly concerning activities both within and outside of New York State. The instructions reference TSB-M-00(5)C for further guidance on aviation-specific tax rules.

Aviation corporations must meticulously follow the CT-3-S guidelines for determining taxable income and applying the appropriate tax rate. Proper completion of Schedule A is crucial for accurate allocation. The instructions emphasize the importance of understanding how New York taxes aviation-related income‚ potentially differing from other industries. Seeking professional tax assistance is advisable for aviation corporations navigating these complexities.

Instructions

dur-a-quartz application instructions tm

Dur-A-Quartz Application Instructions: A Comprehensive Guide

Dur-A-Quartz flooring systems offer seamless‚ durable surfaces‚ utilizing colored quartz aggregate within an epoxy body coat. This guide details installation‚
covering preparation‚
application‚
and finishing techniques for optimal results.

Dur-A-Quartz flooring represents a robust and aesthetically versatile solution for diverse flooring needs‚ seamlessly blending durability with decorative appeal. This system utilizes a unique combination of epoxy and colored quartz aggregate‚ creating a resilient‚ seamless surface ideal for industrial‚ commercial‚ and institutional environments.

Unlike traditional flooring options‚ Dur-A-Quartz offers exceptional resistance to chemicals‚ abrasion‚ and impact‚ ensuring long-lasting performance even in demanding applications. The flooring’s composition allows for customization in color and texture‚ providing architects and designers with creative freedom. Installation involves multiple stages‚ beginning with meticulous surface preparation and culminating in the application of a protective topcoat.

The system’s adaptability extends to thickness‚ allowing for adjustments to meet specific floor requirements. Furthermore‚ optional enhancements like cove bases‚ flexible body coats for crack resistance‚ and moisture vapor transmission (MVT) barriers can be integrated to address unique project challenges. Understanding these components and the proper application techniques is crucial for achieving a high-quality‚ long-lasting Dur-A-Quartz floor.

Understanding Dur-A-Quartz Components

A complete Dur-A-Quartz flooring system comprises several key components‚ each playing a vital role in the final performance and appearance. The foundation is the epoxy body coat‚ typically Perdure E10‚ a 100% solids epoxy resin that binds the quartz aggregate. This epoxy provides the structural integrity and chemical resistance of the floor.

Next is the quartz aggregate itself – Q28 or Q11 colored quartz – which provides the decorative finish and contributes to the floor’s durability. The choice of quartz color significantly impacts the aesthetic outcome. Optional components include MVT barriers‚ essential for substrates prone to moisture vapor transmission‚ preventing coating failure.

A flexible body coat can be incorporated to enhance crack resistance‚ accommodating minor substrate movement. Finally‚ the topcoat – available in Novolac‚ polyaspartic‚ or polyurethane – provides the ultimate protection against wear‚ chemicals‚ and UV exposure‚ while also dictating the floor’s gloss level and overall finish. Proper understanding of each component’s function is paramount for a successful installation.

Surface Preparation: The Foundation for Success

Proper surface preparation is absolutely critical for a successful Dur-A-Quartz installation; it’s the foundation upon which the entire system relies. Begin by thoroughly cleaning the concrete substrate‚ removing all contaminants like dirt‚ dust‚ grease‚ oil‚ and any previous coatings. Mechanical abrasion‚ such as shot blasting or grinding‚ is typically required to achieve a Concrete Surface Profile (CSP) suitable for epoxy adhesion.

Refer to the DUR-A-FLEX Surface Preparation Guide for detailed instructions tailored to specific substrate conditions. Patch any cracks or spalls with an appropriate epoxy patching compound‚ ensuring a smooth‚ level surface. The concrete must be sound‚ structurally stable‚ and free of loose particles.

Crucially‚ no epoxy coatings should be applied unless the surface meets the required preparation standards. Inadequate preparation will lead to adhesion failure‚ delamination‚ and ultimately‚ a compromised floor system. Thoroughness at this stage saves significant time and expense later.

Moisture Vapor Transmission (MVT) Barriers

Addressing Moisture Vapor Transmission (MVT) is paramount‚ as excessive moisture can severely compromise the Dur-A-Quartz flooring system. Concrete substrates often contain residual moisture that can migrate through the slab‚ causing blistering‚ delamination‚ and coating failure. Before application‚ conduct thorough moisture testing – calcium chloride tests are commonly used to determine MVT rates.

If MVT levels exceed the epoxy’s tolerance (refer to product data sheets)‚ a suitable MVT barrier must be installed. These barriers can be epoxy-based or cementitious‚ designed to block moisture migration. Application of the barrier requires strict adherence to the manufacturer’s instructions‚ including surface preparation and application rates.

Selecting the appropriate barrier depends on the severity of the moisture issue and the specific substrate. Ignoring MVT concerns can lead to costly repairs and system failures‚ so proactive mitigation is essential for a long-lasting‚ durable floor.

Mixing and Application of the Epoxy Body Coat (Perdure E10)

The Perdure E10 epoxy body coat forms the foundational layer for the Dur-A-Quartz system‚ providing adhesion and embedding the quartz aggregate. Proper mixing is critical; carefully follow the manufacturer’s ratio for resin and hardener‚ utilizing a mechanical mixer to ensure thorough homogenization. Avoid introducing excessive air during mixing‚ as this can weaken the coating.

Pour the mixed Perdure E10 onto the prepared substrate in manageable strips and immediately spread it at a rate of 100 to 110 square feet per gallon‚ using a squeegee or trowel. A notched trowel aids in achieving uniform thickness and promotes proper aggregate embedding. Work efficiently‚ maintaining a wet edge to prevent lap marks.

Ensure complete coverage and avoid puddling. The epoxy’s working time is limited‚ so application requires a coordinated team. This step is vital for the floor’s structural integrity and aesthetic appeal.

Quartz Aggregate Broadcasting Techniques

Following the application of the Perdure E10 epoxy body coat‚ immediate quartz aggregate broadcasting is essential. This process involves evenly distributing the colored quartz (Q28 or Q11) across the wet epoxy surface‚ creating the decorative and durable wear layer. Consistent coverage is paramount for a uniform appearance and optimal performance.

Begin broadcasting from the edges of the work area‚ working backwards towards the exit. Utilize a hand-operated broadcaster or a mechanical spreader to achieve consistent density. Avoid overloading‚ which can lead to poor aggregate adhesion and a gritty surface. Lightly broadcast‚ allowing the epoxy to fully wet the quartz granules.

Multiple passes may be necessary to achieve full coverage. Allow the epoxy to begin tacking up before broadcasting the final layer. This prevents the aggregate from sinking too deeply and ensures a vibrant‚ textured finish. Proper broadcasting is key to the floor’s longevity and aesthetic qualities.

Application Rate and Tool Selection

When applying the Perdure E10 epoxy body coat‚ a consistent application rate of 100 to 110 square feet per gallon is recommended. This ensures adequate coverage and proper aggregate adhesion. Precise measurement and careful pouring are crucial for maintaining this rate throughout the installation process.

Tool selection significantly impacts the quality of the application. A flat trowel or squeegee is essential for spreading the epoxy evenly across the prepared surface. Notched trowels can also be utilized to control the thickness and ensure consistent material distribution.

For larger areas‚ consider using a mechanical spreader to expedite the process and maintain uniformity. Always use tools constructed from materials compatible with epoxy resins to prevent contamination or adverse reactions. Proper tool maintenance‚ including cleaning after each use‚ is vital for longevity and optimal performance. Remember‚ training videos are available but don’t replace expertise.

Achieving Desired Thickness and Floor Requirements

Dur-A-Quartz floors are remarkably versatile‚ allowing installation to various thicknesses tailored to specific floor requirements. The desired thickness is determined by anticipated traffic levels‚ load-bearing needs‚ and the substrate’s condition. Careful consideration of these factors is paramount before commencing application.

Multiple passes of the epoxy body coat‚ combined with appropriate quartz aggregate broadcasting‚ enable builders to build up the floor to the necessary mil thickness. Consistent monitoring during application is crucial to ensure uniform thickness across the entire surface.

Remember that the topcoat selection – Novolac‚ polyaspartic‚ or polyurethane – also contributes to the overall floor profile. Adhering to manufacturer specifications for each component guarantees optimal performance and longevity. Thorough surface preparation‚ as outlined in the DUR-A-FLEX Surface Preparation Guide‚ is fundamental to achieving a durable and compliant floor system.

Cove Base Installation (Optional)

A cove base provides a seamless transition between the floor and vertical surfaces‚ enhancing both aesthetics and hygiene. Installation is optional but highly recommended for environments demanding stringent cleanliness‚ such as commercial kitchens or healthcare facilities.

The process involves applying a specially formulated epoxy cove base material along the perimeter of the floor‚ blending it smoothly with the floor surface. This eliminates sharp corners where dirt and bacteria can accumulate. Proper blending requires skill and attention to detail‚ ensuring a watertight and visually appealing seal.

Before applying the cove base‚ ensure the wall surface is properly prepared – clean‚ dry‚ and free of contaminants. The cove base material should be compatible with the chosen Dur-A-Quartz epoxy system. Refer to DUR-A-FLEX guidelines for specific product recommendations and application techniques. A correctly installed cove base significantly extends the lifespan and functionality of the flooring system.

Flexible Body Coat for Crack Resistance (Optional)

For substrates prone to movement or existing hairline cracks‚ a flexible body coat offers enhanced crack resistance within the Dur-A-Quartz system. This layer acts as a buffer‚ accommodating minor substrate shifts without compromising the integrity of the finished floor.

Applied between the primer and the Perdure E10 epoxy body coat‚ the flexible body coat maintains the seamless appearance while mitigating crack propagation. It’s particularly beneficial in concrete slabs experiencing thermal expansion and contraction‚ or in areas with known structural instability.

Selecting the appropriate flexible body coat is crucial; it must be fully compatible with both the primer and the Perdure E10. Follow manufacturer’s instructions meticulously regarding mixing ratios and application rates. Proper application ensures optimal flexibility and adhesion. While adding cost‚ this optional layer provides long-term durability and reduces the risk of costly repairs‚ especially in demanding environments.


Topcoat Options: Novolac‚ Polyaspartic‚ Polyurethane

The final layer in a Dur-A-Quartz floor system‚ the topcoat‚ provides crucial protection and aesthetic appeal. Several options exist‚ each offering unique characteristics suited to different environments and performance requirements.

Novolac topcoats deliver exceptional chemical resistance‚ making them ideal for industrial settings‚ laboratories‚ and areas exposed to harsh substances. Polyaspartic topcoats offer rapid cure times‚ minimizing downtime and providing excellent abrasion resistance‚ suitable for high-traffic areas. Polyurethane topcoats provide a balance of durability‚ UV stability‚ and gloss retention‚ offering a versatile solution for various applications.

Consider the specific demands of the environment when selecting a topcoat. Factors include chemical exposure‚ foot traffic‚ UV light exposure‚ and desired gloss level. Proper surface preparation and application are vital for optimal adhesion and performance‚ regardless of the chosen topcoat. Each option contributes to the longevity and overall quality of the Dur-A-Quartz flooring system.

Topcoat Application Procedures

Proper topcoat application is critical for achieving a durable and aesthetically pleasing Dur-A-Quartz floor. Begin with a thoroughly cleaned and prepared surface‚ ensuring the epoxy body coat is fully cured. Carefully mix the topcoat components according to the manufacturer’s instructions‚ maintaining the correct ratio for optimal performance.

Apply the topcoat using a high-quality roller‚ brush‚ or spray equipment‚ maintaining a consistent wet film thickness. Avoid overlapping excessively to prevent inconsistencies. Multiple coats may be necessary to achieve the desired thickness and coverage‚ allowing each coat to cure appropriately before applying the next;

Pay close attention to temperature and humidity during application‚ as these factors can affect curing time and film properties. Inspect the finished surface for any imperfections and address them promptly. Following these procedures ensures a seamless‚ protective‚ and long-lasting topcoat for your Dur-A-Quartz floor.

Chemical Resistance Considerations

Dur-A-Quartz flooring offers robust chemical resistance‚ but the specific level depends heavily on the chosen topcoat. Novolac topcoats provide exceptional resistance to harsh acids and solvents‚ making them ideal for demanding industrial environments. Polyaspartic and polyurethane options offer good overall chemical resistance‚ suitable for areas exposed to moderate chemical spills and cleaning agents.

Before selecting a topcoat‚ carefully assess the specific chemicals the floor will encounter. Consult chemical resistance charts provided by Duraamen to ensure compatibility. Remember that prolonged exposure to concentrated chemicals can degrade even the most resistant coatings.

Regular cleaning and prompt spill cleanup are crucial for maintaining chemical resistance. Avoid abrasive cleaners that can damage the topcoat. Proper topcoat selection and diligent maintenance will maximize the lifespan and protective qualities of your Dur-A-Quartz floor.

Troubleshooting Common Application Issues

Several issues can arise during Dur-A-Quartz application. Fish eyes‚ caused by surface contamination‚ require thorough cleaning and re-preparation. Pinholes in the epoxy body coat often stem from inadequate mixing or outgassing from the substrate; ensure proper mixing techniques and consider an MVT barrier.

Uneven quartz distribution can be corrected by adjusting broadcasting technique and ensuring consistent material spread. If the topcoat exhibits bubbling‚ it may indicate excessive heat or moisture; control environmental conditions and verify substrate dryness.

Remember‚ proper surface preparation is paramount. Training videos‚ while helpful‚ don’t replace expertise. If issues persist‚ consult Duraamen’s technical support for guidance. Don’t attempt to remedy problems without understanding the root cause‚ as this can worsen the situation. Patience and attention to detail are key to a successful installation;

Safety Precautions and Best Practices

Dur-A-Quartz installation necessitates strict adherence to safety protocols. Always wear appropriate personal protective equipment (PPE)‚ including respirators‚ gloves‚ and eye protection‚ when handling epoxy and other chemicals. Ensure adequate ventilation in the work area to avoid inhaling harmful vapors.

Read and understand all product data sheets (PDS) and safety data sheets (SDS) before commencing work. Properly dispose of waste materials according to local regulations. Maintain a clean and organized work environment to prevent slips‚ trips‚ and falls.

Remember‚ epoxy can cause skin irritation; avoid direct contact. Thoroughly train all personnel involved in the installation process. While training videos offer guidance‚ they don’t substitute for comprehensive understanding and experience. Prioritize safety to ensure a successful and hazard-free flooring project.

Instructions

battery tender jr instruction manual

Battery Tender Jr Instruction Manual: A Comprehensive Guide

This manual details Battery Tender Junior charger operation, safety, and troubleshooting, covering 12V systems and various battery types for optimal performance.

The Battery Tender Jr is a robust and user-friendly battery charger designed for maintaining and extending the life of 12V lead-acid, AGM, and gel batteries. This compact charger is ideal for a wide range of applications, including motorcycles, cars, boats, RVs, and more.

It’s engineered to deliver a consistent, low-amperage charge, preventing overcharging and ensuring your battery remains in peak condition. Unlike traditional chargers, the Battery Tender Jr automatically switches between charge and float modes, providing optimal battery care without the need for constant monitoring.

This guide provides comprehensive instructions for safe and effective use, covering setup, charging procedures, troubleshooting, and maintenance.

What is a Battery Tender Jr?

The Battery Tender Jr is a 12V, 750mA battery charger and maintainer specifically designed for lead-acid, AGM, and gel batteries. It’s a “smart” charger, meaning it utilizes a multi-stage charging process to optimize battery health and longevity.

Unlike conventional chargers that can overcharge and damage batteries, the Battery Tender Jr automatically transitions to float mode once the battery is fully charged, maintaining optimal voltage without risk of harm. This makes it perfect for long-term storage or seasonal vehicles.

Its compact size and versatile connectivity options – alligator clips and ring terminals – make it suitable for various applications and easy to use.

Key Features and Specifications

Key features of the Battery Tender Jr include its automatic switching between charge and float modes, ensuring batteries remain topped off without overcharging. It boasts a 12V output at 750mA, ideal for maintaining a wide range of battery sizes.

Specifications include compatibility with lead-acid, AGM, and gel batteries. The charger comes equipped with both alligator clips for quick connections and ring terminals for a more permanent setup. Its compact design allows for easy storage and portability.

Furthermore, it features short circuit, reverse polarity, and over-temperature protection, enhancing safety and reliability.

Understanding the Charger

This section clarifies the Battery Tender Jr’s core functionalities, including its voltage, amperage, and automatic switching modes for efficient battery maintenance.

Voltage Compatibility (12V)

The Battery Tender Jr is specifically designed for 12-volt battery systems. It is crucial to verify your battery’s voltage before connecting the charger; using it on a different voltage system can cause damage to both the charger and the battery. This charger is not compatible with 6V, 16V, or 24V batteries.

Attempting to charge a battery with an incorrect voltage can lead to overheating, reduced battery life, or even a potential fire hazard. The 12V compatibility ensures safe and effective charging for a wide range of applications, including motorcycles, cars, boats, and RVs. Always double-check the battery’s specifications to confirm it’s a 12V system before proceeding with the charging process.

Amperage Output (750mA)

The Battery Tender Jr delivers a consistent 750mA (0.75 amps) of charging current. This amperage is ideal for maintaining a wide variety of 12V lead-acid, AGM, and gel batteries without overcharging. Compared to traditional 3-amp chargers, the 750mA output provides a slower, more controlled charge, extending battery life.

This lower amperage is particularly beneficial for batteries that are already fully charged, as it prevents the damage that can occur from excessive current. The 750mA output ensures a gentle, efficient charge, making it suitable for long-term battery maintenance. It’s a safe and effective solution for keeping batteries topped off and ready for use.

Automatic Switching Modes: Charge & Float

The Battery Tender Jr intelligently manages the charging process through two automatic modes: Charge and Float. Initially, the charger operates in Charge mode, delivering a controlled current to replenish the battery’s energy. Once the battery reaches full capacity, it seamlessly transitions to Float mode.

In Float mode, the charger provides a low-level current, just enough to compensate for self-discharge, maintaining the battery at 100% charge without overcharging. This automatic switching ensures optimal battery health and longevity. This feature eliminates the need for manual intervention, providing a “set it and forget it” charging solution.

Safety Precautions

Always follow safety warnings to prevent electrical shock and ensure proper ventilation during charging, especially concerning potentially explosive battery gases.

General Safety Warnings

Important safety instructions must be followed diligently when using the Battery Tender Jr. This charger is designed for 12-volt lead-acid, AGM, and gel batteries only; using it with other battery types could cause damage or injury.

Never charge damaged batteries. Inspect batteries for cracks or leaks before connecting the charger. Do not disassemble the charger; attempting repairs yourself voids the warranty and poses a safety risk. Keep the charger dry and avoid operating it in wet or damp environments.

Ensure adequate ventilation during charging to prevent the buildup of explosive hydrogen gas. Always disconnect the charger from the AC power source before making any connections or disconnections to the battery. This charger is intended for indoor use only.

Electrical Shock Prevention

To prevent electrical shock, always ensure the charger is properly grounded. Never operate the Battery Tender Jr with a damaged power cord or plug. Inspect the cord regularly for any signs of wear or damage and replace it immediately if necessary.

Avoid touching the charger’s terminals or alligator clips while it is connected to AC power. Do not use the charger in areas where flammable liquids or gases are present, as sparks could ignite them. Keep the charger out of reach of children.

Always disconnect the charger from the AC outlet before attempting any cleaning or maintenance. Never immerse the charger in water or any other liquid. Use insulated tools when working with the battery and charger.

Battery Gas and Ventilation

Batteries release explosive gases during charging – hydrogen and oxygen. Therefore, charge batteries in a well-ventilated area to prevent gas accumulation. Ensure adequate airflow, avoiding enclosed spaces like airtight garages or cabinets.

Keep sparks, flames, and smoking materials away from the battery during charging. Do not charge a frozen battery, as it may rupture and release hazardous gases. If the battery is leaking or shows signs of corrosion, handle it with extreme caution and wear appropriate protective gear.

Always disconnect the charger before disconnecting the battery to prevent arcing, which could ignite the gases. Proper ventilation is crucial for safe battery charging.

Setting Up the Battery Tender Jr

Connect the charger using alligator clips or ring terminals to the battery, ensuring proper polarity – red to positive (+), black to negative (-).

Connecting the Alligator Clips

To begin, ensure the Battery Tender Jr is disconnected from the power outlet. Attach the red alligator clip to the positive (+) terminal of the battery, and the black alligator clip to the negative (-) terminal. Verify a secure connection; loose clips can interrupt the charging process.

These clips are designed for temporary connections, ideal for quick charging or maintenance. Ensure the clips grip the battery posts firmly, avoiding any slippage. Inspect the clips for damage before each use, replacing them if corroded or broken. Proper connection is crucial for safe and efficient charging, preventing sparks or damage to the battery and charger.

Always double-check polarity before plugging in the charger to avoid potential hazards.

Using Ring Terminals for Permanent Connection

For a secure, long-term connection, utilize the included ring terminals. Disconnect the charger from the AC power source before installation. Crimp the ring terminals onto appropriately sized wires, ensuring a strong, gas-tight connection. Attach the red ring terminal to the battery’s positive (+) terminal and the black ring terminal to the negative (-) terminal.

Ring terminals offer a more reliable connection than alligator clips, minimizing voltage drop and ensuring consistent charging. Tighten the connections firmly, but avoid over-tightening, which could damage the battery terminals. Regularly inspect the connections for corrosion or looseness, maintaining optimal performance.

This method is ideal for vehicles or equipment requiring frequent charging.

Connecting to a Dead Battery (Voltage Below 3V)

The Battery Tender Jr incorporates a safety feature preventing it from initiating a charge on batteries with a voltage below 3 Volts. This internal circuit safeguards against potential damage to both the charger and the severely discharged battery. Attempting to charge such a battery directly may result in the charger not starting.

To recover a deeply discharged battery, a higher amperage charger may be required initially to bring the voltage above 3V. Once the battery reaches a sufficient voltage, the Battery Tender Jr can then be connected for a controlled, maintenance charge. Always consult battery-specific guidelines for optimal recovery procedures.

Prioritize safety and avoid forcing a charge on a critically low battery.

Charging Procedures

Follow these steps for safe and effective charging: connect the clips, ensure proper battery type selection, and monitor the LED indicators during operation.

Step-by-Step Charging Instructions

Begin by connecting the Battery Tender Jr’s alligator clips to the battery terminals – red to positive (+), and black to negative (-). Ensure a secure connection. If the battery voltage is below 3V, the charger won’t initiate; a higher voltage is required to start the charging cycle.

Plug the charger into a standard AC outlet. The LED indicator will illuminate, signifying the charger is active. The Battery Tender Jr will automatically assess the battery’s state and begin charging. It will transition between charge and float modes as needed, maintaining optimal battery health.

Periodically check the connections and LED indicator to monitor the charging progress. Disconnect the charger once the battery is fully charged, or leave it connected for maintenance float charging.

Charging Different Battery Types (Lead-Acid, AGM, Gel)

The Battery Tender Jr is designed to safely charge various 12V battery types, including traditional Lead-Acid, Absorbed Glass Mat (AGM), and Gel batteries. No manual adjustments are needed; the charger automatically detects the battery type and adjusts the charging profile accordingly.

For optimal results, ensure the battery is in good condition and properly ventilated. The Battery Tender Jr’s automatic switching between charge and float modes ensures batteries receive the correct voltage and current throughout the charging cycle, preventing overcharging and maximizing lifespan.

This versatility makes it ideal for maintaining a wide range of vehicles and equipment batteries.

Monitoring the Charging Process

Monitoring the Battery Tender Jr is straightforward thanks to its intuitive LED indicator lights. A solid red light indicates the battery is in the charging phase, receiving current. Once the battery reaches full charge, the LED will turn to a solid green, signifying the charger has switched to float mode.

Float mode maintains the battery at its optimal voltage, compensating for self-discharge and keeping it ready for use. A flashing red light suggests a potential issue, such as a reversed polarity connection or a battery with a voltage below 3V.

Regularly checking the LED provides valuable insight into the charging status.

Troubleshooting

This section addresses common issues with the Battery Tender Jr, including charging failures, LED indicator problems, and situations where the charger won’t start.

Charger Not Starting

If the Battery Tender Jr fails to initiate charging, several factors could be at play. Firstly, ensure the battery voltage isn’t below 3 Volts; an internal safety circuit prevents operation with severely discharged batteries. Secondly, verify the connection of the alligator clips or ring terminals – a loose or corroded connection will interrupt the charging process.

Additionally, inspect the charger’s input power source; confirm it’s properly plugged into a functioning AC outlet. Furthermore, check the fuse within the charger’s plug – a blown fuse will immediately halt operation; Finally, if the issue persists, attempt to charge a known good battery to rule out a charger malfunction; if it charges another battery, the original battery is likely the problem.

Battery Not Charging

If the Battery Tender Jr is powered on but the battery isn’t receiving a charge, begin by re-checking the connections. Ensure the alligator clips or ring terminals are firmly attached to the battery terminals, free from corrosion, and making solid contact. Next, confirm the battery type setting is appropriate for your battery – lead-acid, AGM, or gel.

A severely sulfated or damaged battery may not accept a charge. Try a different battery to isolate the issue. Also, verify the battery’s voltage; if it’s extremely low, the charger might initially struggle to recognize it. Finally, if the LED indicator doesn’t show a charging state after these checks, the charger itself may be faulty.

LED Indicator Light Meanings

The Battery Tender Jr’s LED indicator provides crucial charging status information. A solid red light signifies the battery is charging; A solid green light indicates the battery is fully charged and in float mode, maintaining optimal voltage without overcharging. A flashing red light suggests a problem – potentially a reversed polarity connection or a severely damaged battery.

If the light doesn’t illuminate when connected to power, check the power source and the charger’s fuse. A flashing green light can indicate the charger is attempting to initiate a charge on a battery with extremely low voltage (below 3V), and may not start. Refer to the troubleshooting section for further guidance.


Advanced Features & Information

Battery Tender Jr offers float charging for maintenance, charges faster than many 3-amp chargers, and is compatible with DC battery pumps for versatile use.

Float Charging Mode Explained

Float charging is a crucial feature of the Battery Tender Jr, designed for long-term battery maintenance. Once the battery reaches full charge, the charger automatically switches to this mode. Instead of continuing to deliver a constant charge, it provides a small, sustaining current – just enough to offset the battery’s natural self-discharge rate.

This prevents overcharging, which can damage the battery and reduce its lifespan. The Battery Tender Jr intelligently monitors the battery’s voltage and adjusts the float charge accordingly, ensuring it remains at an optimal level. This is ideal for batteries used seasonally or stored for extended periods, keeping them ready for immediate use without degradation. Essentially, float charging maintains a full charge without the risks associated with continuous charging.

Faster Charging Compared to 3-Amp Chargers

Despite its compact size and 750mA output, the Battery Tender Jr can often charge batteries as quickly, or even faster, than traditional 3-amp chargers. This seemingly counterintuitive performance stems from the Battery Tender Jr’s intelligent charging algorithm and efficient power delivery system.

Unlike simple 3-amp chargers that deliver a constant current regardless of the battery’s state, the Battery Tender Jr dynamically adjusts its output based on the battery’s needs. It maximizes current delivery when the battery is deeply discharged and gradually reduces it as the battery approaches full charge, optimizing the charging process for speed and battery health.

DC Battery Pump Compatibility (12V/24V ⎼ Related Accessory)

The Battery Tender Jr, operating at 12V, exhibits compatibility with certain DC battery pumps designed for similar voltage ranges. Specifically, 12V DC battery pumps, often utilized for fluid transfer applications, can be powered using the charger’s output.

These pumps, frequently featuring a flow rate around 40 liters per minute and equipped with 4-meter electrical cables with battery clamps, offer a convenient solution when AC power is unavailable. However, ensure the pump’s amperage draw doesn’t exceed the Battery Tender Jr’s capacity to prevent overload. 24V pumps are not directly compatible.

Maintenance and Care

Regularly inspect cables for damage and clean the charger with a dry cloth to ensure optimal performance and longevity of your Battery Tender Jr.

Cleaning the Charger

To maintain the Battery Tender Jr’s performance and ensure its longevity, periodic cleaning is recommended. Always disconnect the charger from the AC power outlet before any cleaning procedure. Use a soft, dry cloth to wipe down the charger’s casing, removing any dust or debris that may have accumulated.

Avoid using water, solvents, or abrasive cleaners, as these can damage the charger’s internal components or exterior finish. For stubborn dirt, a slightly damp cloth may be used, but ensure the charger is completely dry before reconnecting it to power. Do not attempt to disassemble the charger for cleaning purposes; this could void the warranty and potentially create a safety hazard. Regular cleaning will help prevent overheating and maintain efficient operation of your Battery Tender Jr.

Cable Inspection

Regularly inspect the Battery Tender Jr’s cables for any signs of damage. Before each use, carefully examine the alligator clips and ring terminals for corrosion, fraying, or cracks. Check the cable insulation along its entire length for cuts, abrasions, or exposed wires. Damaged cables can pose a safety risk and reduce the charger’s effectiveness.

If any damage is detected, immediately discontinue use of the charger and replace the cable. Do not attempt to repair damaged cables yourself. Using a damaged cable could result in electric shock or fire. Ensure replacement cables are of the correct gauge and specification for the Battery Tender Jr. Proper cable maintenance is crucial for safe and reliable operation.

Storage Instructions

When storing the Battery Tender Jr for extended periods, disconnect it from both the battery and the AC power source. Clean the charger thoroughly, removing any dirt or debris as outlined in the ‘Cleaning the Charger’ section. Coil the cables loosely and store them in a dry, cool place, away from direct sunlight and extreme temperatures.

Avoid storing the charger in damp or humid environments, as this can lead to corrosion. Ensure the storage location is free from dust and pests. Periodically check the cables for any signs of deterioration during storage. Proper storage will prolong the life of your Battery Tender Jr and ensure it’s ready for use when needed.

Instructions

float vape pen instructions

Float Vape Pen Instructions: A Comprehensive Guide

Float vape pens offer a streamlined vaping experience, requiring understanding of components and proper usage․ This guide details everything from initial setup,
cartridge attachment,
and safety precautions for optimal performance․

Understanding the Float Vape Pen

Float vape pens have rapidly gained popularity as a discreet and user-friendly vaping option․ These devices distinguish themselves through a focus on simplicity and portability, making them accessible to both new and experienced vapers․ Unlike more complex vape setups, Float pens generally require minimal assembly and offer intuitive operation․

A key aspect of understanding a Float vape pen lies in recognizing its core function: to vaporize concentrated cannabis oils or other compatible liquids․ The pen’s heating element warms the oil within a cartridge, creating an inhalable aerosol․ The device’s design often incorporates a push-button activation or draw-activated mechanism for ease of use․

Furthermore, Float pens frequently utilize a 510-threaded connection, a standard within the vaping industry, allowing compatibility with a wide range of cartridges․ Variable voltage settings, available on some models, enable users to customize their vaping experience by adjusting the temperature․ Understanding these fundamental aspects is crucial before delving into the specifics of operation and maintenance․

What is a Float Vape Pen?

A Float vape pen is a type of portable, battery-powered device designed for vaporizing cannabis concentrates, typically oil-filled cartridges․ It’s characterized by its sleek, pen-like shape and ease of use, making it a popular choice for both beginners and seasoned vape users․ Unlike traditional smoking, vaping heats the concentrate to a temperature where its active compounds are released as vapor, rather than combusted․

These pens often feature a 510-threaded connection, a universal standard allowing compatibility with numerous cartridges available on the market․ Many Float pens offer variable voltage settings, empowering users to tailor their vaping experience to their preferences – lower voltages for flavor, higher voltages for stronger vapor production․

Disposable Float devices, like the Flum Float, provide a pre-filled, all-in-one solution, while reusable pens require cartridge refills․ Understanding whether you have a disposable or refillable model is essential for proper operation and maintenance․ They are designed for convenience and discreet consumption․

Key Components of a Float Vape Pen

A typical Float vape pen comprises several essential components working in harmony․ The battery is the power source, often utilizing a 510-threaded connection to accommodate various cartridges․ Variable voltage batteries allow customization of the vaping experience․

The cartridge holds the concentrated oil, available in diverse strains and formulations․ These cartridges screw onto the battery via the 510 thread․ The atomizer, within the cartridge, heats the oil to create vapor․

A power button initiates the heating process, while battery indicator lights display the remaining charge․ Some pens feature draw-activated firing, eliminating the need for a button․ The mouthpiece is where the user inhales the vapor․

Higher-end models may include temperature control settings and digital displays․ Understanding each component’s function is crucial for safe and effective use․ Quality components contribute to a smoother, more flavorful, and reliable vaping experience․ Regular inspection of these parts ensures optimal performance․

Float Vape Pen vs․ Other Vape Pens

Float vape pens distinguish themselves through a focus on simplicity and user-friendliness, often employing a push-button activation or draw-activated mechanism․ Compared to more complex, modular vape devices, Float pens prioritize ease of use, making them ideal for beginners․

Unlike box mods with extensive customization options, Float pens generally offer limited variable voltage settings, striking a balance between control and convenience․ They often utilize standard 510 cartridges, providing compatibility with a wide range of oils․

Compared to disposable vape pens, Float pens are rechargeable, offering a more sustainable and cost-effective solution․ They also tend to be more discreet in size and design than larger vaping setups․

While some vape pens prioritize cloud production, Float pens emphasize flavor and a smooth vaping experience․ They represent a middle ground, offering more features than disposables but less complexity than advanced vaporizers․ Choosing the right pen depends on individual preferences and vaping style․

Getting Started with Your Float Vape Pen

Initial setup is crucial for a positive experience․ Carefully unpack your Float pen, inspect for damage, and ensure all components are present․ Charging and understanding controls follow!

Unboxing and Initial Inspection

Upon receiving your Float Vape Pen, take a moment to carefully unbox the contents․ A standard package typically includes the vape pen battery itself, and potentially a pre-filled cartridge or instructions for filling one․ Inspect all components immediately for any visible signs of damage that may have occurred during shipping․

Check the battery for dents, scratches, or leaks․ Ensure the charging port is clean and free of debris․ If a cartridge is included, verify it’s securely sealed and doesn’t exhibit any cracks or leaks․ Review the included documentation – even if you’re an experienced vaper, it’s good to familiarize yourself with the specific features and warnings related to your Float pen model․

Pay close attention to any safety information provided․ Counterfeit products are a concern, so verify the authenticity of your pen by checking for proper branding and packaging․ A genuine Float pen will have clear markings and a quality finish․ If anything appears amiss, contact the retailer or manufacturer immediately before attempting to use the device․ A thorough initial inspection can prevent potential issues and ensure a safe and enjoyable vaping experience․

Charging Your Float Vape Pen

Charging your Float Vape Pen is crucial for optimal performance․ Most Float pens utilize a standard 510 charging port, compatible with a micro-USB cable – often included in the package․ Before the first use, fully charge the battery; this typically takes between 1 to 3 hours, depending on the battery capacity and charger used․

Connect the USB cable to the charging port on the pen and plug the other end into a reliable USB power source․ Avoid using fast chargers or computer USB ports, as these can sometimes deliver inconsistent power and potentially damage the battery․ While charging, observe the battery indicator lights (discussed in the next section) to monitor the charging progress․

Do not overcharge the battery․ Once fully charged, disconnect the pen from the power source․ Overcharging can reduce battery lifespan and pose a safety risk․ Always use the provided or a compatible charging cable to avoid damaging the device․ A fully charged Float pen will provide ample vaping time, ensuring you can enjoy your experience without interruption․

Understanding the Power Button

The power button on your Float Vape Pen is the primary control for activating the device․ Typically, it’s a small, circular button located on the pen’s body․ Operation usually involves pressing the button five times in quick succession to turn the pen on or off – this is a common safety feature to prevent accidental activation․

Once activated, a single press and hold of the power button heats the atomizer, allowing you to inhale the vapor․ The duration of the press often doesn’t affect the vapor production, unlike some variable voltage pens․ Release the button when you’ve taken a satisfactory draw․ Some models may feature a timed session, automatically shutting off after a set period․

Pay attention to the button’s responsiveness․ A sticky or unresponsive button could indicate a potential issue․ Avoid excessive force when pressing the button, as this could damage the internal components․ Familiarizing yourself with the power button’s function is key to a smooth and enjoyable vaping experience with your Float pen․


Battery Indicator Lights Explained

Float Vape Pens utilize LED indicator lights to communicate battery status․ These lights, usually located near the power button, provide a quick visual assessment of remaining power․ A solid green light generally indicates a full charge, ensuring optimal vaping performance․

As the battery discharges, the light typically changes to yellow or orange, signaling a medium charge level․ This is a good reminder to recharge soon to avoid interruption․ A flashing red light signifies a low battery, indicating that the pen needs immediate charging․ Continuing to use the pen at this level may result in reduced vapor production or complete shutdown․

Some models may also display a specific color or flashing pattern during the charging process, indicating charging status․ Refer to your device’s specific manual for details․ Pay attention to these indicators; they are crucial for maintaining consistent performance and extending the lifespan of your Float vape pen’s battery․

Using Your Float Vape Pen

Proper use involves attaching a cartridge, gentle lip pursing around the mouthpiece, slow inhalation while pressing the power button, and adjusting voltage for a personalized experience․

Attaching a Cartridge

Securely attaching a cartridge to your Float vape pen is a crucial first step for a satisfying vaping session․ Most Float pens utilize a 510 threading connection, a universal standard for vape cartridges․ Begin by carefully inspecting the cartridge and the pen’s connection point for any visible damage or debris․ Ensure both are clean before proceeding․

Gently align the cartridge’s 510 thread with the corresponding threads on the pen’s battery section․ Begin screwing the cartridge clockwise onto the battery․ Avoid excessive force; a snug fit is sufficient․ Over-tightening can potentially damage the threads on either the cartridge or the pen․

Once the cartridge is securely attached, give it a gentle tug to confirm it’s firmly in place․ If it feels loose, tighten it slightly, but again, avoid overdoing it․ A properly attached cartridge will not wobble or easily detach․ Always double-check the connection before powering on the device to prevent leaks or malfunctions․ Remember to consult the specific instructions included with your Float pen and cartridge, as slight variations may exist․

Filling a Cartridge (If Applicable)

Begin by locating the filling port on the cartridge, typically a small hole on the side or top․ Using a suitable applicator – a glass dropper or a specialized filling syringe – slowly introduce the e-liquid into the cartridge․ Avoid overfilling, leaving a small air gap at the top to prevent leakage․ Overfilling can disrupt airflow and cause gurgling during vaping․

After filling, securely seal the filling port with the provided stopper or cap․ Gently shake the cartridge to ensure the e-liquid is evenly distributed․ Allow the cartridge to sit for a few minutes to allow the e-liquid to saturate the wick․ This process, known as “priming,” ensures a smooth and flavorful vaping experience․ Always wipe away any spilled e-liquid to maintain cleanliness and prevent damage to your device․

Proper Inhalation Technique

Mastering the proper inhalation technique is crucial for a satisfying Float vape pen experience․ Unlike traditional cigarettes, vaping doesn’t require deep lung inhales․ Instead, focus on a Mouth-to-Lung (MTL) technique, similar to how you’d sip a beverage․

Gently purse your lips around the mouthpiece, creating a seal․ Begin inhaling slowly and steadily, drawing the vapor into your mouth․ Simultaneously, press and hold the power button to activate the heating element․ Start with short puffs, gradually increasing the duration as you become comfortable․ Avoid taking excessively large hits, as this can lead to coughing or discomfort․

Once the vapor is in your mouth, you can either hold it briefly for enhanced flavor or inhale it directly into your lungs․ Experiment to find what suits your preference․ Remember to exhale slowly and completely․ If you experience any harshness or irritation, reduce the voltage/temperature setting or try a different e-liquid․

Adjusting Voltage/Temperature Settings

Many Float vape pens, particularly those utilizing 510 batteries, offer adjustable voltage or temperature settings․ This customization allows you to fine-tune your vaping experience, influencing vapor production, flavor intensity, and overall throat hit․

Typically, adjustments are made by pressing the power button multiple times in quick succession – often five clicks․ This will cycle through the available settings, usually indicated by LED color changes․ Lower voltage/temperature settings are ideal for beginners or those preferring subtle flavors and cooler vapor․ Higher settings produce more vapor and a stronger throat hit, but can also lead to a burnt taste if set too high․

It’s best to start with the lowest setting and gradually increase it until you find your sweet spot․ Pay attention to the flavor and vapor quality; if you detect a burnt taste, immediately lower the setting․ Remember that different e-liquids may perform optimally at different voltages/temperatures․

Maintenance and Care

Float vape pen longevity relies on regular cleaning, safe battery handling, and timely cartridge replacements․ Proper care prevents malfunctions and ensures consistent, enjoyable vaping sessions․

Cleaning Your Float Vape Pen

Maintaining a clean Float vape pen is crucial for optimal performance and flavor quality․ Regularly cleaning prevents buildup of residue that can affect vapor production and taste․ Before cleaning, always ensure the device is turned off and the cartridge is detached․

For the battery section, use a cotton swab lightly dampened with isopropyl alcohol (90% or higher is recommended)․ Gently wipe down the threading where the cartridge connects, as well as the exterior of the battery․ Avoid getting any liquid inside the battery’s central port․ Allow the alcohol to evaporate completely before reattaching a cartridge․

Cartridge connections can also accumulate oil residue․ Carefully wipe the cartridge’s threading with a clean cotton swab and isopropyl alcohol․ Ensure no alcohol drips into the cartridge itself․

Avoid using excessive liquid during cleaning, as this can damage the internal components․ Never submerge the vape pen in any liquid․ A dry cotton swab can be used to remove any remaining residue after the alcohol has dried․ Regular, gentle cleaning will significantly extend the life of your Float vape pen and provide a consistently enjoyable vaping experience․

Battery Safety Guidelines

Prioritizing battery safety is paramount when using a Float vape pen․ Lithium-ion batteries require careful handling to prevent potential hazards․ Never leave your vape pen unattended while charging, and always use a compatible charger․ Overcharging can damage the battery and create a fire risk․

Avoid exposing the battery to extreme temperatures – both heat and cold․ Do not leave it in direct sunlight or a hot car․ Similarly, avoid storing it in freezing conditions․ Extreme temperatures can degrade battery performance and safety․

Inspect the battery regularly for any signs of damage, such as dents, cracks, or leaks․ If you notice any damage, discontinue use immediately and dispose of the battery properly․ Do not attempt to repair a damaged battery․

Proper disposal is crucial․ Do not throw batteries in the trash․ Instead, take them to a designated battery recycling facility․ Float, like many vape manufacturers, advises against use by individuals under 21 due to nicotine content and potential health risks․ Always adhere to local regulations regarding vape pen usage and battery disposal․

Cartridge Replacement

Replacing a cartridge on your Float vape pen is a straightforward process, ensuring continued enjoyment․ First, ensure the device is powered off․ Gently detach the empty cartridge by unscrewing it from the battery section – typically a standard 510 connection․ Avoid excessive force to prevent damage to the threading․

Carefully remove the new cartridge from its packaging․ Inspect the cartridge for any visible damage before attachment․ Align the 510 connector on the new cartridge with the battery’s connector and screw it on securely, but not overly tight․ A snug fit is sufficient․

Prime the new cartridge, especially if it’s your first time using that particular oil or flavor․ Take a few small draws without pressing the power button to saturate the wick․ This prevents a dry hit and ensures optimal flavor․

Always dispose of empty cartridges responsibly, following local regulations․ Some areas have specific guidelines for cannabis-related waste․ Using a variable power battery, like those from Float, allows for customized vaping experiences with new cartridges․

Troubleshooting Common Issues

Encountering issues with your Float vape pen? Several common problems have simple solutions․ If the device won’t power on, first ensure it’s adequately charged․ Try a different USB cable and power source․ If charging doesn’t resolve the issue, the battery may be faulty․

For weak vapor production, check the cartridge connection․ Ensure it’s securely attached․ A clogged cartridge can also cause this; try priming it with a few gentle draws․ Adjusting the voltage/temperature settings (if your battery allows) can also improve vapor․

If you experience a burning taste, immediately stop using the device․ This usually indicates a dry wick or low oil level in the cartridge․ Replace the cartridge and prime it properly․

Battery issues, like inconsistent power, often signal a failing battery․ Consider replacing it․ Remember, using a 510 variable power battery from Float offers more control and potential troubleshooting options․ Always prioritize safety and discontinue use if problems persist․

Safety Precautions

Prioritize safety by understanding nicotine warnings, age restrictions, and legal considerations․ Store your Float vape pen securely, away from children and pets, and avoid counterfeit products․

Nicotine Usage Warnings

Nicotine is a highly addictive substance, and Float vape pens, particularly those containing nicotine, are not suitable for non-smokers․ If you do not currently smoke or vape, it is strongly advised that you do not begin using a Float vape pen or any other vaping product․ The use of nicotine-containing products can lead to dependence and potential health risks․

For current smokers, vaping with a Float pen should be considered as a potential alternative, but it is not risk-free․ It’s crucial to understand that nicotine exposure can have adverse effects on cardiovascular health, and developmental impacts for adolescents and young adults whose brains are still developing․

Disposable vape devices, like the Float, specifically carry warnings regarding nicotine content; Always check the packaging for nicotine strength and be mindful of your intake․ Symptoms of nicotine overdose can include nausea, vomiting, dizziness, and increased heart rate․ If you experience any of these symptoms, seek medical attention immediately․

Furthermore, keep Float vape pens out of reach of children and pets, as accidental ingestion of nicotine liquid can be extremely dangerous․ Responsible usage and awareness of the potential risks are paramount when using any nicotine-containing product․

Age Restrictions and Legal Considerations

The sale and use of Float vape pens, and vaping products in general, are subject to strict age restrictions and legal regulations․ In most jurisdictions, the minimum legal age to purchase and use vaping products is 21 years old․ It is illegal for individuals under this age to buy, possess, or consume these products․

Compliance with local laws is essential․ Regulations regarding vaping vary significantly by state, country, and even city․ These laws may cover aspects such as permissible nicotine concentrations, flavor restrictions, and where vaping is allowed in public spaces․ It is your responsibility to be aware of and adhere to the laws in your specific location․

Purchasing counterfeit or illegally obtained Float vape pens carries significant risks․ These products may contain harmful substances or fail to meet safety standards․ Always purchase from authorized retailers to ensure product authenticity and quality․

Furthermore, be aware of potential restrictions on online sales and shipping of vaping products․ Some jurisdictions prohibit the direct-to-consumer shipment of e-cigarettes․ Violating these laws can result in fines, penalties, or legal consequences․

Proper Storage of Your Vape Pen

Ensuring the longevity and safety of your Float vape pen requires proper storage practices․ When not in use, store your vape pen in a cool, dry place, away from direct sunlight and extreme temperatures․ Heat and humidity can degrade the battery and e-liquid, affecting performance and potentially creating safety hazards․

Keep the device out of reach of children and pets․ Accidental ingestion of e-liquid or tampering with the device can be dangerous․ A locked cabinet or drawer is a suitable storage location․ Avoid leaving your vape pen unattended in public places, as it could be lost or stolen․

If you plan to store your Float vape pen for an extended period, it’s best to remove the cartridge․ This prevents potential leaks or degradation of the e-liquid․ Ensure the battery is not fully charged or completely depleted before long-term storage; aim for around 50% charge․

Regularly inspect your vape pen for any signs of damage, such as cracks or leaks․ If you notice any issues, discontinue use and dispose of the device responsibly․

Avoiding Counterfeit Products

The market is unfortunately flooded with counterfeit vape products, posing significant health and safety risks․ When purchasing a Float vape pen, always buy from authorized retailers or the official Float website to guarantee authenticity․ Be wary of suspiciously low prices, as these are often a red flag for fakes․

Inspect the packaging carefully․ Authentic Float products have high-quality packaging with clear branding, accurate spelling, and proper labeling․ Counterfeit products often exhibit poor print quality, misspellings, or damaged packaging․ Examine the device itself for any inconsistencies in design or build quality compared to images on the official website․

Check for security features, if any are present on genuine Float products․ These might include unique serial numbers or holographic markings․ Avoid purchasing from online marketplaces with unreliable sellers or those lacking customer reviews․

Using a counterfeit vape pen can expose you to harmful chemicals and substandard battery components, potentially leading to health issues or even explosions․ Prioritize your safety by verifying the authenticity of your Float vape pen before use․

Instructions

instructional planning center

Instructional Planning Centers: A Comprehensive Overview

Instructional planning centers are vital hubs, supporting educators with resources and strategies for effective teaching and learning. They facilitate curriculum alignment and enhance instructional design.

What is an Instructional Planning Center?

An Instructional Planning Center (IPC) serves as a dedicated space and resource hub within a school or district, designed to support teachers in the crucial process of curriculum development and lesson planning. It’s more than just a room filled with materials; it’s a collaborative environment fostering pedagogical expertise. The core purpose of an IPC is to empower educators to create engaging, effective, and standards-aligned instructional experiences for all students.


Typically, an IPC provides access to a wide array of resources, including curriculum guides, sample lesson plans, assessment tools, and professional development materials. It functions as a central point for sharing best practices and promoting innovative teaching strategies. Furthermore, an IPC often houses technology integration tools and digital resources, assisting teachers in seamlessly incorporating technology into their lessons. Ultimately, the IPC aims to streamline the instructional process and improve student outcomes through thoughtful and deliberate planning.

The Core Functions of an IPC

The primary functions of an Instructional Planning Center (IPC) revolve around supporting teachers in designing and delivering high-quality instruction. A central role is curriculum mapping and alignment, ensuring lessons adhere to established standards and learning objectives. IPCs facilitate the creation and curation of instructional materials, offering resources like lesson plans, assessments, and supplementary activities.

Another key function is providing professional development opportunities, equipping teachers with the latest pedagogical strategies and technological tools. Data analysis is also crucial; IPCs help teachers interpret student performance data to inform instructional decisions and refine their approaches. Furthermore, they foster collaboration among educators, creating a space for sharing best practices and problem-solving. By centralizing these functions, the IPC streamlines the instructional process, ultimately enhancing teacher effectiveness and student achievement.

Historical Development of Instructional Planning

The evolution of instructional planning mirrors shifts in educational philosophy. Early efforts focused on teacher-created materials, often lacking standardization. The rise of progressive education in the early 20th century emphasized student-centered learning, prompting more deliberate lesson design. Post-Sputnik, a focus on standardized curricula and objectives led to more formalized instructional planning processes.

The emergence of Instructional Planning Centers as dedicated spaces gained momentum in the latter half of the 20th century, driven by the need to support teachers with increasingly complex curricula. The integration of technology in the late 20th and early 21st centuries further transformed instructional planning, with digital resources becoming central. Today, IPCs continue to evolve, adapting to new research, technologies, and the demands of a rapidly changing educational landscape, prioritizing data-driven instruction and personalized learning.

Key Components of Effective Instructional Planning

Effective instructional planning centers around clear objectives, rigorous curriculum alignment, and diverse assessment strategies, fostering student success and impactful teaching.

Curriculum Alignment and Standards

A central function of an instructional planning center (IPC) is ensuring robust curriculum alignment with established learning standards. This involves a meticulous process of mapping curriculum content to specific standards, identifying gaps, and developing resources to bridge those gaps effectively. The IPC serves as a repository of standards documents, providing teachers with easy access to the frameworks guiding their instruction.

Furthermore, the IPC facilitates workshops and professional development sessions focused on understanding and implementing standards-based curriculum. This ensures that teachers not only know what standards to address but also how to integrate them seamlessly into their lesson plans. Alignment isn’t merely about ticking boxes; it’s about creating a cohesive learning experience where each element of instruction contributes to students’ mastery of essential skills and knowledge. The IPC champions a vertically aligned curriculum, ensuring continuity across grade levels and a progressive build-up of understanding.

Learning Objectives: Bloom’s Taxonomy & Beyond

The instructional planning center (IPC) plays a crucial role in guiding teachers toward crafting effective learning objectives. While Bloom’s Taxonomy remains a foundational framework – encompassing remembering, understanding, applying, analyzing, evaluating, and creating – the IPC extends this by introducing contemporary approaches to objective writing. Workshops focus on developing SMART objectives: Specific, Measurable, Achievable, Relevant, and Time-bound.

The IPC provides resources and templates to assist teachers in moving beyond simply stating what students will do to articulating how their understanding will be demonstrated. This includes exploring alternative taxonomies and frameworks that cater to diverse learning styles and subject areas. Emphasis is placed on aligning objectives with both curriculum standards and assessment strategies, ensuring a cohesive instructional design. The IPC champions objectives that promote higher-order thinking skills and foster a deeper, more meaningful learning experience for all students.

Assessment Strategies: Formative & Summative

A core function of the instructional planning center (IPC) is supporting teachers in implementing robust assessment practices. The IPC emphasizes a balanced approach, advocating for both formative and summative assessments to gauge student learning effectively. Formative assessments – like quick checks for understanding, exit tickets, and peer reviews – are presented as ongoing tools to inform instruction and provide timely feedback.

The IPC offers professional development on designing high-quality formative assessments that are aligned with learning objectives. Simultaneously, the center assists in developing summative assessments – such as unit tests, projects, and presentations – that accurately measure student mastery of content. Resources include rubrics, assessment templates, and guidance on data analysis to interpret assessment results and adjust instructional strategies accordingly. The IPC promotes assessment for learning, rather than simply assessment of learning, fostering a continuous improvement cycle.

Resources Typically Found in an IPC

Instructional planning centers house diverse materials: digital software, online platforms, print textbooks, workbooks, and hands-on manipulatives, supporting varied instructional approaches.

Digital Resources: Software & Online Platforms

Instructional Planning Centers (IPCs) increasingly rely on robust digital resources to empower educators. These encompass a wide spectrum of software and online platforms designed to enhance lesson planning, curriculum delivery, and student engagement. Interactive whiteboard software facilitates dynamic presentations and collaborative activities, while learning management systems (LMS) like Canvas or Moodle streamline assignment distribution and grading.

Online databases provide access to a wealth of scholarly articles, multimedia content, and primary source materials. Digital curriculum platforms offer pre-designed lesson plans, assessments, and differentiated instructional materials aligned with specific standards. Furthermore, specialized software assists with data analysis, allowing teachers to track student progress and tailor instruction accordingly. Access to these tools requires ongoing professional development to ensure effective integration into pedagogical practices, maximizing their potential to improve student outcomes and teacher efficiency.

Print Materials: Textbooks, Workbooks, & Manipulatives

Despite the rise of digital resources, Instructional Planning Centers (IPCs) continue to house a comprehensive collection of traditional print materials. These include current textbook editions aligned with district and state standards, providing a foundational base for core instruction. Supplementary workbooks offer targeted practice and reinforcement of key concepts, catering to diverse learning needs.

Crucially, IPCs often maintain a stock of hands-on manipulatives – physical tools like base-ten blocks, fraction circles, and geometric solids – that facilitate concrete learning experiences, particularly in mathematics and science. These materials are invaluable for kinesthetic learners and for building conceptual understanding. A well-curated print collection, alongside digital resources, ensures teachers have a versatile toolkit to support varied instructional approaches and address the unique requirements of their students, fostering a richer and more engaging learning environment.

Technology Integration Tools

Modern Instructional Planning Centers (IPCs) are equipped with a range of technology integration tools to support teachers in leveraging digital resources effectively. This includes access to interactive whiteboards, document cameras, and various student response systems for real-time assessment and engagement. IPCs often curate lists of vetted educational software and online platforms aligned with curriculum standards, offering teachers options for differentiated instruction.

Furthermore, they may provide training and support on utilizing learning management systems (LMS) like Google Classroom or Canvas. Access to audio-visual equipment, such as projectors and speakers, is also common. The goal is to empower educators to seamlessly integrate technology into their lessons, enhancing student learning experiences and preparing them for a digitally-driven world. These tools, combined with professional development, ensure impactful technology use within the classroom.

The Role of the Instructional Planner

Instructional planners collaborate with teachers, providing expertise in curriculum development, assessment, and technology integration to foster improved instructional practices and student success.

Collaboration with Teachers

Effective instructional planners don’t operate in isolation; their core function revolves around robust collaboration with teachers. This partnership begins with understanding individual teacher needs, classroom contexts, and student demographics. Planners offer individualized support, co-planning lessons, and modeling innovative instructional strategies.

Regular meetings, professional learning communities, and shared planning time are crucial components of this collaborative process. Planners act as a sounding board for new ideas, providing feedback on lesson plans and offering suggestions for differentiation. They also facilitate the sharing of best practices among teachers, fostering a culture of continuous improvement.

Furthermore, collaboration extends to curriculum mapping and alignment with state standards. The instructional planner assists teachers in selecting appropriate resources and developing assessments that accurately measure student learning. This collaborative approach ensures that instructional practices are both effective and aligned with school-wide goals.

Professional Development & Training

A central role of the instructional planning center is providing high-quality professional development and training opportunities for teachers. These programs aren’t one-size-fits-all; they are tailored to address identified needs and promote evidence-based practices. Workshops might focus on new curriculum implementation, effective assessment strategies, or integrating technology into the classroom.

Training extends beyond initial workshops, offering ongoing support through coaching, mentoring, and peer observation. The IPC can facilitate access to external experts and conferences, keeping teachers abreast of the latest research and innovations in education. Emphasis is placed on practical application, ensuring teachers can immediately implement new skills in their classrooms.

Furthermore, the instructional planner often leads sessions on data analysis, helping teachers interpret student performance data to inform their instructional decisions. This continuous cycle of professional learning empowers teachers to refine their practice and improve student outcomes.

Data Analysis & Improvement Cycles

Instructional Planning Centers (IPCs) champion a data-driven approach to school improvement. They assist teachers in collecting, analyzing, and interpreting various data points – formative assessments, summative evaluations, student work samples, and even observational notes. This isn’t simply about assigning grades; it’s about identifying trends and patterns in student learning.

The IPC facilitates collaborative data analysis sessions, where teachers can share insights and collectively problem-solve. This collaborative environment fosters a deeper understanding of student needs and informs targeted interventions. The center provides tools and training to help teachers effectively utilize data to adjust their instructional strategies.

This analysis fuels continuous improvement cycles. Based on data findings, teachers, with support from the IPC, refine their lesson plans, modify teaching methods, and implement new resources. The cycle repeats, ensuring ongoing growth and responsiveness to student needs, ultimately maximizing learning outcomes.

Benefits of Utilizing an Instructional Planning Center

IPCs foster improved student achievement, boost teacher efficacy through collaborative support, and streamline curriculum implementation, creating a more focused learning environment for all.

Improved Student Outcomes

A well-functioning Instructional Planning Center (IPC) directly contributes to enhanced student performance. By providing teachers with access to meticulously aligned curricula and evidence-based instructional strategies, IPCs empower educators to deliver more impactful lessons. This focused approach ensures that learning objectives are clearly defined and consistently reinforced, leading to deeper student understanding.

Furthermore, the resources available within an IPC – including diverse learning materials and assessment tools – allow teachers to differentiate instruction effectively, catering to the unique needs of each learner. This personalized learning experience fosters greater engagement and motivation, ultimately resulting in improved academic outcomes. The collaborative environment fostered by the IPC also allows teachers to share best practices and refine their approaches, creating a continuous cycle of improvement that benefits all students. Data-driven insights, facilitated by the IPC, pinpoint areas where students struggle, enabling targeted interventions and support.

Enhanced Teacher Effectiveness

Instructional Planning Centers (IPCs) significantly bolster teacher effectiveness by serving as central resource hubs. They alleviate the burden of individual curriculum development, providing educators with pre-aligned materials and proven instructional strategies. This allows teachers to dedicate more time to individualized student support and classroom management, maximizing their impact.

The professional development opportunities offered through IPCs equip teachers with the latest pedagogical techniques and best practices, fostering continuous growth. Collaboration with colleagues within the IPC environment encourages the sharing of ideas and solutions, creating a supportive network. Access to data analysis tools enables teachers to assess student progress effectively and adjust their instruction accordingly. Ultimately, IPCs empower teachers to feel more confident, prepared, and effective in their roles, leading to a more positive and productive learning environment for all students. This focused support translates directly into improved teaching quality.

Streamlined Curriculum Implementation

Instructional Planning Centers (IPCs) play a crucial role in streamlining curriculum implementation across schools and districts. By centralizing curriculum resources and aligning them with established standards, IPCs ensure consistency and coherence in instruction. This eliminates redundancies and gaps in learning, fostering a more unified educational experience for students.

IPCs provide teachers with readily available lesson plans, assessments, and instructional materials, reducing the time and effort required for curriculum preparation. This allows for a smoother rollout of new initiatives and programs, minimizing disruption to the learning process. Furthermore, IPCs facilitate communication and collaboration among teachers, ensuring that everyone is on the same page regarding curriculum expectations and best practices. The result is a more efficient and effective curriculum implementation process, ultimately benefiting both teachers and students through a cohesive and well-supported learning journey.

Challenges and Solutions for IPCs

Instructional planning centers face hurdles like funding and technology integration. Solutions involve seeking grants, prioritizing resources, and providing ongoing professional development for staff.

Budget Constraints & Resource Allocation

Instructional Planning Centers (IPCs) frequently grapple with limited budgets, impacting their ability to provide comprehensive support. Securing adequate funding often requires demonstrating the IPC’s value through data-driven outcomes – showcasing improved student achievement and teacher effectiveness. Resource allocation becomes a critical balancing act; prioritizing essential digital subscriptions, professional development opportunities, and updated print materials is paramount.

Creative solutions include grant writing, forging partnerships with local businesses for in-kind donations, and exploring cost-effective open educational resources (OER). Strategic purchasing, such as site licenses for software, can reduce per-user costs. Furthermore, advocating for IPC funding during school board meetings and highlighting successful IPC-supported initiatives can build support. Careful needs assessments ensure resources directly address identified teacher and student needs, maximizing impact despite financial limitations. Efficient resource management is key to a thriving IPC.

Keeping Pace with Educational Technology

Instructional Planning Centers (IPCs) face the ongoing challenge of integrating rapidly evolving educational technology. Staying current requires continuous professional development for IPC staff, ensuring they possess expertise in new software, platforms, and digital learning tools. A proactive approach involves regularly evaluating emerging technologies for their potential to enhance instruction and student learning.

IPCs should curate a collection of vetted digital resources, offering teachers access to innovative tools aligned with curriculum standards. Providing training and support on effective technology integration is crucial, moving beyond simply introducing the tools to demonstrating pedagogical applications. Furthermore, IPCs can facilitate communities of practice where teachers share successful technology integration strategies. Budget allocation must prioritize technology upgrades and subscriptions, recognizing that technology is no longer supplemental but integral to modern education. Adaptability and a forward-thinking mindset are essential for IPC success.

Ensuring Equity and Access for All Students

Instructional Planning Centers (IPCs) play a critical role in promoting equitable access to high-quality learning experiences for all students. This necessitates careful consideration of diverse learning needs, including students with disabilities, English language learners, and those from varying socioeconomic backgrounds. IPCs must curate resources that are culturally responsive and differentiated to meet individual student requirements.

Accessibility is paramount; digital resources should adhere to accessibility standards, ensuring usability for students with disabilities. IPCs should proactively identify and address potential barriers to access, such as lack of technology at home, and advocate for resources to bridge these gaps. Professional development for teachers should emphasize inclusive instructional practices and strategies for supporting diverse learners. Furthermore, IPCs can collaborate with special education teams to provide tailored support and resources, fostering a truly inclusive learning environment for every student.

Instructions

nj cbt 100 instructions 2022

NJ CBT 100 Instructions 2022: A Comprehensive Guide

Navigating the NJ CBT 100 requires a meticulous approach‚ encompassing applicant ID creation‚ understanding technical data like 100x80x90 dimensions‚ and utilizing recommended study materials such as Perlis‚ Jungquist‚ & Smith’s work.

Understanding the NJ CBT 100 Test

The New Jersey Computer-Based Test (CBT 100) serves as a crucial assessment for individuals seeking specific roles‚ particularly within aviation maintenance and related fields‚ focusing on the Superjet 100 (SSJ-100) aircraft. This examination comprises 100 multiple-choice questions and requires the completion of four essay responses‚ demanding both breadth of knowledge and analytical writing skills.

Candidates should prepare for a rigorous evaluation of their understanding of core principles and practical applications. Successful completion often necessitates referencing recommended resources‚ including materials by Perlis‚ Jungquist‚ and Smith‚ which provide a foundational understanding of relevant concepts. The test isn’t merely a knowledge check; it assesses the ability to apply learned information effectively.

Furthermore‚ familiarity with technical specifications‚ such as dimensions (e.g.‚ 100x80x90)‚ may be relevant depending on the specific role. The CBT 100 is a key component of training programs for both military and civil crews‚ as well as maintenance engineers‚ highlighting its importance in ensuring competency and safety standards.

Purpose and Overview of the CBT 100

The primary purpose of the NJ CBT 100 is to evaluate a candidate’s foundational knowledge and aptitude for roles demanding a high level of technical understanding‚ particularly concerning aircraft maintenance – specifically‚ the SSJ-100. It functions as a standardized assessment tool‚ ensuring all applicants meet a minimum competency threshold before entering specialized training programs or assuming critical responsibilities.

This test is integral to both military and civil aviation crew certification‚ as well as the qualification of maintenance engineers. The CBT 100’s structure includes 100 multiple-choice questions and four essay components‚ designed to assess both recall and analytical skills. Preparation often involves utilizing recommended study materials‚ such as those authored by Perlis‚ Jungquist‚ and Smith‚ to build a strong theoretical base.

Beyond theoretical knowledge‚ the test may indirectly assess understanding of related technical data‚ like dimensions (e.g.‚ 100x80x90)‚ depending on the specific job function. Successful completion is a prerequisite for accessing advanced training modules‚ such as Module 1: Basic Course‚ and signifies readiness for practical application.

Eligibility Requirements for Taking the CBT 100

Determining eligibility for the NJ CBT 100 hinges on several key factors‚ primarily relating to an applicant’s intended role within the aviation sector. Individuals pursuing positions as military or civil aviation crews‚ or those seeking qualification as maintenance engineers‚ are generally required to undertake this assessment.

A crucial first step is the creation of a valid Applicant ID and associated login credentials‚ enabling access to the online testing platform. While specific prerequisites may vary depending on the employing organization‚ a foundational understanding of technical concepts is implicitly expected. Candidates should ensure they meet any stated educational or experience criteria outlined by their prospective employer.

Furthermore‚ adherence to testing protocols‚ including providing accurate location information (as required by systems like ADAMS for athletes in testing pools)‚ is essential. The ability to access and utilize recommended study materials‚ potentially requiring printed and bound copies‚ also contributes to preparedness. Meeting these requirements ensures a fair and standardized assessment process for all applicants.

Test Structure and Content

The NJ CBT 100 comprises 100 multiple-choice questions and requires four essay responses. Candidates should prepare for a comprehensive assessment of their knowledge and analytical skills.

Number of Questions and Time Limit

The NJ CBT 100 examination is a rigorously structured assessment designed to evaluate a candidate’s competency. Specifically‚ the test consists of a total of 100 multiple-choice questions‚ each carefully crafted to assess understanding of key concepts and principles. Beyond the multiple-choice section‚ applicants are also required to compose four distinct essay responses‚ demanding not only knowledge recall but also the ability to articulate thoughts clearly and concisely.

While the precise time allocation isn’t explicitly stated in the available information‚ successful completion necessitates efficient time management. Candidates should allocate sufficient time to each question‚ ensuring thorough consideration before selecting an answer. The essay component requires strategic planning and focused writing to address the prompts effectively within the allotted timeframe. Preparation should include practice tests to simulate exam conditions and refine pacing strategies.

It’s crucial to note that the recommended study materials‚ including resources by Perlis‚ Jungquist‚ and Smith‚ should be thoroughly reviewed to build a strong foundation for both sections of the CBT 100. Familiarity with the subject matter will significantly enhance performance and confidence during the examination.

Multiple-Choice Questions Format

The multiple-choice section of the NJ CBT 100 comprises 100 questions‚ forming a substantial portion of the overall assessment. These questions are designed to test a broad range of knowledge and understanding related to the subject matter. Each question typically presents a stem‚ followed by four answer options‚ only one of which is demonstrably correct. Candidates must carefully analyze each option‚ applying critical thinking skills to identify the most accurate response.

The format emphasizes precision and attention to detail. Distractors – incorrect but plausible answer choices – are frequently employed to challenge candidates and differentiate between varying levels of comprehension. Successful test-takers will not only possess a strong grasp of the core concepts but also the ability to discern subtle nuances and identify logical fallacies within the provided options.

Preparation should involve extensive practice with similar question types. Utilizing recommended study materials‚ such as those authored by Perlis‚ Jungquist‚ and Smith‚ will familiarize candidates with the style and complexity of the questions. Mastering effective test-taking strategies‚ including process of elimination and time management‚ is also crucial for maximizing performance on this section of the CBT 100.

Essay Component: Guidelines and Expectations

The NJ CBT 100 incorporates an essay component consisting of four distinct essays‚ designed to assess a candidate’s ability to articulate complex ideas‚ demonstrate critical thinking‚ and apply learned principles in a comprehensive manner. These essays are not merely tests of knowledge recall‚ but rather evaluations of analytical and written communication skills.

Candidates are expected to present well-structured‚ coherent arguments supported by relevant evidence and logical reasoning. Clarity‚ conciseness‚ and grammatical accuracy are paramount. Essays should directly address the prompt‚ avoiding tangential discussions or irrelevant information. A strong thesis statement‚ followed by supporting paragraphs‚ is highly recommended.

While external resources are not explicitly prohibited‚ candidates should rely primarily on their understanding of the core material. It’s advisable to prepare by practicing essay writing under timed conditions‚ mirroring the test environment. Remember that the essays contribute significantly to the overall score‚ and a well-crafted response can substantially enhance a candidate’s chances of success. Candidates may find benefit from reviewing materials from Perlis‚ Jungquist‚ & Smith to refine their analytical writing.

Preparation Resources

Effective preparation involves utilizing recommended study materials‚ including works by Perlis‚ Jungquist‚ & Smith‚ alongside online practice tests and a focused application of CBT principles for optimal results.

Recommended Study Materials (Including Perlis‚ Jungquist‚ & Smith)

Comprehensive preparation for the NJ CBT 100 hinges on utilizing targeted study resources. Candidates are advised to consult materials designed to bolster their understanding of the core concepts assessed during the examination. Specifically‚ the work of Perlis‚ Jungquist‚ & Smith – “Cognitive Behavioral Therapy for Insomnia: A Step-by-Step Guide” (translated from English‚ published in St. Petersburg) – is highly recommended. This resource‚ spanning 273 pages and 3MB in size‚ provides a foundational understanding of CBT principles crucial for success.

Furthermore‚ candidates should ensure their study materials are properly prepared – printed and bound – for efficient review. While the CBT 100 consists of 100 multiple-choice questions and requires four essays‚ a solid grasp of underlying CBT methodologies‚ as detailed in the recommended texts‚ is paramount. Remember that effective study isn’t merely about memorization; it’s about internalizing the principles and applying them to various scenarios. Supplementing these core texts with additional CBT resources will further enhance your preparedness and confidence when tackling the NJ CBT 100.

Utilizing CBT Principles in Test Preparation

Applying Cognitive Behavioral Therapy (CBT) principles isn’t just relevant to the exam’s content; it’s a powerful strategy for preparing for the NJ CBT 100 itself. Address test anxiety proactively by identifying and challenging negative thought patterns. Replace self-doubt with realistic affirmations‚ focusing on your preparation and capabilities. Employ behavioral techniques like creating a structured study schedule and breaking down the material into manageable chunks.

Practice active recall – testing yourself frequently rather than passively rereading – to strengthen memory and understanding. Simulate test conditions during practice sessions to build familiarity and reduce stress on exam day. Recognize and manage potential cognitive distortions‚ such as catastrophizing or all-or-nothing thinking. Remember‚ the NJ CBT 100 assesses your understanding of CBT; demonstrating self-application of these principles will not only improve your score but also reinforce your grasp of the subject matter. Consistent‚ mindful preparation‚ grounded in CBT techniques‚ is key to success.

Online Resources and Practice Tests

Supplementing your core study materials with online resources is crucial for NJ CBT 100 preparation. While specific official practice tests may be limited‚ explore reputable platforms offering CBT-focused quizzes and assessments. These can help you gauge your understanding of key concepts and identify areas needing further attention. Focus on resources that mirror the exam’s multiple-choice format‚ consisting of 100 questions‚ to build familiarity and pacing skills.

Be cautious of unofficial sources and prioritize materials aligned with the exam’s content outline. Utilize online forums and study groups to connect with other candidates‚ share insights‚ and discuss challenging topics. Remember to verify the accuracy of information found online. Consider resources that offer detailed explanations for correct and incorrect answers‚ fostering a deeper understanding of the underlying principles. Effective online study‚ combined with recommended texts like those by Perlis‚ Jungquist‚ & Smith‚ will significantly enhance your preparedness for the NJ CBT 100.

Technical Aspects & Logistics

Successfully completing the NJ CBT 100 demands attention to technical details‚ including applicant ID creation and ensuring your system meets specified requirements for online testing and login credentials.

Creating an Applicant ID and Login Credentials

The initial step towards taking the NJ CBT 100 involves establishing a secure online profile. This process begins with creating a unique Applicant ID‚ which serves as your primary identifier throughout the testing procedure. The document referenced details instructions for this crucial step‚ emphasizing the importance of retaining this ID for future access and correspondence.

Following Applicant ID creation‚ you will need to establish login credentials – a username and password – to access the online testing platform. Ensure you choose a strong‚ memorable password that adheres to the platform’s security requirements. It’s highly recommended to record these credentials in a secure location‚ separate from the platform itself‚ to prevent lockout situations.

The online system requires careful navigation. The provided information suggests the process involves accessing a specific company login portal. Be prepared to provide necessary personal information during registration‚ ensuring accuracy to avoid delays or complications. Remember to carefully review and acknowledge the terms and conditions before finalizing your account setup. Maintaining a record of your login attempts and any error messages encountered can be beneficial for troubleshooting purposes.

Technical Data Specifications (e.g.‚ dimensions: 100x80x90)

While seemingly unrelated to the cognitive assessment itself‚ specific technical data points are referenced in connection with the NJ CBT 100 process. Notably‚ dimensions of 100x80x90 are provided‚ though their direct application within the test isn’t immediately clear. It’s plausible these relate to packaging or physical materials associated with supplemental study resources‚ potentially the recommended printed and bound materials from Perlis‚ Jungquist‚ & Smith.

Further technical specifications are presented in a table format‚ detailing parameters like output steps‚ kW‚ airflow (m/h)‚ sound level (dB(A))‚ and motor wattage (W). These values‚ alongside identifiers like CBT‚ 155x87x43‚ KRT1900‚ KRTV19‚ and EV300‚ strongly suggest a connection to the testing equipment or the environment where the test is administered – perhaps relating to ventilation or power requirements.

Understanding these specifications may be crucial for test center administrators‚ but candidates should be aware of their existence as they might influence the testing environment. It’s advisable to inquire about the testing facility’s technical setup if you have specific concerns regarding noise levels or environmental conditions.

System Requirements for Online Testing

Successfully completing the NJ CBT 100 online necessitates adherence to specific system requirements‚ though detailed specifications aren’t explicitly outlined in the provided information. However‚ the documentation emphasizes the importance of creating an applicant ID and login credentials to access the CES test online‚ indicating a web-based delivery method.

Therefore‚ a stable internet connection is paramount. Candidates should ensure their computer meets basic operating system requirements for modern web browsers (Chrome‚ Firefox‚ Safari‚ or Edge are likely compatible). While not stated‚ disabling browser extensions and pop-up blockers is generally recommended to avoid interference during the test.

Furthermore‚ the reference to technical data suggests potential compatibility concerns with specific hardware configurations. Although dimensions like 100x80x90 aren’t directly applicable to software‚ they hint at a standardized testing environment. It’s prudent to verify compatibility with the testing platform before the exam date‚ potentially through a practice test or system check provided by the testing administrator. Ensure your system can handle basic document viewing (PDFs) for any supplementary materials.

Related Training Programs

Comprehensive CBT classes are available for both military and civil crews‚ alongside specialized training for maintenance engineers‚ including a foundational Module 1 basic course for enhanced preparation.

CBT Classes for Military and Civil Crews

Dedicated CBT training programs are meticulously designed to prepare both military personnel and civil aviation crews for the demands of the NJ CBT 100 examination. These courses delve into the core principles assessed by the test‚ focusing on practical application and strategic test-taking techniques. The curriculum emphasizes a thorough understanding of the material‚ mirroring the content found in recommended resources like those authored by Perlis‚ Jungquist‚ and Smith.

The training extends beyond simple memorization‚ fostering critical thinking skills essential for tackling the multiple-choice questions and composing effective essay responses. Participants benefit from simulated testing environments‚ allowing them to acclimate to the time constraints and format of the actual CBT 100. Furthermore‚ instructors provide personalized feedback and guidance‚ addressing individual strengths and weaknesses. The courses often incorporate real-world scenarios relevant to both military and civilian aviation contexts‚ enhancing comprehension and retention.

Preparation also includes familiarization with the technical aspects of the exam‚ such as the applicant ID creation process and system requirements for online testing. These classes aim to ensure candidates are fully equipped‚ not only with the knowledge but also with the logistical understanding needed to succeed on test day.


CBT Training for Maintenance Engineers

Specialized CBT training programs cater specifically to the unique needs of maintenance engineers preparing for the NJ CBT 100. These courses recognize the distinct technical expertise required of this profession and tailor the curriculum accordingly. Emphasis is placed on understanding the practical implications of the concepts tested‚ bridging the gap between theoretical knowledge and real-world application within aircraft maintenance.

The training incorporates detailed analysis of technical data specifications‚ such as dimensions (e.g.‚ 100x80x90) and system requirements‚ ensuring engineers are comfortable navigating the technical aspects of the exam. Modules often include case studies and problem-solving exercises relevant to maintenance procedures and troubleshooting. Instructors‚ often experienced maintenance professionals themselves‚ provide valuable insights and guidance.

Preparation extends to mastering the essay component‚ focusing on clear‚ concise‚ and technically accurate writing. Candidates learn to effectively articulate complex technical information and demonstrate their understanding of relevant regulations and safety protocols. Recommended study materials‚ including resources by Perlis‚ Jungquist‚ and Smith‚ are integrated into the curriculum to provide a comprehensive foundation. The goal is to equip engineers with the confidence and competence to excel on the CBT 100.

Specific Training Modules (Module 1: Basic Course)

Module 1‚ the foundational “Basic Course‚” is a critical starting point for NJ CBT 100 preparation. This introductory module establishes a core understanding of the test’s structure‚ content‚ and scoring. It emphasizes familiarization with the multiple-choice question format and introduces strategies for effective time management during the exam. Candidates learn to identify key information within questions and eliminate incorrect answer choices.

A significant portion of Module 1 is dedicated to building a strong foundation in the core concepts assessed on the CBT 100. This includes a review of relevant regulations‚ safety procedures‚ and technical terminology. The module also provides guidance on creating applicant IDs and navigating the online testing platform‚ addressing potential technical challenges.

Preparation for the essay component begins with an overview of the guidelines and expectations. Candidates practice outlining and structuring essays‚ focusing on clarity‚ conciseness‚ and logical reasoning. Recommended resources‚ such as those by Perlis‚ Jungquist‚ and Smith‚ are introduced to support deeper understanding. The module culminates in a practice exam designed to assess comprehension and identify areas for improvement‚ ensuring a solid base for subsequent modules.

Instructions

sew eurodrive operating instructions

SEW-Eurodrive manuals detail innovative drive solutions, encompassing products and systems for diverse industrial applications, ensuring optimal performance and longevity.

These comprehensive guides, available as PDFs, cover everything from absolute encoders (ES1H, AS1H series) to fieldbus gateways like the UFF41B.

With a global presence—18 production and 92 assembly plants—SEW-Eurodrive prioritizes customer support, fast delivery, and on-site assistance worldwide.

Overview of SEW-Eurodrive Products

SEW-Eurodrive boasts an extensive portfolio of drive and automation technology, catering to a vast spectrum of industrial needs. Their core offerings encompass geared motors, industrial gearboxes, drive controllers, and decentralized drive technology. A significant portion of their product line focuses on modular systems, allowing for customized solutions tailored to specific applications.

Furthermore, SEW-Eurodrive excels in providing sophisticated control systems, including frequency inverters and servo drives, alongside a comprehensive range of encoder solutions – notably the ES1H, AS1H, AK0H, EK0H, AK1H, and EK1H series of absolute encoders. They also offer crucial connectivity solutions like the UFF41B fieldbus gateway, facilitating seamless integration with various communication protocols.

With 18 production and 92 assembly plants globally, SEW-Eurodrive ensures product availability and responsive support across continents.

Importance of Following Operating Instructions

Adhering to SEW-Eurodrive operating instructions is paramount for ensuring the safe, reliable, and efficient operation of their products. These manuals provide critical guidance on installation, commissioning, operation, and maintenance, preventing potential damage to equipment and minimizing downtime. Ignoring these instructions can lead to malfunctions, reduced performance, and voided warranties.

Proper understanding of parameters, configuration settings, and error handling procedures – detailed within the manuals – is crucial for optimal system functionality. Specifically, correct manual reset procedures, like those utilizing the DBG11B, are vital for resolving operational issues.

SEW-Eurodrive prioritizes user safety and product longevity; therefore, diligent adherence to the provided documentation is non-negotiable for maximizing the return on investment.

Safety Precautions

SEW-Eurodrive manuals emphasize general, electrical, and mechanical safety guidelines to prevent accidents, ensuring personnel protection during installation and ongoing operation.

General Safety Guidelines

SEW-Eurodrive operating instructions consistently prioritize comprehensive safety measures for all personnel involved with their drive solutions. Before commencing any work – installation, maintenance, or troubleshooting – thoroughly review the relevant manual sections. Always disconnect power before performing any maintenance or repair activities to avoid electrical hazards.

Ensure proper guarding is in place to prevent accidental contact with moving parts. Qualified personnel, adequately trained on SEW-Eurodrive equipment, should exclusively perform installations and repairs. Never modify components without explicit authorization from SEW-Eurodrive, as this could compromise safety and performance.

Adhere to all local and national safety regulations. Regularly inspect equipment for wear and tear, and promptly address any identified issues. Maintain a clean and organized work environment to minimize trip hazards and ensure safe access to components. Prioritize personal protective equipment (PPE) appropriate for the task at hand.

Electrical Safety

SEW-Eurodrive equipment operates with potentially hazardous voltages; therefore, strict adherence to electrical safety protocols is paramount. Always de-energize and lock out/tag out (LOTO) power sources before undertaking any electrical work, verifying complete power disconnection with appropriate testing devices.

Qualified electricians, familiar with relevant electrical codes and SEW-Eurodrive systems, must perform all electrical installations and maintenance. Never work on live circuits. Ensure proper grounding of all equipment to prevent electrical shock hazards. Inspect all cables and connections for damage before energizing the system.

Utilize appropriately rated fuses and circuit breakers to protect against overcurrents. Avoid modifications to electrical components that could compromise safety features. Regularly check for loose connections and damaged insulation. Follow all applicable national and local electrical safety standards when working with SEW-Eurodrive products.

Mechanical Safety

SEW-Eurodrive drive systems involve rotating parts and substantial mechanical forces; thus, prioritizing mechanical safety is crucial. Before any maintenance or inspection, ensure the drive is completely stopped and mechanically secured to prevent unexpected movement. Implement appropriate guarding to protect personnel from pinch points, rotating components, and ejected parts.

Regularly inspect all mechanical components – couplings, gears, housings – for wear, damage, or loosening. Tighten all fasteners to the manufacturer’s specified torque values. Never operate equipment with missing or damaged guards. Use appropriate lifting equipment and techniques when handling heavy components.

Ensure proper alignment of coupled components to minimize vibration and stress. Avoid modifying mechanical components without explicit authorization from SEW-Eurodrive. Always follow lockout/tagout procedures during mechanical servicing to prevent accidental activation.

Understanding the Control System

SEW-Eurodrive control systems feature basic components, parameterization options, and intuitive display elements for efficient operation and precise control of drive solutions.

Basic Components of the Control System

SEW-Eurodrive control systems are built upon a foundation of interconnected components working in harmony to deliver precise and reliable motion control. Core elements include the drive controller, responsible for interpreting commands and regulating motor performance, and the frequency inverter, which adjusts the motor’s speed and torque.

Essential to the system are the motor itself – often an asynchronous or synchronous motor – and the encoder, providing crucial feedback on position and speed. The control system also incorporates a power supply, ensuring stable and consistent energy delivery. Furthermore, communication interfaces, such as those supporting fieldbus protocols, enable seamless integration with higher-level automation systems.

These components, when properly configured, create a robust and adaptable control solution for a wide range of industrial applications.

Parameterization and Configuration

SEW-Eurodrive drive controllers require careful parameterization and configuration to achieve optimal performance and tailored functionality. This process involves setting specific parameters within the controller’s software, defining operational characteristics like acceleration and deceleration rates, and configuring input/output signals.

Configuration often utilizes dedicated software tools, allowing users to establish communication with the drive controller and modify parameters efficiently. Key settings include motor data, encoder resolution, and communication protocol parameters for fieldbus integration. Proper configuration ensures the drive system operates safely and effectively, matching the specific requirements of the application.

Detailed manuals provide step-by-step guidance for this crucial setup process.

Display and Operating Elements

SEW-Eurodrive drive controllers feature intuitive displays and operating elements designed for ease of use and efficient control. Typically, a multi-line LCD or graphical display presents critical operating data, including speed, torque, current, voltage, and error messages.

Operating elements commonly include a keypad with buttons for navigating menus, adjusting parameters, and initiating functions like start, stop, and reset. Some models incorporate rotary encoders or potentiometers for precise parameter adjustments.

The display interface provides real-time feedback on the drive’s status, enabling operators to monitor performance and diagnose potential issues quickly. Detailed operating instructions explain the function of each element.

Manual Reset Procedures

SEW-Eurodrive systems offer manual reset capabilities, often via the DBG11B, to address error states and restore operation after faults or power interruptions.

Manual Reset via DBG11B

The DBG11B serves as a crucial interface for initiating manual resets within SEW-Eurodrive systems. This procedure is typically employed when encountering error conditions that prevent automatic recovery, offering a direct method for restoring operational control. Utilizing the DBG11B allows technicians to bypass fault states and resume functionality, particularly after specific error triggers.

Detailed instructions within the SEW-Eurodrive operating manuals outline the precise steps for performing a manual reset using this device. These steps often involve navigating through specific parameter settings and confirming the reset command. Proper execution is vital to avoid unintended consequences or further system disruptions. Always consult the relevant documentation for your specific drive model before attempting a manual reset via the DBG11B.

Successful implementation ensures a swift return to normal operation, minimizing downtime and maximizing productivity.

Error Handling and Troubleshooting

SEW-Eurodrive operating instructions emphasize a systematic approach to error handling. Initial troubleshooting involves carefully observing error messages displayed on the control panel or via diagnostic tools. These messages provide valuable clues regarding the nature and location of the fault. Consulting the comprehensive error code list within the manual is crucial for accurate interpretation.

Common issues often relate to electrical connections, mechanical faults, or incorrect parameter settings. The manuals guide users through step-by-step diagnostic procedures, including checking wiring, inspecting components, and verifying configuration parameters. Utilizing the DBG11B for manual resets, as detailed in the documentation, can resolve certain error states.

If issues persist, contacting SEW-Eurodrive support is recommended for expert assistance and potential on-site service.

Resetting After Power Failure

SEW-Eurodrive operating instructions detail procedures for restoring functionality following a power interruption. Upon power restoration, many devices will automatically attempt to resume operation using previously saved parameters. However, a controlled reset may be necessary to ensure optimal performance and prevent unexpected behavior.

The manual outlines specific steps, potentially involving the DBG11B interface, to initiate a complete system reset. This process clears any temporary errors and reloads the configured settings. It’s crucial to follow the prescribed sequence to avoid data corruption or equipment damage.

Depending on the device and application, a parameter check post-reset is advised to confirm correct operation. SEW-Eurodrive support can provide guidance if difficulties arise during the recovery process.

Encoder Specific Instructions

SEW-Eurodrive provides detailed manuals for absolute encoders—ES1H, AS1H, AK0H, EK0H, AK1H, and EK1H—covering data interpretation and troubleshooting procedures.

Absolute Encoders: ES1H, AS1H, AK0H, EK0H, AK1H, EK1H


SEW-Eurodrive’s absolute encoders – encompassing the ES1H, AS1H, AK0H, EK0H, AK1H, and EK1H series – deliver precise position feedback crucial for advanced automation systems. These encoders utilize sophisticated technology to provide a unique code for each shaft position, eliminating the need for referencing upon startup.

Detailed documentation, available as downloadable PDFs, outlines specific installation guidelines, wiring diagrams, and parameterization settings for each encoder model. Understanding encoder data and signal interpretation is paramount for correct system integration. The manuals thoroughly explain the significance of various signals and how to decode them effectively.

Troubleshooting sections address common issues, offering diagnostic steps and potential solutions to ensure optimal encoder performance and minimize downtime. Proper handling and maintenance, as detailed in the manuals, are essential for maximizing the lifespan and reliability of these critical components.

Encoder Data and Signal Interpretation

SEW-Eurodrive absolute encoder manuals emphasize the importance of correctly interpreting encoder data for seamless system operation. These encoders output a unique binary or Gray code representing the absolute shaft position, crucial for precise control and feedback. Understanding the resolution – bits per revolution – is fundamental, defining the encoder’s accuracy.

Signal interpretation involves decoding the parallel or serial data transmitted by the encoder. Manuals detail the specific signal protocols (e.g., SSI, Profibus, PROFINET) and their corresponding data formats. Proper configuration of the control system to match the encoder’s output is vital.

Accurate interpretation ensures correct position monitoring, velocity calculation, and coordinated motion control. Troubleshooting often involves verifying signal integrity and confirming the control system’s ability to correctly decode the encoder’s output, as outlined in the provided documentation.

Troubleshooting Encoder Issues

SEW-Eurodrive operating instructions provide systematic troubleshooting steps for encoder problems. Common issues include signal loss, incorrect position readings, and communication errors. Initial checks involve verifying power supply, cable connections, and encoder mounting security.

If signals are absent, inspect wiring for breaks or shorts, and confirm the controller’s input parameters match the encoder’s output. Incorrect readings often indicate resolution mismatches or signal interference; shielding and proper grounding are crucial. Communication errors require verifying the correct protocol selection and baud rate settings.

Referencing the manual’s error code descriptions aids in pinpointing the fault. If issues persist, SEW-Eurodrive support offers expert assistance, ensuring minimal downtime and optimal system performance.

Fieldbus Gateway Instructions (UFF41B)

SEW-Eurodrive UFF41B gateway manuals detail installation, configuration, and supported communication protocols, facilitating seamless integration into diverse fieldbus systems for automation.

Installation and Configuration of UFF41B

Proper installation of the SEW-Eurodrive UFF41B fieldbus gateway is crucial for reliable communication. Begin by carefully mounting the device, ensuring adequate ventilation and protection from environmental factors.

Configuration typically involves utilizing a compatible programming interface and software, allowing users to define communication parameters, such as baud rate, protocol settings, and device addressing.

Detailed manuals provide step-by-step instructions for establishing connections with various PLCs and control systems.

Key configuration steps include assigning a unique node ID, selecting the appropriate communication protocol (e.g., Profibus, Profinet, EtherNet/IP), and mapping data between the gateway and connected devices.

Thorough testing and verification are essential to confirm successful communication and data exchange.

Communication Protocols Supported

The SEW-Eurodrive UFF41B fieldbus gateway demonstrates versatility through its support for a wide range of industrial communication protocols. This allows seamless integration with diverse automation systems and PLCs.

Key supported protocols include Profibus DP, enabling robust data exchange in established automation networks. Additionally, Profinet support facilitates high-speed, real-time communication for demanding applications.

EtherNet/IP compatibility ensures interoperability with Rockwell Automation systems, while other protocols may be supported depending on the specific UFF41B model and firmware version.

Detailed documentation outlines the configuration parameters and requirements for each protocol, ensuring optimal performance and reliable data transmission. Proper protocol selection is vital for achieving desired system functionality.

Troubleshooting Fieldbus Communication

When encountering issues with UFF41B fieldbus communication, systematic troubleshooting is crucial. Begin by verifying physical connections – cables, terminations, and power supply. Check for correct baud rate and network address configuration within the gateway.

Utilize diagnostic tools within the SEW-Eurodrive system and the connected PLC to identify error messages and communication status. Inspect for protocol-specific errors, such as frame errors or timeout issues.

Firmware updates can resolve compatibility problems; ensure the UFF41B has the latest version. Interference from electromagnetic sources can disrupt communication; assess the environment.

Consult the detailed manual for specific error code interpretations and recommended solutions. If problems persist, contact SEW-Eurodrive support for expert assistance.

Maintenance and Servicing

SEW-Eurodrive operating instructions emphasize regular maintenance, proper lubrication, and utilizing genuine spare parts to ensure optimal performance and extend equipment lifespan.

Regular Maintenance Schedule

SEW-Eurodrive operating instructions mandate a proactive maintenance approach for sustained reliability. Initial checks after installation are crucial, verifying correct mounting and operation. Routine inspections—monthly for high-usage systems, quarterly for standard applications—should encompass visual assessments for leaks, unusual noises, or excessive wear.

Lubrication, guided by specific product manuals, is paramount; intervals vary based on operating conditions and load. Regularly examine electrical connections for tightness and signs of corrosion. Filter replacements, if applicable, are essential for maintaining fluid cleanliness. Detailed logs documenting all maintenance activities are highly recommended, facilitating trend analysis and predictive maintenance strategies. Adhering to this schedule minimizes downtime and maximizes the lifespan of your SEW-Eurodrive equipment.

Lubrication Guidelines

SEW-Eurodrive operating instructions emphasize the critical role of proper lubrication for optimal performance and longevity. Always consult the specific product manual to determine the correct lubricant type and quantity; using incorrect lubricants can cause significant damage. Lubrication intervals depend heavily on operating conditions – higher loads, temperatures, and duty cycles necessitate more frequent lubrication.

Generally, gear units require periodic oil changes, while bearings may need grease replenishment. Ensure the lubricant meets SEW-Eurodrive’s specified viscosity and performance characteristics. During lubrication, carefully monitor for leaks and ensure proper sealing. Document all lubrication activities, including date, lubricant type, and quantity. Following these guidelines prevents premature wear, reduces friction, and extends the service life of your SEW-Eurodrive components.

Spare Parts and Replacements

SEW-Eurodrive strongly recommends using only genuine SEW-Eurodrive spare parts to maintain product integrity and warranty validity. Utilizing non-approved parts can compromise performance, safety, and potentially void your warranty. A comprehensive catalog of spare parts is available through SEW-Eurodrive’s global network and online resources.

When ordering replacements, always provide the complete product identification number and the part number for accurate fulfillment. SEW-Eurodrive’s extensive global presence—with numerous assembly plants—ensures fast availability and short delivery times for critical components. Proper storage of spare parts is also crucial; keep them in a clean, dry environment to prevent damage. Refer to the operating instructions for specific replacement procedures and safety precautions.

Company Information & Support

SEW-Eurodrive, founded in 1931, is a leading global provider of drive technology and automation, offering comprehensive support and career opportunities worldwide.

SEW-Eurodrive Global Presence

SEW-Eurodrive boasts an extensive international network, demonstrating a commitment to serving customers across all continents with readily available products and swift delivery times. This global reach is underpinned by a substantial infrastructure, comprising 18 strategically located production plants and an impressive 92 assembly facilities.

This widespread presence ensures localized support, allowing for personalized, on-site assistance tailored to specific regional needs. The company’s dedication extends beyond mere product provision; it encompasses a holistic approach to customer service, fostering strong relationships and ensuring optimal operational efficiency for businesses worldwide.

SEW-Eurodrive’s global footprint facilitates rapid response times and minimizes logistical challenges, solidifying its position as a trusted partner in industrial automation and drive technology.

Contacting SEW-Eurodrive Support

SEW-Eurodrive prioritizes comprehensive customer support, offering various avenues for assistance regarding their products and operating instructions. Access to detailed documentation, including manuals for absolute encoders (ES1H, AS1H, AK0H series) and fieldbus gateways (UFF41B), is readily available online as downloadable PDFs.

For direct assistance, customers can leverage SEW-Eurodrive’s global network of service centers and representatives. These local experts provide personalized support, troubleshooting guidance, and assistance with parameterization and configuration.

The company’s website serves as a central hub for accessing technical resources, FAQs, and contact information for regional support teams. Dedicated support ensures users can maximize the performance and reliability of their SEW-Eurodrive systems.

Career Opportunities at SEW-Eurodrive

SEW-Eurodrive, a family-owned company and global leader in drive technology, fosters a dynamic corporate culture that encourages innovation and personal development. Opportunities span various fields, supporting the creation and maintenance of cutting-edge products like absolute encoders (AK1H, EK1H series) and fieldbus gateways (UFF41B).

The company’s commitment to its employees extends to providing excellent benefits and career advancement prospects. Individuals interested in contributing to the development of advanced industrial automation solutions are encouraged to explore available positions.

SEW-Eurodrive’s global presence, with locations worldwide, offers diverse career paths and the chance to work on impactful projects, ensuring the continued success of their drive solutions and operating instructions.

PreviousNext

You Want To Have Your Favorite Car?

We have a big list of modern & classic cars in both used and new categories.