Guide

nail sizing guide

Nail Sizing Guide: A Comprehensive Overview (Updated 02/07/2026)

Today, February 7th, 2026, understanding nail health begins with recognizing subtle changes; nails offer vital clues to overall well-being and potential underlying conditions.

Understanding Nail Anatomy

The nail unit is a complex biological structure, extending from the base of the finger to the free edge. Fingernails originate from the matrix, located under the cuticle, where new cells are continuously created. These cells undergo keratinization, forming the nail plate – the visible part of the nail.

Beneath the nail plate lies the nail bed, providing nourishment and support. The hyponychium is the skin beneath the free edge, acting as a protective seal. Surrounding the nail are lateral nail folds and the proximal nail fold, contributing to nail shape and protection.

Understanding these components is crucial, as changes in any part can indicate health issues. Healthy nails are smooth and firm, reflecting overall wellness. Observing nail structure provides valuable insights into systemic health.

The Composition of Nails: Keratin and Layers

Nails are primarily composed of keratin, a fibrous structural protein also found in skin and hair. This protein provides strength and rigidity, protecting the sensitive fingertips and toes. Nails aren’t a single solid piece; they consist of multiple layers of dead keratinocytes.

These layers – dorsal nail plate, ventral nail plate, and matrix – work together to form a resilient barrier. The nail plate itself is transparent, with its color derived from blood vessels in the underlying nail bed. The quality of keratin, and therefore nail health, is heavily influenced by diet and overall health.

Proper hydration and nutrient intake are essential for maintaining strong, healthy keratin production, ensuring optimal nail structure and appearance;

Common Nail Conditions & Their Indicators

Recognizing nail abnormalities is crucial for early detection of potential health issues. Common conditions include nail fungus, often presenting as discoloration – white or yellow-brown spots – under the nail. Nail ridges, extending from cuticle to tip, are frequently benign, but changes warrant attention.

Nail pitting, characterized by small depressions, is often linked to skin disorders like psoriasis and eczema. These indicators aren’t always definitive; a healthcare provider’s examination and laboratory analysis are often necessary for accurate diagnosis.

Changes in nail shape, color, or texture should never be ignored, as they can signal underlying systemic diseases or nutritional deficiencies. Prompt evaluation is key to effective management.

Nail Fungus: Identification and Initial Signs

Nail fungus, a prevalent infection, typically begins subtly. The earliest sign is often a white or yellow-brown spot appearing under the fingernail or toenail’s edge. This discoloration gradually increases as the fungal infection penetrates deeper into the nail matrix.

Initially, the nail may thicken and become brittle, potentially leading to crumbling or distortion in shape. A foul odor can sometimes accompany the infection. It’s important to note that not all nail discoloration indicates fungus; other conditions can mimic these symptoms.

Early identification is vital for effective treatment, as fungal infections can be persistent and challenging to eradicate. Consulting a healthcare professional is recommended for diagnosis and appropriate intervention.

Nail Ridges: Vertical vs. Horizontal – What Do They Mean?

Nail ridges, common occurrences, manifest in two primary forms: vertical and horizontal. Vertical ridges, extending from the cuticle to the nail tip, are generally considered a normal part of aging and usually pose no cause for concern. They often become more prominent with increasing age, reflecting natural changes in nail growth.

However, horizontal ridges – known as Beau’s lines – are more indicative of a systemic issue. These lines traverse the nail width and suggest a temporary interruption in nail growth, potentially due to illness, stress, or injury.

Identifying the ridge’s direction is crucial. While vertical ridges are typically benign, horizontal ridges warrant medical evaluation to determine the underlying cause and address any health concerns.

Nail Pitting: Connection to Skin Disorders (Psoriasis, Eczema)

Nail pitting presents as small, round depressions or noticeable notches within the nail plate’s surface. This condition is frequently observed in individuals diagnosed with skin disorders, most notably psoriasis and eczema. While not exclusive to these conditions, its presence often signals an underlying dermatological issue requiring attention.

In psoriasis, nail pitting arises from abnormal keratinization, disrupting the smooth nail formation. Eczema can also contribute to nail pitting, though the mechanism differs. Recognizing nail pitting as a potential symptom is vital for early diagnosis and appropriate management of these skin conditions.

If you observe pitting, consulting a dermatologist is recommended for accurate assessment and tailored treatment plans.

How Nails Grow: From Matrix to Tip

Nail growth originates in the matrix, located beneath the skin at the base of the nail, under the cuticle. This is where new nail cells are continuously produced. These cells are composed of keratin, a protein also found in skin and hair, and are pushed forward as new cells develop behind them.

As cells move forward, they become compacted and flattened, eventually forming the visible nail plate. This process results in the nail gradually extending from the matrix towards the tip. Healthy fingernails grow approximately 3.5 millimeters per month, while toenails grow slower, around 1.6 millimeters per month.

The entire process, from matrix to tip, demonstrates the nail’s continuous regeneration.

Factors Affecting Nail Growth

Several factors influence the rate of nail growth. Age plays a significant role; nails generally grow faster in younger individuals and slow down with increasing age. Diet and nutrition are crucial, as deficiencies in vitamins (like biotin) and minerals can impact nail health and growth. A balanced diet supports keratin production.

Underlying health conditions can also cause noticeable nail changes. Conditions like anemia, thyroid disorders, and psoriasis can affect nail growth rate and appearance. Circulation problems can also slow growth. Furthermore, seasonal changes and even stress levels can temporarily influence nail growth patterns.

Maintaining overall health is key to optimal nail development.

Age and Nail Growth Rate

Nail growth demonstrably changes throughout a person’s lifespan. Fingernails typically grow faster in childhood and adolescence, reaching peak growth rates during these periods. As individuals enter adulthood, nail growth gradually slows down. This deceleration continues with advancing age, becoming particularly noticeable after the age of 60.

Older adults often experience significantly slower nail growth compared to younger individuals. This is due to a combination of factors, including reduced circulation, decreased metabolic rate, and potentially, nutritional deficiencies common in older populations. Nail thickness may also change with age, becoming more brittle.

Understanding these age-related changes is crucial for interpreting nail health.

Diet and Nutritional Impact on Nail Health

Nail health is intrinsically linked to nutritional status. Keratin, the primary protein composing nails, requires adequate protein intake for optimal production. Deficiencies in protein can lead to slow growth and brittle nails. Essential vitamins and minerals also play critical roles.

Biotin (Vitamin B7) is frequently associated with nail strength, though evidence is mixed. Iron deficiency can cause spoon-shaped nails (koilonychia). Zinc is vital for nail growth and repair, while deficiencies can manifest as white spots. Vitamin C aids in collagen production, contributing to nail strength.


A balanced diet rich in these nutrients supports healthy nail development and minimizes abnormalities.

Underlying Health Conditions & Nail Changes

Nails often reflect systemic health, serving as indicators of underlying conditions. Psoriasis and eczema frequently cause nail pitting – small depressions in the nail surface. Thyroid disorders can lead to brittle, slow-growing nails. Anemia, particularly iron deficiency, is linked to spoon-shaped nails (koilonychia).

Lung diseases may cause nail clubbing, a widening of the fingertips with nail curvature. Kidney disease can result in half-and-half nails (Lindsay’s nails), displaying a pale base and dark tip. Diabetes can impair circulation, affecting nail growth and increasing susceptibility to infections.

Significant nail changes warrant medical evaluation to identify and address any underlying health concerns.

Identifying Nail Abnormalities as Health Clues

Nails provide a visible window into overall health, often displaying early signs of systemic issues. Discoloration – yellowing, blueness, or white spots – can signal liver problems, circulation issues, or fungal infections. Changes in nail shape, like spoon nails or clubbing, are strongly associated with specific conditions.

Ridges, whether vertical or horizontal (Beau’s lines), can indicate nutritional deficiencies, stress, or illness. Pitting, small depressions in the nail, is commonly linked to skin disorders like psoriasis. Observing these abnormalities is crucial.

Promptly recognizing these clues encourages timely medical evaluation, potentially leading to early diagnosis and effective management of underlying health concerns.

Diagnostic Methods for Nail Issues

Accurate diagnosis of nail problems often begins with a thorough physical examination by a healthcare provider. This involves careful observation of the nail’s color, shape, and texture, alongside a review of the patient’s medical history and any associated symptoms.

Nail sample collection is a common next step. Clippings or scrapings from under the nail are sent to a laboratory for analysis. This helps identify fungal infections or other pathogens. Further tests might include a fungal culture or a potassium hydroxide (KOH) examination.

In some cases, a nail biopsy may be necessary to rule out more serious conditions. These diagnostic procedures ensure targeted and effective treatment.

Nail Sample Collection for Laboratory Analysis

Collecting a nail sample is a straightforward procedure, typically performed by a healthcare professional. It involves carefully trimming or scraping debris from under the affected nail(s). This collected material is then placed in a sterile container and sent to a laboratory for detailed examination.

Laboratory analysis often begins with a microscopic examination using potassium hydroxide (KOH). This helps detect the presence of fungal elements. A fungal culture may also be performed, allowing for the identification of the specific fungal species causing the infection.

Accurate lab results are crucial for determining the most effective treatment plan, ensuring successful resolution of the nail issue.

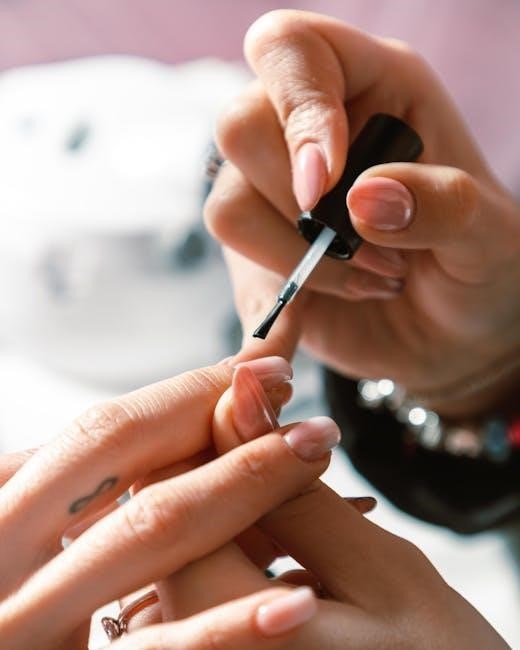
Basic Nail Care Practices

Maintaining healthy nails involves consistent, simple practices. Keeping nails clean is paramount; regular washing with mild soap and water prevents dirt and bacteria buildup. Trimming nails straight across, then rounding the tips gently, minimizes snags and breakage. Avoid overly aggressive filing, which can weaken the nail structure.

Nail lotion and moisturizing are essential, especially after handwashing. Hydrated nails are less prone to brittleness and splitting. Applying cuticle oil regularly nourishes the nail bed, promoting healthy growth.

Proper nail care isn’t just cosmetic; it’s a foundational element of overall health and well-being.

Keeping Nails Clean and Trimmed

Consistent cleanliness is the cornerstone of healthy nails. Wash hands and nails frequently with mild soap and lukewarm water, ensuring thorough cleaning under the free edge. Gently scrub to remove dirt and debris, preventing bacterial or fungal growth. Dry hands completely after washing.

Proper trimming prevents breakage and discomfort. Use sharp nail clippers or scissors to trim nails straight across, avoiding rounding the corners excessively, which can lead to ingrown nails. File edges gently to smooth any rough spots. Regular trimming maintains a manageable length and promotes optimal nail health.

The Importance of Nail Lotion and Moisturizing

Nail health extends beyond the nail plate itself; the surrounding skin plays a crucial role. Frequent handwashing and exposure to environmental factors can strip nails and cuticles of essential moisture, leading to dryness, brittleness, and cracking. Regular application of nail lotion or cuticle oil replenishes lost hydration.

Moisturizing strengthens nails and promotes flexibility, reducing the risk of breakage and splitting. Look for lotions containing ingredients like shea butter, jojoba oil, or vitamin E. Massage the lotion into the nails and cuticles, stimulating blood flow and encouraging healthy growth. Consistent moisturizing is vital for maintaining strong, resilient nails.

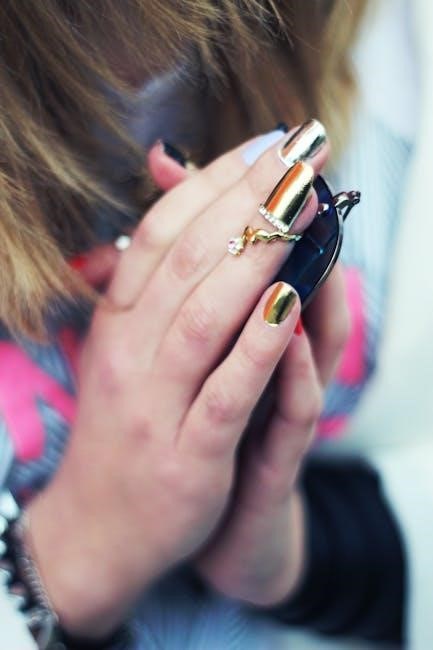
Nail Discoloration: Causes and Concerns

Changes in nail color can signal various underlying issues, ranging from minor infections to more serious health conditions. Yellow nails, for instance, might indicate a fungal infection, frequent use of dark nail polish, or, less commonly, conditions like psoriasis or thyroid disorders. It’s crucial to investigate persistent yellowing.

Blue nails (cyanosis) are a more urgent concern, often indicating a lack of oxygen in the blood. This could be due to respiratory problems, heart conditions, or exposure to cold temperatures. If you notice blue nails, seek immediate medical attention. Other discolorations, like white spots, are often harmless, but any significant or unexplained color change warrants evaluation.

Yellow Nails: Potential Causes

Yellow nails, a common concern, often begin as a subtle discoloration under the nail tip, gradually spreading as the nail grows. A frequent culprit is fungal infection – particularly in toenails – presenting as a yellow-brown hue. However, consistently using dark-colored nail polish without a base coat can also stain the nails yellow.

Less common causes include psoriasis, a skin condition that can affect nails, and thyroid disorders. In rare instances, yellow nails may indicate a respiratory condition or even lymphedema. If the discoloration persists despite good nail hygiene and polish-free periods, consulting a healthcare provider is advisable to determine the underlying cause and appropriate treatment.

Blue Nails (Cyanosis): When to Seek Medical Attention

Blue-tinted nails, known as cyanosis, are a serious sign demanding prompt medical evaluation. This discoloration indicates a lack of oxygen in the blood, potentially stemming from various underlying health issues. Unlike yellowing, cyanosis isn’t a localized nail problem; it reflects systemic concerns.

Possible causes range from exposure to cold temperatures – causing temporary vasoconstriction – to more severe conditions like heart problems, lung diseases, or circulatory issues. Raynaud’s phenomenon, a condition affecting blood vessels, can also induce blue nails. If you observe persistent or significant blueness, especially accompanied by shortness of breath, chest pain, or dizziness, seek immediate medical attention. This isn’t a condition to ignore.

Changes in Nail Shape: What to Look For

Subtle alterations in nail shape can signal underlying health concerns, making regular observation crucial. Two notable changes are spoon nails (koilonychia) and nail clubbing, each indicating distinct potential issues. Spoon nails present as concave depressions, resembling a spoon, often linked to iron deficiency anemia or hemochromatosis. Addressing the underlying deficiency is key to correction.

Nail clubbing, conversely, involves an enlargement of the fingertips with nail curvature changes. This is frequently associated with lung diseases, heart conditions, inflammatory bowel disease, or liver problems. If you notice either of these shape changes, it’s essential to consult a healthcare professional for proper diagnosis and management. Early detection improves outcomes.

Spoon Nails (Koilonychia)

Spoon nails, medically termed koilonychia, are characterized by a distinct concave shape, causing the nail to resemble a spoon. This condition isn’t always a cause for immediate alarm, but it warrants investigation. The most common association is with iron deficiency anemia, where insufficient iron levels impact nail growth and structure. However, koilonychia can also be linked to hemochromatosis, a condition involving excessive iron absorption.

Other potential causes include hypothyroidism, lupus, and even prolonged exposure to certain chemicals. Diagnosis typically involves a physical examination and blood tests to assess iron levels and rule out other underlying conditions. Treatment focuses on addressing the root cause, often through iron supplementation or managing the associated health issue.

Clubbing of the Nails

Clubbing, a notable nail deformity, presents as an enlargement of the fingertips accompanied by a rounding of the nail bed. The angle between the nail fold and the nail plate typically increases, creating a bulbous appearance. This isn’t a condition affecting the nail itself, but rather a sign of underlying systemic illness.

Most commonly, clubbing is associated with lung diseases such as chronic obstructive pulmonary disease (COPD), lung cancer, and cystic fibrosis. However, it can also indicate heart conditions, inflammatory bowel disease, and even liver cirrhosis. Diagnosis requires a thorough medical evaluation, including imaging tests to identify the underlying cause. Treatment centers on managing the primary health issue driving the nail changes.

Nail Biting and its Effects

Onychophagia, commonly known as nail biting, is a frequent habit often stemming from stress, anxiety, or boredom. While seemingly harmless, chronic nail biting can lead to a multitude of negative consequences extending beyond cosmetic concerns. Frequent biting damages the nail bed, increasing susceptibility to bacterial and fungal infections, causing redness, swelling, and pain.

Furthermore, it can distort nail growth, leading to uneven or deformed nails. Nail biting also introduces germs into the mouth, elevating the risk of colds and other illnesses. In severe cases, it can contribute to dental problems like malocclusion and enamel erosion. Breaking the habit often requires behavioral therapy, stress management techniques, and sometimes, the use of bitter-tasting nail polishes as deterrents.

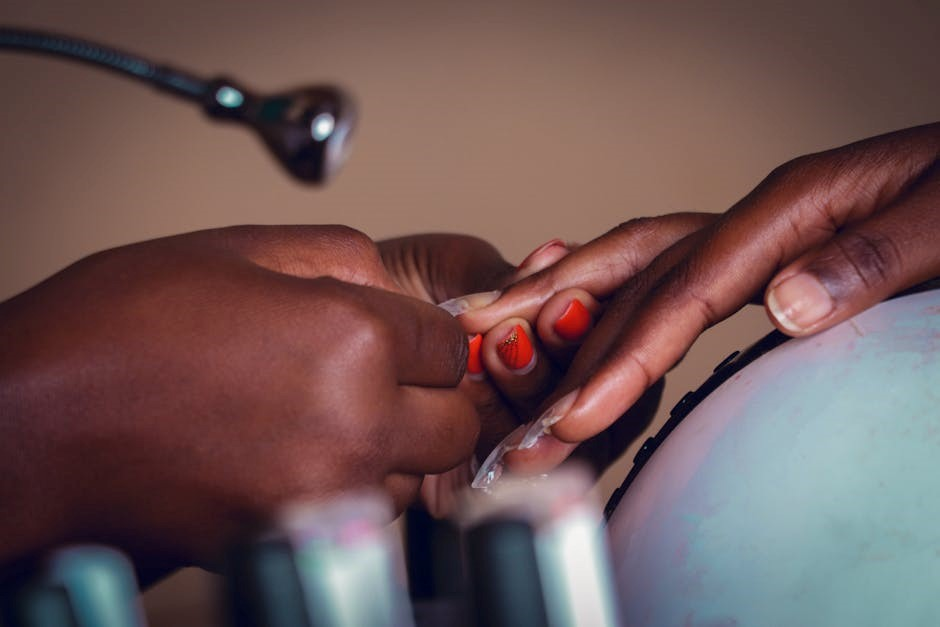
Professional Nail Care vs. Home Care

Maintaining optimal nail health involves a balance between diligent home care and occasional professional treatments. Home care, encompassing regular cleaning, trimming, and moisturizing with nail lotion, forms the foundation of healthy nails. Consistent application of these practices prevents brittleness, cracking, and infection. However, professional nail care offers benefits beyond basic maintenance.

Skilled technicians can identify subtle abnormalities often missed during self-examination, providing early detection of potential issues. Professional manicures and pedicures offer deep hydration, cuticle care, and precise shaping. They also utilize sterilized tools, minimizing the risk of infection. While home care is essential for daily upkeep, periodic professional visits enhance nail health and address specific concerns, ensuring long-term vitality and appearance.

When to Consult a Healthcare Professional

Prompt medical attention is crucial when nail changes signal potential health concerns. Consult a healthcare provider if you notice significant discoloration – yellowing or blueness – accompanied by pain or swelling. Changes in nail shape, such as spoon nails (koilonychia) or clubbing, warrant immediate evaluation, as they can indicate underlying systemic diseases.

Persistent nail pitting, especially if linked to skin conditions like psoriasis or eczema, requires professional diagnosis and management. Any sudden or unexplained nail abnormalities, including fungal infections that don’t respond to over-the-counter treatments, necessitate a visit. Don’t hesitate to seek expert advice; early intervention can prevent complications and ensure optimal nail and overall health. A nail sample analysis may be required for accurate diagnosis.

Resources for Further Information on Nail Health

For comprehensive insights into nail health, the Mayo Clinic offers detailed information on various nail conditions and their associated health implications. Their website, featuring contributions from experts at the Mayo Clinic College of Medicine and Science, provides accessible explanations and guidance.

Additionally, resources from medical institutions like the Mayo Clinic’s School of Graduate Medical Education and School of Health Sciences offer in-depth articles and educational materials. Exploring these platforms can empower you with knowledge about recognizing nail abnormalities as health clues. Remember, understanding your nails is a proactive step towards maintaining overall wellness. Further research can be found through reputable medical websites and healthcare provider recommendations.

Guide

mediacom tv channel guide

Mediacom TV Channel Guide: A Comprehensive Overview (Updated 02/07/2026)

Mediacom offers diverse channel packages, with availability varying by location and equipment.
Access lineups and rates online, or via watch.mediacomtoda.com for streaming content.
Channel displays may differ based on TV type.

Understanding Your Mediacom Channel Lineup

Your Mediacom channel lineup is a personalized selection of programming, influenced by your chosen package and location. Not all video services are universally available, and channel displays can vary depending on whether you’re using a digital-ready TV or an HDTV. Remember, High Definition (HD) channels necessitate an HDTV for proper viewing.

Mediacom structures its channel offerings to cater to diverse preferences, including local channels, entertainment, news, and sports. Packages range in price and content, so understanding the specifics of your plan is crucial. Channel numbers can differ based on your area – for example, Pensacola, Florida, features channels like WAR (AC 3), WFGX (MNet 35), and WKRG (C 5). Similarly, Panama City, Florida, offers WCP (C 18) and WPCT (IND each TV).

Furthermore, Mediacom provides digital subchannels, denoted as -DT2 or -DT3, offering additional programming options. To explore the full extent of available content, including on-demand options, visit watch.mediacomtoda.com. Always refer to the most current guide for accurate channel listings.

Accessing the Mediacom Channel Guide Online

Mediacom provides convenient online access to its channel guide, allowing customers to explore available programming from any web-enabled device. To view channel lineups and standard rates specific to your area, simply enter your address on the Mediacom website. This ensures you receive accurate information tailored to your location, as channel availability varies.

Beyond localized listings, Mediacom’s online platform, watch.mediacomtoda.com, serves as a central hub for streaming content. This portal allows subscribers to access on-demand movies and shows, as well as live TV programming, depending on their package. The website also offers helpful resources, including a new customer welcome guide, an outage map, and contact information.

Regularly checking the online guide is recommended, as channel lineups are subject to change. Mediacom updates its offerings to provide the best possible viewing experience. Utilizing the online tools complements the on-screen guide for a comprehensive overview of available channels.

Mediacom Channel Guide by Location

Mediacom’s channel lineup is highly localized, meaning the channels available to you depend significantly on your specific geographic location. For instance, residents of Pensacola, Florida, can access channels like WAR (AC 3), WFGX (MNet 35), and WKRG (C 5). Similarly, in Panama City, Florida, viewers have access to WCP (C 18) and WPCT (IND each TV).

Further north, in Salisbury, Maryland, the channel offerings include WMDT-DT2 (CW 3) and WOC-DT2 (FOX 21). This regional variation ensures that local broadcast signals and regional sports networks are included where appropriate. To determine the precise channel lineup for your address, Mediacom strongly encourages using the address lookup tool on their website.

It’s important to note that even within a city, channel availability can sometimes vary. This is due to factors like signal strength and network agreements. Always confirm your specific channels using the online guide.

Digital vs. HD Channels on Mediacom

Mediacom offers both digital and High Definition (HD) channels, providing varying viewing experiences. Digital channels represent the standard digital broadcast, while HD channels deliver a significantly sharper and more detailed picture. Accessing HD channels requires a compatible HDTV – a television specifically designed to receive high-definition signals.

It’s crucial to understand that simply having an HD television doesn’t automatically guarantee access to all HD channels. Your Mediacom equipment and subscription package also play a vital role. Some packages include a wider selection of HD channels than others.

Display channels may also vary depending on whether you’re using a digital-ready TV or a set-top box. Mediacom notes that not all video services are available on all equipment choices. To maximize your viewing experience, ensure you have the appropriate equipment and a subscription that includes the HD channels you desire;

Required Equipment for Viewing Mediacom Channels

To fully enjoy the Mediacom channel lineup, specific equipment is necessary, varying based on your chosen services. A digital television is fundamental for receiving standard digital channels. However, accessing HD channels mandates an HDTV – a television capable of displaying high-definition signals.

Beyond the TV itself, a Mediacom set-top box is often required, particularly for accessing premium channels, On Demand content, and interactive features. The type of set-top box influences the channels available; some support more advanced features than others.

Mediacom emphasizes that not all video services are universally available, depending on your equipment selection. Furthermore, to stream content online, utilizing platforms like watch.mediacomtoda.com, a compatible internet connection and potentially a streaming device are essential. Ensure your equipment aligns with your desired channel package for optimal viewing.

Navigating the Mediacom On-Screen Channel Guide

The Mediacom on-screen channel guide is designed for intuitive browsing. Typically accessed via the “Guide” button on your remote, it presents a grid-style layout displaying current and upcoming programming across all available channels.

Users can navigate using the arrow keys, selecting channels to view detailed program information, including descriptions and run times. Many guides offer filtering options, allowing you to narrow results by genre (movies, sports, news) or channel type (HD, local).

Mediacom’s guide often includes a search function, enabling quick access to specific shows or channels. Remember that displayed channel numbers can vary depending on your TV and equipment setup. For additional support and features, explore watch.mediacomtoda.com for online viewing options and program guides.

Popular Channel Packages Offered by Mediacom

Mediacom provides a range of channel packages to suit diverse viewing preferences and budgets. Core packages typically include local channels, popular entertainment networks, and essential news sources. Customers can then add premium options like sports packages, movie channels (such as MNet 35 ⸺ WFGX), and international programming.

Specific package names and channel lineups vary by location, so checking the Mediacom website or contacting customer support is crucial. Many packages offer HD channel access, requiring an HDTV for optimal viewing.

Don’t forget to explore watch.mediacomtoda.com for on-demand content and streaming options that complement your chosen package. Mediacom frequently updates its offerings, ensuring customers have access to the latest entertainment and information.

Local Channels Available Through Mediacom

Mediacom prioritizes providing access to essential local channels, varying significantly based on your geographic location. In Pensacola, Florida, viewers can typically access WAR (AC 3), WFGX (MNet 35), and WKRG (C 5). Panama City, Florida, offers WCP (C 18) and WPCT (IND each TV), while Salisbury, Maryland, includes WMDT-DT2 (CW 3) and WOC-DT2 (FOX 21).

Channel numbers may differ depending on your specific equipment and digital TV capabilities. Mediacom ensures broad availability of these channels, but some video services may have limitations based on equipment choice.

For the most accurate and up-to-date local channel listings, it’s recommended to enter your address on the Mediacom website. These channels are generally available “everywhere” and complement the broader entertainment options available through watch.mediacomtoda.com.

Channel Listings for Pensacola, Florida

Pensacola, Florida Mediacom subscribers have access to a variety of local and network channels. Key listings include WAR (AC 3), offering local programming and community content. WFGX (MNet 35) provides additional entertainment options, while WKRG (C 5) delivers news, weather, and popular network shows.

It’s important to note that channel availability and display numbers can vary depending on your chosen equipment and whether you’re using a digital-ready TV or an HDTV. Not all video services feature every channel, and some may require specific equipment upgrades.

Furthermore, Mediacom offers access to additional content through its online platform, watch.mediacomtoda.com. For a personalized channel lineup reflecting your specific package and location, please consult your Mediacom account details or contact customer support.

WAR (AC 3) Channel Details

WAR (AC 3) is a Pensacola, Florida-based channel offering a blend of local programming and diverse content. As an access channel, WAR focuses on community events, local news segments, and public service announcements, providing a platform for Pensacola residents and organizations.

Subscribers can expect a schedule featuring locally produced shows, community calendars, and information relevant to the Pensacola area. The channel aims to connect viewers with local happenings and foster a sense of community engagement.

Channel availability and display number (AC 3) may vary based on your Mediacom equipment and TV type. Access to WAR is generally available “everywhere” through Mediacom’s service, and supplemental content may be found on watch.mediacomtoda.com. Check your local Mediacom guide for the most up-to-date schedule;

WFGX (MNet 35) Channel Details

WFGX (MNet 35) serves the Pensacola, Florida area, delivering a diverse range of programming to Mediacom subscribers. Identified as a MNet channel, WFGX typically features a mix of entertainment, including movies, classic television series, and potentially some local content.

Viewers can anticipate a schedule that caters to a broad audience, offering options for family viewing and individual preferences. While specific programming varies, WFGX aims to provide accessible and engaging entertainment options.

Channel availability and display number (MNet 35) are subject to change based on your Mediacom equipment and TV type. Like other channels, WFGX is generally available “everywhere” within the Mediacom service area, with additional content potentially accessible via watch.mediacomtoda.com. Consult your local Mediacom guide for the latest schedule information.

WKRG (C 5) Channel Details

WKRG (C 5) is a prominent local channel serving the Mobile, Alabama and Pensacola, Florida regions through Mediacom. As a designated “C” channel, it primarily broadcasts network programming from CBS, alongside local news, weather, and community-focused content;

Subscribers can expect a consistent schedule of national CBS shows, live sports coverage, and in-depth local reporting. WKRG plays a vital role in keeping the community informed and entertained. The channel number (C 5) may vary slightly depending on your digital TV setup.

Like all Mediacom channels, availability is contingent on your chosen video service package and equipment. For expanded content options and on-demand viewing, visit watch.mediacomtoda.com. Always refer to your on-screen Mediacom guide for the most current programming schedule and channel listings.

Channel Listings for Panama City, Florida

Mediacom provides a range of local and network channels to customers in Panama City, Florida. Key channels include WCP (C 18), a local access channel offering community programming, and WPCT (IND each TV), an independent station broadcasting diverse entertainment content.

Channel availability can vary based on your selected Mediacom package and the type of television equipment you utilize. Digital-ready TVs may display channels differently, and High Definition (HD) channels require an HDTV for optimal viewing. Not all video services feature every channel, depending on equipment choices.

For a personalized channel lineup and standard rates specific to your Panama City address, Mediacom encourages customers to utilize the online channel lookup tool. Supplemental content and on-demand options are accessible through watch.mediacomtoda.com, offering expanded viewing choices.

WCP (C 18) Channel Details

WCP (C 18), a local access channel available through Mediacom in Panama City, Florida, is dedicated to serving the community with locally produced programming. This channel typically features content focused on civic events, local government meetings, and community initiatives.

Viewers can expect a diverse range of programs, including coverage of school board meetings, city council sessions, and local sports events. WCP aims to provide a platform for local voices and promote civic engagement within the Panama City area.

Channel availability and specific programming schedules are subject to change. Mediacom subscribers can access the most up-to-date channel information through the online channel guide or the on-screen guide. Supplemental content may also be available via watch.mediacomtoda.com. Remember that channel displays may vary depending on your TV type.

WPCT (IND each TV) Channel Details

WPCT (IND each TV), an independent channel broadcasting in Panama City, Florida, offers a varied programming lineup to Mediacom subscribers. As an independent station, WPCT often features a mix of classic television shows, movies, and locally produced content, catering to a broad audience.

Viewers can anticipate a diverse schedule including syndicated programs, vintage films, and potentially local news or community events. The “each TV” designation suggests individual tuning may be required on different televisions within a household.

Channel availability and programming are subject to change based on broadcasting schedules and agreements. Mediacom customers can find the most current channel information through the online or on-screen channel guides. Additional content may be accessible at watch.mediacomtoda.com. Display channels may vary with a digital-ready TV.

Channel Listings for Salisbury, Maryland

Mediacom provides a selection of local and network channels to customers in Salisbury, Maryland. Channel lineups can vary depending on the specific service package and equipment utilized. Key channels available in the Salisbury area include WMDT-DT2 (CW 3) and WOC-DT2 (FOX 21), offering access to popular network programming and local content.

These digital subchannels deliver a range of entertainment, news, and sports programming. It’s important to note that not all video services feature every channel, and display channels may differ based on the type of television used – HD channels require an HDTV.

For the most accurate and up-to-date channel listings, Mediacom encourages customers to consult the online channel guide or the on-screen guide accessible through their Mediacom receiver. Further content is available at watch.mediacomtoda.com.

WMDT-DT2 (CW 3) Channel Details

WMDT-DT2, broadcasting on channel 3 as part of The CW network, is a key offering within the Mediacom channel lineup for Salisbury, Maryland viewers. This digital subchannel provides access to a diverse range of programming, including primetime dramas, reality shows, and sporting events affiliated with The CW.

Availability of WMDT-DT2, like all Mediacom channels, can depend on the customer’s specific service package and equipment. It’s crucial to remember that not all video services feature every channel, and channel displays may vary depending on the type of television being used.

Customers can verify channel availability and explore additional viewing options through the Mediacom online channel guide or the interactive on-screen guide. For streaming content and further details, visit watch.mediacomtoda.com. Enjoy the entertainment provided by WMDT-DT2!

WOC-DT2 (FOX 21) Channel Details

WOC-DT2, broadcasting on channel 21 as part of the FOX network, is a prominent channel within the Mediacom channel lineup for viewers in the Delmarva region, specifically Salisbury, Maryland. This digital subchannel delivers a wide array of programming, encompassing popular dramas, comedies, live sports broadcasts, and breaking news coverage from FOX.

Like other Mediacom channels, access to WOC-DT2 is contingent upon the customer’s chosen service package and the type of equipment they have. It’s important to note that not all video services include every channel, and displayed channel numbers can differ based on the TV used.

To confirm channel availability and discover additional viewing options, customers are encouraged to consult the Mediacom online channel guide or the interactive on-screen guide. Streaming content and further information can be found at watch.mediacomtoda.com. Enjoy the diverse programming offered by WOC-DT2!

Watching Content Online with Mediacom (watch.mediacomtoda.com)

Mediacom enhances your viewing experience with watch.mediacomtoda.com, a platform allowing subscribers to stream a variety of content online. This service provides access to live TV channels, on-demand movies and shows, and a personalized viewing experience accessible on computers, tablets, and smartphones.

Using watch.mediacomtoda.com requires a valid Mediacom account login. The available content mirrors your subscribed channel package, ensuring you can enjoy your favorite programs anywhere with an internet connection. It’s a convenient alternative to traditional TV viewing, offering flexibility and portability.

The platform is regularly updated with new content and features. Remember that service features may vary depending on your equipment choice. Mediacom continually strives to improve its online offerings, providing a seamless and engaging entertainment experience for all subscribers. Explore watch.mediacomtoda.com today!

Troubleshooting Channel Guide Issues

Experiencing problems with your Mediacom channel guide? Several factors can cause discrepancies. First, ensure your equipment is properly connected and receiving a signal. Channel displays can vary depending on whether you’re using a digital or HDTV – HD channels require an HDTV for optimal viewing.


If channels are missing or displaying incorrectly, try resetting your set-top box. A simple reboot often resolves temporary glitches. Remember, not all video services are available with every equipment choice. Verify your subscribed package includes the desired channels.

If issues persist, check for service outages in your area. Mediacom’s website provides an outage map for quick reference. Finally, remember that the channel lineup can change. For the most up-to-date information, consult the online guide or contact customer support.

Contacting Mediacom Customer Support for Channel Guide Assistance

If you’ve tried troubleshooting your Mediacom channel guide issues without success, reaching out to customer support is the next step. Mediacom offers multiple avenues for assistance, ensuring you can find a method that suits your needs.

You can contact them directly via phone; their customer service number is readily available on the Mediacom website. Alternatively, explore the online support resources, including FAQs and a knowledge base, which may contain solutions to common problems. Live chat support is also frequently offered for immediate assistance.

When contacting support, have your account information ready, including your address and account number. Be prepared to describe the issue in detail, including any error messages or specific channels affected. Remember to inquire about any ongoing service outages in your area that might be contributing to the problem.

Guide

embroidery placement guide

Embroidery Placement Guide: A Comprehensive Overview (02/07/2026 01:10:17)

Embroidery success hinges on selecting the correct stabilizer; four major types exist: cut-away‚ tear-away‚ water-soluble‚ and heat-away films‚ each suited for unique projects.

Understanding Embroidery Placement Fundamentals

Embroidery placement isn’t merely aesthetic; it’s a technical consideration deeply intertwined with fabric behavior and design density. Proper placement ensures stitch integrity and prevents garment distortion. Understanding how different fabrics react to needle penetration is crucial – knits stretch‚ wovens hold shape‚ and stretch fabrics demand specialized techniques.

Stabilizers play a pivotal role‚ acting as a foundation to support stitches and prevent puckering. The goal is to achieve a flat‚ stable surface for embroidery‚ regardless of the fabric’s inherent characteristics. Consider the design’s weight; denser designs require heavier stabilization than lighter‚ simpler motifs. Careful planning at this stage minimizes issues like lint buildup in the bobbin case and stabilizer breakage during the embroidery process‚ ultimately leading to a professional finish.

The Importance of Stabilizers in Embroidery

Stabilizers are absolutely essential in machine embroidery‚ functioning as a support system beneath the fabric to prevent distortion and ensure stitch quality. Without proper stabilization‚ fabrics can pucker‚ stretch‚ or wrinkle during the embroidery process‚ leading to a flawed final product. They provide necessary structure‚ especially for delicate or loosely woven materials.

Different stabilizer types address specific needs. Cut-away stabilizers offer maximum support for dense designs‚ while tear-away options are suitable for lighter embroidery on stable fabrics. Water-soluble stabilizers excel with delicate materials or when a clean finish is paramount; Choosing the correct weight and type prevents issues like excessive lint in the bobbin and breakage‚ safeguarding both the fabric and your embroidery machine.

Factors Influencing Stabilizer Choice

Several key factors dictate the ideal stabilizer selection for any embroidery project. Fabric type is paramount; knits‚ wovens‚ and stretch fabrics each demand different levels of support. The density of the embroidery design plays a crucial role – denser designs require more substantial stabilization‚ often cut-away‚ to prevent puckering.

Consider the fabric’s weight and weave. Lightweight or loosely woven fabrics necessitate stronger stabilizers. The desired finish also matters; tear-away stabilizers are convenient but may leave residue‚ while water-soluble options dissolve completely. Finally‚ anticipate potential machine issues; choosing the wrong stabilizer can lead to lint buildup and breakage‚ impacting embroidery quality and machine longevity.

Types of Embroidery Stabilizers

Embroidery utilizes four primary stabilizer categories: cut-away‚ tear-away‚ water-soluble‚ and heat-away films‚ each offering distinct properties for varied fabric and design needs.


Cut-Away Stabilizers: Detailed Examination

Cut-away stabilizers provide exceptional support for dense embroidery designs and fabrics prone to distortion. These stabilizers remain intact during the embroidery process‚ offering maximum stabilization‚ and are subsequently trimmed away from the fabric’s backside. They are available in a broad spectrum of weights‚ ranging from lightweight 1-ounce options to heavier weights exceeding 3 ounces‚ ensuring a suitable match for nearly any fabric type.

The selection of the appropriate weight is crucial; lighter weights are ideal for delicate fabrics‚ while heavier weights are recommended for substantial designs on stretchable materials. Because they remain in place‚ cut-away stabilizers are particularly effective when working with knits or fabrics that easily pull or pucker. Remember to carefully cut away the excess stabilizer close to the stitch line after embroidery is complete‚ avoiding any damage to the design itself.

Cut-Away Stabilizer Weights and Applications

Cut-away stabilizers boast a diverse range of weights‚ each tailored for specific embroidery applications. Lightweight (1-2 ounce) options excel with finer fabrics and less dense designs‚ providing gentle support without adding bulk. Medium-weight (2.5-3 ounce) stabilizers are versatile‚ suitable for a wide array of projects‚ including apparel and home décor.

Heavier weights (3.5+ ounce) are indispensable for high-density designs‚ stretch fabrics‚ or when maximum stabilization is paramount. These robust stabilizers prevent puckering and distortion‚ ensuring a professional finish. Consider the fabric’s weight and the design’s stitch count when selecting a weight; denser designs necessitate heavier stabilization. Proper weight selection guarantees optimal results and longevity of your embroidered creations.

Best Fabrics for Cut-Away Stabilization

Cut-away stabilizers are exceptionally well-suited for a broad spectrum of fabrics‚ particularly those requiring robust support. Knit fabrics‚ prone to stretching and distortion‚ benefit immensely from the firm hold provided by cut-away‚ preventing unwanted shifting during embroidery. Similarly‚ stretch fabrics‚ like spandex or Lycra‚ demand the stability cut-away offers to maintain design integrity.

Woven fabrics‚ including denim and canvas‚ also respond favorably to cut-away‚ especially when tackling dense or intricate designs. Delicate fabrics‚ while seemingly counterintuitive‚ can also utilize lightweight cut-away for gentle support. Ultimately‚ any fabric susceptible to puckering‚ distortion‚ or requiring a clean‚ defined finish will thrive with cut-away stabilization.

Tear-Away Stabilizers: A Practical Guide

Tear-away stabilizers offer a convenient solution for fabrics where a clean finish isn’t paramount‚ or where removing the stabilizer is easily achievable. These stabilizers are ideal for projects where the backing won’t be visible or will be encased within the garment. They are particularly useful for lighter-weight fabrics and simpler designs‚ providing sufficient support during the stitching process without adding excessive bulk.

However‚ careful consideration must be given to the weight of the tear-away chosen. Using too light a weight can result in insufficient support‚ leading to puckering or distortion. Conversely‚ a heavier weight might be difficult to tear cleanly‚ potentially damaging the surrounding fabric. Proper selection ensures a smooth‚ professional result.

Choosing the Right Tear-Away Weight

Selecting the appropriate tear-away stabilizer weight is crucial for optimal embroidery results. Lighter weights‚ generally around 1-2 ounces‚ are best suited for stable fabrics and less dense designs. These minimize bulk and are easier to remove cleanly. However‚ denser designs or loosely woven fabrics require a medium weight (2.5-3.5 ounces) to prevent puckering and distortion during stitching.

Heavier tear-away stabilizers‚ exceeding 3 ounces‚ are typically reserved for very dense designs or fabrics prone to significant shifting. While providing maximum support‚ they can be challenging to tear without potentially damaging the embroidery or base fabric. Always test a small sample to ensure clean removal before committing to a full project.

Fabrics Suitable for Tear-Away Stabilizers

Tear-away stabilizers excel with medium-weight‚ stable woven fabrics like cotton‚ linen‚ and polyester blends. These materials generally possess enough inherent stability to withstand the embroidery process with minimal support. However‚ avoid using tear-away on knit fabrics or stretchy materials‚ as they are prone to distortion and require the firmer hold of a cut-away stabilizer.

For lightweight or loosely woven fabrics‚ a lighter-weight tear-away is preferable to prevent leaving behind stabilizer residue. Always consider the design density; simpler designs work well with tear-away on a wider range of fabrics‚ while complex‚ dense designs benefit from a heavier weight or a different stabilizer type altogether. Testing is key!

Water-Soluble Stabilizers: Techniques and Uses

Water-soluble stabilizers‚ like Wet N Gone‚ are invaluable for delicate fabrics or intricate designs needing full support. They dissolve completely in water‚ leaving no residue – ideal for lace or sheer materials. A unique technique involves wetting the embroidery instead of rinsing; this allows the stabilizer to dry within the stitches‚ creating exceptional stiffness‚ perfect for freestanding lace projects.

These stabilizers are also excellent as a temporary support layer‚ easily removed after embroidery. However‚ be mindful of design density; dense designs may require multiple layers for sufficient stabilization. Always test solubility with a small sample before embarking on a large project‚ ensuring complete dissolution.

Wet N Gone and Similar Products

Wet N Gone is a leading brand in water-soluble stabilizers‚ renowned for its clarity and complete dissolution. Similar products offer varying levels of stiffness and solubility rates‚ catering to diverse embroidery needs. These stabilizers are available in sheets‚ pre-cut shapes‚ and even as a spray adhesive for temporary fabric bonding.

They excel in supporting delicate fabrics during intricate embroidery‚ preventing puckering and distortion. A key benefit is their versatility – they can be used for freestanding lace‚ appliqué‚ and as a topping to enhance stitch definition. Remember to consider the water temperature and agitation level during removal‚ as excessive heat or vigorous washing can sometimes affect the stabilizer’s breakdown.

Achieving Stiffness with Water-Soluble Stabilizers

Water-soluble stabilizers aren’t limited to simply dissolving away; they can be strategically utilized to impart stiffness to embroidered projects‚ particularly beneficial for creating freestanding lace or dimensional elements. Instead of a full rinse‚ lightly wetting the embroidery allows the stabilizer to dry within the stitches‚ effectively becoming a structural component.

This technique is ideal for delicate designs requiring support‚ like intricate floral motifs or detailed cutwork. Experiment with varying levels of moisture – a light mist provides subtle stiffness‚ while thorough wetting yields a more rigid result. Remember to test on a scrap piece first to gauge the final effect and ensure compatibility with your chosen fabric and thread.

Heat-Away (Film) Stabilizers: Specialized Applications

Heat-away‚ or film‚ stabilizers represent a niche solution within embroidery‚ excelling in applications demanding exceptional detail and minimal residue. These stabilizers adhere to the fabric via heat and are subsequently removed by applying heat again‚ leaving virtually no trace behind. They are particularly well-suited for delicate fabrics where other stabilizer types might cause damage or distortion.

However‚ their use requires precision; improper heat application can melt or leave a sticky residue. Heat-away stabilizers are frequently employed for heirloom projects‚ sheer fabrics‚ and intricate lace designs. Careful consideration of fabric compatibility and temperature settings is crucial for optimal results‚ ensuring a pristine finish and preserving the integrity of your embroidered masterpiece.

Stabilizer Selection Based on Fabric Type

Fabric dictates stabilizer choice; knits need stretch‚ wovens require stability‚ and delicate materials benefit from water-soluble options for optimal embroidery results.

Stabilizing Knit Fabrics

Knit fabrics‚ known for their stretch and flexibility‚ present unique stabilization challenges in embroidery. Unlike rigid wovens‚ knits require stabilizers that accommodate movement without causing puckering or distortion of the design. Cut-away stabilizers are frequently recommended for knits‚ providing robust support‚ especially for dense stitch counts. However‚ the weight of the cut-away must be carefully considered; lighter weights are suitable for finer knits‚ while heavier weights are needed for thicker or more substantial knits.

Tear-away stabilizers can be used on knits‚ but only with lighter designs and lower stitch densities to avoid fabric distortion during the tearing process. Water-soluble stabilizers are also excellent choices‚ particularly for delicate knits or when a completely invisible stabilization is desired. The key is to ensure the stabilizer fully dissolves‚ leaving no residue that could affect the fabric’s drape or feel. Proper hooping is also crucial – avoid over-stretching the knit fabric during the hooping process to prevent distortion.

Stabilizing Woven Fabrics

Woven fabrics‚ generally more stable than knits‚ offer greater flexibility in stabilizer selection for embroidery. Cut-away stabilizers are a versatile choice‚ suitable for a wide range of woven weights and densities. The appropriate weight depends on the fabric’s weight and the design’s complexity; heavier fabrics and denser designs require heavier-weight cut-away stabilizers. Tear-away stabilizers are also frequently used with wovens‚ particularly for lighter-weight fabrics and designs with moderate stitch counts.

Choosing the correct tear-away weight is crucial to prevent fabric distortion during removal. Water-soluble stabilizers can be beneficial for delicate wovens or when a soft hand is desired‚ ensuring complete dissolution to avoid stiffness. Consider the fabric’s weave; tighter weaves generally require more substantial stabilization than looser weaves. Proper hooping is still essential‚ ensuring the fabric is taut but not stretched‚ to maintain design accuracy.

Stabilizing Stretch Fabrics

Stabilizing stretch fabrics presents unique challenges due to their inherent elasticity; proper support is vital to prevent distortion during and after embroidery. Cut-away stabilizers are generally the preferred choice‚ providing the necessary reinforcement to counteract stretching. However‚ selecting the appropriate weight is critical – too light‚ and the fabric will distort; too heavy‚ and it can compromise the fabric’s drape and stretch recovery.

Consider using a no-show stabilizer‚ designed to blend seamlessly with the fabric’s color and texture. Water-soluble stabilizers can also be effective‚ particularly for delicate stretch fabrics‚ offering temporary support that dissolves completely. Avoid tear-away stabilizers‚ as they often don’t provide sufficient support and can leave residue. Careful hooping is paramount; ensure the fabric is smoothly adhered to the hoop without stretching or puckering.

Embroidery Design Considerations for Placement

Design density‚ size‚ and color interplay with fabric; dense stitching demands robust stabilization‚ while larger designs require broader stabilizer coverage for optimal results.

Density of Stitching and Stabilizer Requirements

Embroidery designs with high stitch density—those featuring closely packed stitches—demand significantly more stabilization than lighter‚ more open designs. This is because the fabric needs substantial support to prevent puckering‚ distortion‚ or even breakage during the embroidery process.

For dense designs‚ particularly on delicate or loosely woven fabrics‚ a heavier-weight cut-away stabilizer is often the best choice. Cut-away stabilizers provide the most robust support‚ effectively encapsulating the stitches and preventing movement.

Conversely‚ designs with lower stitch density may only require a lighter-weight tear-away or water-soluble stabilizer. The key is to assess the design’s complexity and the fabric’s inherent stability. Ignoring this crucial relationship can lead to disappointing results and wasted materials. Always err on the side of caution and choose a stabilizer that provides adequate support for the entire design.

Design Size and Stabilizer Coverage

The size of your embroidery design directly impacts the necessary stabilizer coverage. A small‚ simple design might be adequately supported by a stabilizer patch only slightly larger than the design itself. However‚ larger‚ more intricate designs require significantly more extensive stabilization.

Ensure the stabilizer extends at least one inch beyond all edges of the design. This provides a sufficient buffer zone to prevent stitches from pulling or distorting the fabric‚ especially during hoop movement. For very large designs‚ consider using multiple stabilizer layers or a larger hoop to distribute the support evenly.

Insufficient stabilizer coverage is a common cause of embroidery failures. Always prioritize adequate support to ensure a professional-looking finish and prevent damage to your fabric and machine. Proper coverage is paramount for designs spanning a considerable area.

Color and Fabric Interaction

The interplay between your chosen thread colors and the fabric’s base color significantly influences the final embroidered appearance. Dark threads on dark fabrics may require denser stitching for visibility‚ demanding a more robust stabilizer to prevent puckering or distortion. Conversely‚ lighter threads on lighter fabrics might necessitate a lighter-weight stabilizer to avoid a stiff or bulky feel.

Consider the fabric’s texture and weave. Smooth‚ tightly woven fabrics generally require less stabilization than loosely woven or textured fabrics. The stabilizer’s color should ideally complement or contrast subtly with both the fabric and thread colors to minimize visibility after embroidery.

Always test a small sample before embarking on a large project to assess color contrast and stabilizer suitability‚ ensuring optimal aesthetic results and structural integrity.

Troubleshooting Common Stabilization Issues

Stabilizer problems like puckering‚ lint buildup‚ or breakage are common; addressing these issues promptly ensures quality embroidery and extends machine lifespan significantly.

Dealing with Puckering and Distortion

Puckering and distortion in embroidery frequently stem from inadequate stabilization‚ particularly with stretchy or delicate fabrics. Ensuring proper hoop tension is paramount; overly tight hoops can distort the fabric‚ while loose ones allow movement during stitching. Selecting a stabilizer weight appropriate for the fabric and design density is crucial – lighter fabrics require lighter stabilizers‚ and denser designs demand heavier support.

Consider using a temporary spray adhesive to secure the fabric to the stabilizer‚ preventing shifting. For particularly problematic areas‚ layering stabilizers can provide enhanced support. Reducing stitch density in areas prone to puckering can also alleviate the issue. Always test on a scrap piece of fabric before embroidering the final design to identify and correct any stabilization problems.

Preventing Excessive Lint in Bobbin Cases

Excessive lint buildup in bobbin cases is a common embroidery issue‚ often linked to stabilizer disintegration during stitching; Lower quality or improperly chosen stabilizers are primary culprits; tear-away and water-soluble stabilizers are particularly prone to shedding. Regularly cleaning the bobbin area – after each design‚ or even mid-stitch for dense designs – is essential.

Using a good quality stabilizer specifically designed for machine embroidery significantly reduces lint. Slowing down the stitching speed can also minimize friction and stabilizer breakdown. Consider using a bobbin cover to contain loose lint. Inspect stabilizer edges for fraying before stitching‚ and trim any loose threads. Proper machine maintenance‚ including regular oiling‚ contributes to smoother operation and reduced lint production.

Addressing Stabilizer Breakage During Embroidery

Stabilizer breakage mid-stitch can halt a project and cause significant frustration. Often‚ this stems from using an insufficient stabilizer weight for the design’s density or fabric type. Ensure the stabilizer adequately supports all stitches‚ especially fills. A heavier weight stabilizer is crucial for intricate or high-stitch-count designs.

Check needle sharpness; a dull needle increases friction and can tear the stabilizer. Reduce stitching speed to lessen stress on both the stabilizer and the fabric. Verify proper tension settings‚ as incorrect tension can contribute to breakage. If breakage persists‚ try a different stabilizer brand or type. Carefully inspect the stabilizer for pre-existing weaknesses before hooping.

Advanced Embroidery Placement Techniques

Layering stabilizers enhances support‚ while combining types caters to complex designs; floating stabilizers are ideal for delicate fabrics‚ preventing distortion and damage.

Layering Stabilizers for Enhanced Support

Layering embroidery stabilizers is a powerful technique for providing exceptional support‚ particularly when working with dense stitch designs or challenging fabrics. This method involves using multiple layers of stabilizer‚ often combining different types to achieve optimal results. For instance‚ a base layer of a heavier cut-away stabilizer can provide a firm foundation‚ while a layer of water-soluble stabilizer on top can help prevent stitch distortion and provide a clean finish;

The key to successful layering is understanding the properties of each stabilizer and how they complement each other. Consider the fabric weight and stretch‚ the stitch density‚ and the desired level of support. Heavier fabrics and denser designs generally require more layers or heavier-weight stabilizers. Experimentation is crucial to determine the ideal combination for your specific project‚ ensuring a professional and durable embroidered outcome.

Using Multiple Stabilizer Types in a Single Design

Employing diverse stabilizer types within a single embroidery design unlocks advanced support and tailored solutions for complex projects. This strategy addresses varying needs across different design elements‚ optimizing stabilization where it’s most critical. For example‚ a dense floral motif might benefit from a water-soluble topper to prevent stitches from sinking into the fabric‚ combined with a cut-away stabilizer beneath for overall stability.

Consider using tear-away stabilizers in areas requiring flexibility‚ while reserving cut-away for sections demanding rigid support. This nuanced approach minimizes puckering and distortion‚ ensuring a polished finish. Careful planning is essential; ensure compatibility between stabilizer types and consider removal methods to avoid damaging the embroidery. This technique elevates your work‚ achieving professional-quality results.

Floating Stabilizers for Delicate Fabrics

For exceptionally delicate fabrics like lace or sheer materials‚ “floating” stabilizers offer a non-invasive support solution. Unlike traditional methods‚ floating involves placing a water-soluble or heat-away stabilizer on top of the fabric‚ directly under the design‚ without fully adhering it. This prevents fabric distortion and minimizes the risk of stabilizer residue remaining visible.

Water-soluble stabilizers are particularly effective‚ dissolving completely during washing‚ leaving no trace. Heat-away films provide temporary stiffness during embroidery‚ then vanish with a gentle iron. This technique is ideal for intricate designs on fragile materials‚ preserving their inherent beauty. Careful stitch density adjustments are crucial to prevent puckering‚ ensuring a flawless‚ lightweight finish.

Guide

how much do you tip fishing guides

Understanding Fishing Guide Tipping Etiquette

Gratuity for fishing guides acknowledges their dedication and expertise, reflecting the overall experience, not just the fish caught.
Understanding these nuances ensures appropriate appreciation.

The Importance of Tipping

Tipping a fishing guide is a significant gesture of gratitude for their hard work, local knowledge, and commitment to providing a memorable experience. It goes beyond a simple service charge, recognizing the guide’s expertise in navigating waters, locating fish, and ensuring angler safety.

Guides often invest heavily in their equipment, boat maintenance, and ongoing education. A tip supplements their income, acknowledging these costs and the dedication required to excel in their profession. It’s a direct way to show appreciation for a well-executed trip, regardless of the fishing success.

Recognizing Hard Work and Dedication

Fishing guides demonstrate remarkable dedication, often working long hours in challenging conditions to ensure client satisfaction. Their expertise extends beyond fishing; they’re educators, navigators, and problem-solvers, constantly adapting to changing weather and fish behavior.

Recognizing this effort with a generous tip acknowledges their commitment to providing a safe, enjoyable, and informative experience. It’s a tangible expression of gratitude for their professionalism, patience, and willingness to go the extra mile. A tip validates their skills and passion for the sport.

When to Consider Tipping

Consider tipping your fishing guide before or at the conclusion of the trip, reflecting on the entire experience. While not always mandatory, tipping is customary for exceptional service and a memorable outing.

Evaluate the guide’s effort, knowledge shared, and overall contribution to your enjoyment. Factors like weather conditions, fish activity, and the guide’s ability to adapt should influence your decision. Even on slower fishing days, acknowledge their hard work and dedication with a thoughtful gratuity.

Standard Tipping Practices in the US

A 20% tip is generally considered standard for US fishing guides, acknowledging their service. However, factors like experience and trip quality influence this amount.

The 20% Guideline

The 20% benchmark serves as a solid foundation for expressing gratitude to your fishing guide for a well-executed trip. This percentage is calculated on the total cost of the charter, encompassing all fees associated with the experience. It’s a widely accepted practice, demonstrating respect for the guide’s time, knowledge, and effort.

However, remember this is a starting point. Exceptional service, going above and beyond to enhance your day, often warrants a higher gratuity. Conversely, while rare, significantly subpar service might justify a slight adjustment. Ultimately, the 20% guideline provides a convenient and respectful baseline for tipping your fishing guide in the US.

Factors Influencing the Tip Amount

Several elements beyond the base 20% can sway your tipping decision. The guide’s proactive fish-finding skills, willingness to cater to your skill level, and overall positive attitude are key considerations. A guide who patiently teaches techniques or adapts to challenging conditions deserves recognition.

Furthermore, the condition of the boat, quality of equipment, and the guide’s knowledge of the local fishery contribute to the experience. Remember, a tip reflects the entire trip – not solely the number of fish landed. Consider these factors when determining a fair and appreciative gratuity.

Total Trip Experience as a Key Factor

Ultimately, your fishing guide’s tip should mirror the complete experience, encompassing more than just the fish count. Days with slow bites or adverse weather don’t necessarily warrant a reduced tip if the guide demonstrated exceptional effort, knowledge, and a positive attitude.

Conversely, abundant catches don’t automatically justify a larger tip; assess the guide’s contribution to the success. Was the experience enjoyable, informative, and safe? A truly memorable trip, regardless of the catch, deserves generous recognition through a thoughtful gratuity.

Beyond the 20% Standard

Exceptional service—going above and beyond—justifies tips exceeding 20%. Consider expertise, effort, and creating a memorable experience when determining gratuity amounts.

Exceptional Service Deserving Higher Tips

Guides demonstrating exceptional service truly elevate the fishing experience, warranting a tip beyond the standard 20%. This includes proactively catering to angler skill levels, providing detailed instruction, and consistently ensuring safety and comfort throughout the trip.

Going the extra mile – like cleaning fish beyond expectations, offering insightful local knowledge, or adapting to changing conditions with remarkable skill – deserves recognition. A higher tip reflects genuine appreciation for a guide’s dedication to creating an unforgettable and successful outing. Consider 25-30% for truly outstanding performance.

Poor Service and Adjusting the Tip

While tipping is customary, it’s directly tied to the quality of service received. If a guide is unprepared, lacks knowledge, demonstrates a poor attitude, or compromises safety, adjusting the tip is reasonable. Open communication is key; politely address concerns with the guide or charter operator first.

Reducing or even foregoing a tip should be a last resort, reserved for genuinely unacceptable service. Consider the circumstances – were issues within the guide’s control? A reduced tip (10-15%) or no tip should reflect the diminished experience, but avoid confrontation.

Considering the Guide’s Expertise

A guide’s knowledge significantly impacts the trip, justifying a generous tip. Experienced guides possess invaluable local insights, fish-finding skills, and safety expertise. They often go above and beyond, tailoring the experience to your skill level and preferences.

Guides demonstrating exceptional knowledge – identifying species, understanding weather patterns, teaching techniques – deserve recognition. Consider a higher tip (20-25%) for guides who elevate the trip beyond expectations through their expertise and dedication to providing a memorable angling experience.

Tipping on Different Types of Fishing Trips

Tipping varies based on the trip type: fly fishing, saltwater charters, and freshwater excursions each have unique customs, generally following the 20% guideline.

Fly Fishing Guide Tipping

For fly fishing guides, a 20% tip based on the total trip cost remains a standard practice, acknowledging their specialized skills in casting, fly selection, and river knowledge. However, consider exceeding this for exceptional instruction or navigating challenging conditions.

Factors like personalized attention, willingness to adapt to skill levels, and overall enhancement of the fly fishing experience justify a higher gratuity. Even on days with limited fish, a guide’s expertise in technique and river reading deserves recognition.

Remember, a tip reflects not just the catch, but the entire guided experience and the guide’s commitment to your angling success.

Saltwater Fishing Charter Tipping

Saltwater charter tipping often involves the entire crew, not just the captain. A 20% tip is customary, but consider splitting it amongst the captain, first mate, and deckhands based on their service. Exceptional fish handling, boat maintenance, and proactive assistance warrant a generous tip.

If the crew works tirelessly to locate fish and provide a safe, enjoyable experience, even with a modest catch, a higher gratuity is appropriate. Conversely, poor service or lack of effort may justify a reduced tip.

Remember to factor in the overall effort and dedication demonstrated by the entire charter team.

Freshwater Fishing Guide Tipping

For freshwater fishing guides, a 20% tip remains a solid benchmark, but flexibility is key. The total trip experience heavily influences gratuity; consider the guide’s knowledge, teaching ability, and effort in finding fish. Exceptional guides who go above and beyond deserve recognition.

If the guide provides valuable instruction, expertly navigates the water, and creates a memorable experience, increase the tip accordingly. Days with limited fish due to weather or conditions shouldn’t necessarily penalize a hardworking guide;

Personalize the tip based on the value received.

International Tipping Customs

Tipping expectations vary globally; research local norms before your trip. Currency considerations are crucial, and understanding cultural etiquette is paramount for respectful gratuity.

Varying Expectations Around the World

Global tipping practices for fishing guides differ significantly from US standards. In some countries, tipping isn’t customary or is considered impolite, while others anticipate it. For example, in certain parts of Central America, a smaller percentage, around 10%, might be appropriate, or a fixed amount.

Conversely, destinations like New Zealand often don’t require tipping, as guides are typically well-compensated. Always prioritize researching the specific region’s customs. Ignoring local etiquette can be seen as disrespectful, so understanding these nuances is vital for a positive experience and showing appreciation appropriately.

Researching Local Tipping Norms

Before your international fishing trip, diligent research into local tipping customs is crucial. Online fishing forums and travel websites dedicated to the destination often provide valuable insights. Consult guide associations specific to that region for their recommendations.

Don’t hesitate to ask your tour operator or hotel concierge about appropriate gratuity levels. Understanding whether tips are included in the package price is also essential. Being informed demonstrates respect for the local culture and ensures you express gratitude in a manner that is well-received and appreciated.

Currency Considerations for International Trips

When tipping fishing guides internationally, consider the local currency and exchange rates. US dollars are often accepted, particularly in tourist areas, but local currency is generally preferred. Determine if the guide prefers cash or if credit card tips are feasible, accounting for potential transaction fees.

Small bills are always appreciated for easier distribution amongst crew members. Research the current exchange rate to calculate an appropriate tip amount equivalent to the standard 20% guideline. Being prepared with the correct currency demonstrates respect and simplifies the process.

What Impacts a Fishing Guide’s Income?

A guide’s income is affected by expenses, seasonality, and licensing costs. Tips supplement their base income, recognizing effort even on challenging, low-catch days.

Expenses Guides Cover

Fishing guides shoulder significant operational costs that directly impact their earnings. These expenses extend far beyond just the boat and tackle; they encompass fuel for the vessel, essential maintenance and repairs to keep it running smoothly, and comprehensive insurance coverage for both liability and the boat itself.

Guides also bear the cost of necessary licensing and permits required to operate legally, alongside continual professional development to enhance their expertise. Providing all the necessary fishing equipment, bait, and often even refreshments for clients adds to these financial burdens. Recognizing these substantial outlays is crucial when considering appropriate gratuity.

Seasonality of the Work

The income of a fishing guide is often heavily influenced by the seasonal nature of the work. Peak seasons, when fishing is most productive and demand is highest, provide the bulk of their annual earnings. However, off-season periods can bring significantly reduced income, or even complete unemployment.

Guides must budget carefully to cover living expenses throughout the year, relying on income earned during the busy season to sustain them during slower times. A generous tip, particularly during successful trips, can greatly help bridge the gap during these lean months, acknowledging the unpredictable nature of their profession.

Guide Licensing and Insurance Costs

Operating as a professional fishing guide involves substantial ongoing expenses beyond just boat maintenance and tackle. Guides are typically required to obtain and maintain specific licenses and permits to legally operate in their fishing areas, representing a significant financial investment.

Furthermore, comprehensive liability insurance is crucial to protect both the guide and their clients. These costs, combined with potential vehicle expenses and marketing efforts, eat into a guide’s earnings. A thoughtful tip acknowledges these often-overlooked business necessities and supports their professionalism.

Alternatives to Monetary Tips

Positive online reviews and referrals are incredibly valuable, alongside thoughtful gifts. Social media shout-outs also demonstrate appreciation for a guide’s hard work and expertise.

Positive Reviews and Referrals

Beyond a monetary tip, consider the lasting impact of a glowing review. Online platforms are crucial for guides, influencing future bookings and their livelihood. Detailed feedback highlighting exceptional service, expertise, and a positive experience is invaluable.

Referrals are equally powerful; sharing your positive experience with fellow anglers directly contributes to a guide’s success. Word-of-mouth remains a significant driver of business in the fishing industry. Taking the time to recommend a guide demonstrates genuine appreciation and supports their continued dedication to providing memorable angling adventures.

Gifts as a Token of Appreciation

While a monetary tip remains standard, thoughtful gifts can supplement your gratitude. Consider items reflecting the guide’s passions or useful for their profession. High-quality fishing accessories, a durable multi-tool, or even a gift certificate to a local fly shop are excellent choices.

Personalized gifts demonstrate extra care, but always ensure they are appropriate and considerate. Homemade treats or local specialties can also be a nice touch. Remember, the gesture’s sincerity matters more than the gift’s monetary value, showcasing your appreciation beyond a simple gratuity.

Social Media Shout-Outs

In today’s digital age, a positive social media mention can significantly benefit a fishing guide’s business. A heartfelt post detailing your experience, tagging the guide and any associated charter or lodge, expands their reach to potential clients.

Include photos or videos from your trip, highlighting the guide’s expertise and the memorable moments created. Positive online reviews on platforms like Google or Yelp are equally valuable. These digital endorsements are powerful alternatives, complementing a monetary tip and boosting the guide’s reputation.

Specific Scenarios and Tipping

Tip amounts should reflect the trip’s overall quality, regardless of fish quantity; exceptional effort deserves recognition, while poor service may warrant adjustment.

Trips with Limited Fish Caught

Even when the fishing is slow, a guide’s skill and effort deserve consideration. Tipping should focus on the total experience, encompassing factors beyond the number of fish landed.

Did the guide work tirelessly to locate fish, provide helpful instruction, and maintain a positive attitude? If so, a standard 15-20% tip is still appropriate.

Reducing the tip significantly due to a lack of fish can be discouraging. Communicate concerns directly with the guide, but remember external factors often influence fishing success.

A guide’s knowledge, boat handling, and commitment to safety are valuable, regardless of the catch rate, and should be acknowledged through appropriate gratuity.

Trips with Abundant Fish Caught

A successful fishing trip warrants a generous tip, reflecting the guide’s skill in locating and helping you catch fish. While 20% remains standard, consider exceeding this amount for exceptional service.

If the guide went above and beyond – providing personalized instruction, cleaning fish meticulously, or offering extra insights – a tip of 25-30% is a thoughtful gesture.

Remember, abundant fish aren’t solely due to luck; they represent the guide’s expertise and hard work.

Rewarding exceptional performance encourages continued dedication and enhances the overall fishing experience for future anglers. Don’t hesitate to show your appreciation!

Multi-Day Fishing Trips

For extended fishing adventures, tipping practices differ slightly. Instead of tipping daily, it’s customary to wait until the trip’s conclusion and provide a single, larger gratuity.

Calculate the total cost of the trip, including lodging, meals, and guide services, then apply a 15-20% tip based on the overall experience.

Exceptional service throughout the duration – consistent fish finding, excellent meals, and attentive care – justifies a tip towards the higher end of that range.

Consider the cumulative effort and dedication demonstrated over multiple days when determining the appropriate amount;

Tipping Lodge Staff and Crew

Extend gratitude to support staff! Consider tipping deckhands, cooks, and other crew members, often 10-20% of the guide’s fee, or a collective pool.

Deckhands and First Mates

Deckhands and first mates are integral to a smooth and enjoyable fishing experience. Their contributions often include baiting hooks, handling fish, maintaining the vessel, and ensuring passenger safety. A tip of 10-15% of the total charter cost, or a flat rate of $50-$100 per day, is a customary expression of appreciation for their hard work.

If the deckhand provides exceptional service – going above and beyond to assist with gear, offer fishing advice, or create a positive atmosphere – consider increasing the tip accordingly. Splitting the tip evenly among the crew is also a common practice, especially on larger vessels with multiple staff members.

Cooks and Other Support Staff

Often overlooked, cooks and other support staff significantly enhance the overall fishing trip experience. If meals are provided, a tip of $20-$50 per day for the cook is a thoughtful gesture, acknowledging their culinary efforts. For other support staff, such as those maintaining the lodge or assisting with gear, a collective tip of $20-$100 for the entire trip is appropriate.

Consider the level of service provided; exceptional meals or particularly helpful assistance warrant a higher tip. Similar to deckhands, pooling tips amongst all support staff can ensure everyone is recognized for their contributions.

Splitting the Tip Among the Crew

On larger charters with multiple crew members, determining how to distribute the tip can be tricky. A common practice is to divide the total tip proportionally based on each crew member’s role and contribution. The captain typically receives the largest share, followed by the first mate/deckhand.

Discussing tip allocation with the captain beforehand can clarify expectations. Alternatively, leaving the tip with the captain to distribute ensures fair apportionment, acknowledging everyone’s hard work and dedication to a successful trip.

Common Misconceptions About Tipping

Tipping isn’t always mandatory, nor does it automatically cover all trip costs; guides deserve a tip based on service quality and effort provided.

Tipping is Mandatory

The belief that tipping a fishing guide is strictly mandatory is a common misunderstanding. While deeply ingrained in the culture of showing appreciation for excellent service, a tip isn’t a contractual obligation.
Guides provide a service, and exceptional service deserves recognition, but a lack of a tip doesn’t negate the cost of the charter itself.

However, consistently not tipping can be viewed negatively within the guiding community. It’s more accurate to consider tipping a customary practice, a gesture of gratitude reflecting the guide’s effort, expertise, and contribution to a memorable experience, rather than a required fee.

The Tip Covers All Costs

A frequent misconception is that the tip supplements the guide’s income to cover their operational expenses. This isn’t entirely accurate; the charter fee is intended to cover fuel, boat maintenance, tackle, licenses, and insurance.


The tip is specifically a reward for the guide’s skill, knowledge, customer service, and effort in creating a positive fishing experience. While guides do absorb significant costs, the tip isn’t a reimbursement for those, but rather a bonus acknowledging exceptional performance and dedication to client satisfaction.

Guides Expect a Tip Regardless of Service

The notion that fishing guides automatically expect a tip, irrespective of the service provided, is a common misunderstanding. While tipping is customary and appreciated, it should always be contingent upon the quality of the experience.

Guides strive to deliver exceptional service, but factors like weather or fish behavior are beyond their control. A tip should reflect effort, expertise, and a positive attitude, not simply a default expectation. Adjusting the tip based on service quality is perfectly acceptable and understood.

Resources for Further Information

Explore online fishing forums, guide associations, and travel websites for detailed tipping guides and community insights to refine your gratuity approach.

Online Fishing Forums and Communities

Engaging with online fishing forums and communities provides a wealth of firsthand experiences regarding tipping practices. Anglers frequently discuss appropriate gratuity amounts based on various trip scenarios, offering valuable perspectives beyond standard guidelines. Platforms like MidCurrent and Tom’s Catch Blog host discussions where users share their experiences and regional nuances.

These forums are excellent resources for understanding local customs and gaining insights into what fellow anglers consider fair compensation for exceptional service. You can find specific threads dedicated to tipping etiquette for different types of fishing – fly fishing, saltwater charters, and freshwater excursions – ensuring informed decisions.

Fishing Guide Associations

Professional fishing guide associations often provide resources and guidelines regarding appropriate tipping etiquette. While they rarely dictate specific amounts, they emphasize recognizing exceptional service and hard work. These associations champion ethical practices within the industry, subtly promoting fair compensation for guides.

Checking the websites of regional or national guide associations can offer insights into industry standards and expectations. They may feature articles or FAQs addressing gratuity, helping anglers understand the value a guide brings to the experience. Associations often prioritize client satisfaction and guide professionalism, indirectly supporting reasonable tipping practices.

Travel Websites with Tipping Guides

Numerous travel websites offer comprehensive tipping guides, often including specific advice for fishing charters and guided trips. These resources typically recommend a standard of 20% of the total trip cost as a baseline for good service. However, they also stress that this is a guideline, and adjustments should be made based on the quality of the experience.

Websites frequently highlight factors like the guide’s knowledge, helpfulness, and overall effort as justification for increasing the tip. They also acknowledge that exceptional catches aren’t the sole determinant of gratuity.

Guide

buck alaskan guide

Buck Alaskan Guide: An Overview

Buck knives are deeply ingrained in Alaskan hunting traditions, favored by seasoned guides like Mike Bowden of Hidden Alaska Guides and Outfitters.

Kodiak Guide Service utilizes Buck knives for processing Sitka deer, showcasing their reliability in demanding conditions. These tools represent a legacy of quality.

Historical Significance of Buck Knives in Alaskan Hunting

Buck knives have a storied past intertwined with the rugged landscape of Alaskan hunting. For generations, these blades have been trusted companions for hunters and guides navigating the challenging terrain and demanding conditions of the Last Frontier. Their reputation isn’t merely marketing; it’s built on decades of proven performance.

The enduring popularity stems from their durability and reliability – qualities essential when far from civilization. Early Alaskan hunters quickly recognized the value of a knife that could withstand harsh weather, heavy use, and the rigors of field dressing big game. Guides, like those at Kodiak Guide Service, depended on consistent performance.

The classic Buck 110 Folding Hunter, in particular, became a symbol of quality and craftsmanship. Its robust design and dependable locking mechanism made it a favorite among those pursuing Sitka blacktail deer and larger game. This historical reliance continues today, solidifying Buck’s place as an iconic brand within Alaskan hunting culture.

The Role of a Hunting Guide in Alaska

Alaskan hunting guides play a crucial role, extending far beyond simply leading clients to game. They are experts in navigating the vast wilderness, possessing intimate knowledge of animal behavior, terrain, and weather patterns. Safety is paramount; guides ensure hunts are conducted responsibly and ethically, adhering to strict regulations.

A skilled guide, such as those from Hidden Alaska Guides and Outfitters or Kodiak Guide Service, provides invaluable assistance with all aspects of the hunt – from scouting and tracking to field dressing and packing out harvested game. They often possess extensive first-aid training and are prepared for emergencies.

Furthermore, guides enhance the overall hunting experience, offering insights into Alaskan wildlife and ecosystems. They frequently rely on dependable tools like Buck knives for efficient game processing, demonstrating their commitment to quality and preparedness. Their expertise transforms a hunt into a memorable and successful adventure.

Popular Buck Knife Models for Alaskan Guides

Buck’s 110 Folding Hunter, Vantage Force, Pursuit, Open Season Skinner, and Paklite Skinner are frequently chosen by Alaskan guides for their durability and function.


Buck 110 Folding Hunter: A Classic Choice

The Buck 110 Folding Hunter stands as an iconic and enduring symbol of quality within the hunting community, and its popularity extends deeply into the rugged landscapes of Alaska. This knife boasts a robust design, featuring a strong blade typically crafted from 440C stainless steel, known for its excellent edge retention and corrosion resistance – crucial attributes when operating in Alaska’s diverse environments.

With over 25 variations available, guides can select a 110 model tailored to their specific needs. The knife’s lockback mechanism provides secure blade deployment, essential for safe and efficient field dressing. Its full tang construction contributes to overall strength and balance, making it a reliable companion for processing game. Many Alaskan hunting guides appreciate the 110’s versatility, utilizing it for tasks ranging from initial game preparation to detailed skinning and butchering. The classic wood handle offers a comfortable and secure grip, even in challenging weather conditions, solidifying its place as a trusted tool for generations of hunters and guides.

Buck Vantage Force: Durability and Versatility

The Buck Vantage Force is engineered for demanding use, making it a favored choice among Alaskan hunting guides who require a knife capable of withstanding harsh conditions. Constructed with a robust blade, often featuring a coated 420HC stainless steel, it delivers exceptional strength and corrosion resistance – vital for Alaska’s wet and challenging terrain.

Its glass-filled nylon handle provides a secure and comfortable grip, even when wet or gloved, enhancing control during critical tasks. The Vantage Force’s versatility shines through its suitability for a wide range of applications, from processing big game like moose to preparing smaller game such as Sitka deer. The secure frame lock mechanism ensures safe blade deployment and prevents accidental closure during use. Guides value its lightweight design, minimizing pack weight during extended backcountry expeditions. This knife represents a modern blend of durability, functionality, and ergonomic design, making it a reliable asset for any Alaskan hunting professional.

Buck Pursuit: Lightweight and Functional

For Alaskan hunting guides prioritizing minimal weight without sacrificing performance, the Buck Pursuit series offers an excellent solution. Designed with a focus on streamlined functionality, the Pursuit boasts a lightweight build, crucial for long days spent navigating the Alaskan wilderness. Its blade, often crafted from 420HC stainless steel, provides a balance of sharpness, edge retention, and corrosion resistance.

The textured handle, typically made from glass-filled nylon, ensures a secure and comfortable grip, even in challenging weather conditions. Guides appreciate its versatility for tasks like game processing, camp chores, and emergency situations. The Pursuit’s design emphasizes ease of carry and deployment, making it a practical tool for quick access in the field. It’s a dependable choice for guides who need a reliable, lightweight knife that won’t weigh them down during extended hunts, particularly when packing light is essential for mobility and efficiency.

Buck Open Season Skinner: Ideal for Processing Game

Alaskan hunting guides consistently rely on efficient game processing, and the Buck Open Season Skinner is specifically engineered for this purpose. Its curved blade, often featuring a satin finish, is designed to facilitate precise skinning and caping, minimizing waste and maximizing yield. The ergonomic handle, typically constructed from durable materials like Micarta or G10, provides a secure and comfortable grip, even with gloved hands or in cold conditions.

Guides value the Skinner’s ability to navigate tight spaces and contours during processing, ensuring clean and efficient work. The blade’s shape allows for controlled cuts, crucial for preserving the quality of harvested game. Available in various blade steels, including 420HC and 154CM, the Open Season Skinner offers a balance of sharpness, edge retention, and corrosion resistance. It’s a go-to choice for guides who demand a dedicated skinning knife capable of handling the demands of Alaskan big game.

Buck Paklite Skinner: Maximizing Pack Weight Efficiency

For Alaskan hunting guides prioritizing lightweight gear, the Buck Paklite Skinner presents an exceptional solution; Every ounce counts when navigating remote wilderness areas, and this knife minimizes pack weight without sacrificing essential functionality. Featuring a skeletonized handle construction, the Paklite significantly reduces bulk while maintaining a surprisingly robust feel in hand.

The high-carbon stainless steel blade offers a keen edge for efficient skinning and processing, crucial for guides managing multiple harvests. Despite its lightweight design, the Paklite Skinner doesn’t compromise on durability. It’s built to withstand the rigors of field use, offering reliable performance throughout extended hunts. Guides appreciate its packability and the ability to quickly deploy it when needed, making it an invaluable tool for minimizing weight and maximizing efficiency in the Alaskan backcountry.

Essential Features for Alaskan Hunting Knives

Alaskan hunting demands knives with superior blade steel, like 154CM, durable handle materials—Micarta or G10—and reliable locking mechanisms for safety and performance.

Blade Steel: 154CM and its Advantages

When selecting a Buck knife for the rigors of Alaskan hunting, the blade steel is paramount. 154CM stainless steel consistently emerges as a top choice among guides and hunters alike, and for very good reason. This high-carbon stainless steel strikes an exceptional balance between hardness, toughness, and corrosion resistance – crucial attributes when facing the unpredictable Alaskan wilderness.

Compared to other stainless steels, 154CM holds an edge remarkably well, reducing the frequency of sharpening in the field. This is invaluable during extended hunts where convenience and efficiency are key. Furthermore, its toughness prevents chipping or breaking, even when subjected to demanding tasks like processing large game. The stainless composition provides significant resistance to rust and staining, vital in the damp Alaskan environment.

Buck Knives frequently utilize 154CM in many of their popular models, ensuring hunters receive a blade capable of withstanding harsh conditions and delivering consistent performance. This steel allows for a keen edge, making it ideal for precise work during field dressing and butchering.

Handle Materials: Micarta, G10, and Wood

The handle material of an Alaskan hunting knife is as critical as the blade steel, impacting grip, durability, and overall comfort. Buck knives offer a range of options, each suited to different preferences and hunting scenarios. Micarta, a composite material made from linen or canvas impregnated with resin, is a popular choice for its exceptional durability and resistance to moisture. It provides a secure grip even when wet, essential in Alaskan conditions.

G10, a fiberglass-epoxy laminate, offers similar benefits to Micarta, boasting superior strength and resistance to cracking. It’s often favored for its lighter weight and modern aesthetic. Traditional wood handles, while aesthetically pleasing, require more maintenance to prevent warping or cracking from moisture exposure.

Alaskan guides often prioritize Micarta or G10 for their reliability in harsh environments. A secure and dependable grip is paramount when handling game, and these materials consistently deliver, ensuring safe and efficient operation in the field.

Locking Mechanisms: Frame Locks and Back Locks

A robust locking mechanism is non-negotiable for an Alaskan hunting knife, ensuring blade stability during demanding tasks like processing game. Buck knives commonly employ two primary locking systems: frame locks and back locks. Frame locks utilize the knife’s frame itself to engage and lock the blade, offering a streamlined and reliable design. They are known for their strength and ease of operation with one hand.

Back locks, also known as spine locks, feature a spring-loaded bar that engages behind the blade’s tang, providing a secure and audible lock. This mechanism is highly durable and resistant to accidental disengagement. The choice between the two often comes down to personal preference and intended use.

Alaskan guides require a locking mechanism they can depend on implicitly, especially when working with large game. Both frame and back locks, when properly maintained, offer the necessary security for safe and efficient field work.

Choosing the Right Buck Knife for Specific Alaskan Game

Selecting the ideal Buck knife hinges on the quarry; Sitka deer demand precision, moose require robust blades, and bear hunting necessitates substantial, reliable tools.

Sitka Blacktail Deer Hunting with Buck Knives

Sitka Blacktail deer hunting in Alaska presents unique challenges, demanding a knife that balances agility and strength. Guides, like those at Kodiak Guide Service, frequently rely on Buck knives for precise field dressing. The Buck 110 Folding Hunter, a classic choice, offers a dependable blade length and locking mechanism suitable for initial caping and hide removal.

However, for more intricate work, the Buck Open Season Skinner proves invaluable. Its curved blade excels at separating the hide from the carcass efficiently, minimizing waste. The lightweight nature of the Buck Pursuit also makes it a viable option for hunters prioritizing pack weight.

Crucially, maintaining a razor-sharp edge is paramount. Alaskan conditions can quickly dull a blade, so field sharpening tools are essential. A properly chosen Buck knife, coupled with diligent maintenance, transforms a challenging hunt into a rewarding experience, ensuring ethical and efficient game processing;

Moose Hunting and Knife Selection

Moose hunting in Alaska necessitates a robust and durable knife capable of handling large game. Alaskan hunting guides prioritize knives that can withstand heavy use and prolonged exposure to harsh elements. The Buck Vantage Force, with its strong blade steel (often 154CM), emerges as a top contender for initial breakdown tasks. Its full tang construction ensures exceptional strength during quartering.

For detailed processing, the Buck Paklite Skinner offers a balance between weight and functionality. Its design facilitates efficient hide removal, crucial when dealing with a moose’s substantial hide. Guides often appreciate the ergonomic handle materials, like Micarta, providing a secure grip even with gloved hands.

Sharpening becomes even more critical with moose hunting due to the sheer volume of work. A reliable sharpening stone and honing steel are indispensable tools for maintaining peak performance throughout the process, ensuring clean and precise cuts.

Bear Hunting Considerations and Knife Choice

Bear hunting in Alaska demands a knife prioritizing safety and substantial cutting power. Alaskan guides emphasize a blade capable of quickly and efficiently processing thick hides and dense muscle tissue. The Buck 110 Folding Hunter, a classic choice, provides a reliable and versatile option for initial field dressing. Its lockback mechanism offers secure blade deployment, crucial in a potentially stressful situation.

However, for more specialized tasks like caping, the Buck Open Season Skinner proves invaluable. Its curved blade excels at precise skinning around the head and paws. Handle material is paramount; G10 or Micarta offer superior grip even when wet or covered in blood.

Guides consistently stress the importance of maintaining a razor-sharp edge. A dull knife increases the risk of injury to both the hunter and the animal. Regular sharpening in the field is non-negotiable when dealing with a bear harvest.

Alaskan Guide Services Featuring Buck Knives

Kodiak Guide Service relies on Buck knives for processing game, particularly Sitka deer, while Hidden Alaska Guides, led by Mike Buck Bowden, also utilizes them.

Kodiak Guide Service and Buck Knife Usage

Kodiak Guide Service, operating in areas renowned for exceptional Sitka blacktail deer, consistently demonstrates a strong reliance on Buck knives within their hunting operations. Mike Horstman’s service prioritizes quality equipment, and Buck knives have proven themselves indispensable for field dressing and processing harvested game.

The demanding Alaskan wilderness requires tools capable of withstanding harsh conditions, and Buck knives deliver. Guides at Kodiak Guide Service appreciate the knives’ durability, sharpness retention, and comfortable grip – essential features during long days in the field. Their preference isn’t merely anecdotal; it’s a practical choice based on years of experience.

Specifically, the efficient processing of Sitka deer necessitates a reliable blade, and Buck knives consistently meet this need. Clients benefit from the professionalism and preparedness exhibited by guides equipped with such trusted tools, contributing to a successful and ethical hunting experience. The service’s commitment to quality extends to every aspect of their operations, including their choice of cutlery.

Hidden Alaska Guides and Outfitters ― Mike Buck Bowden

Mike Buck Bowden, the owner and operator of Hidden Alaska Guides and Outfitters, embodies the spirit of Alaskan hunting expertise. His personal connection to the region and dedication to providing exceptional hunting experiences are well-regarded within the guiding community.

While specific knife models utilized aren’t explicitly detailed, Bowden’s commitment to quality service suggests a preference for reliable and durable tools – qualities synonymous with Buck knives. A seasoned outfitter understands the critical role a dependable knife plays in successful game processing and overall safety in the wilderness.

Hidden Alaska Guides and Outfitters likely employs knives for a variety of tasks, from preparing game for transport to addressing unexpected field repairs. Bowden’s operation prioritizes a seamless and professional experience for clients, and dependable equipment is fundamental to achieving this goal. His “little slice” of Alaska demands tools that can withstand its challenges;

Knife Maintenance and Care in the Alaskan Wilderness

Alaskan guides prioritize consistent sharpening for field readiness, alongside diligent cleaning to prevent corrosion. Proper sheaths and carry systems are also essential for safety.

Sharpening Techniques for Field Use

Maintaining a razor-sharp edge is paramount for Alaskan hunting guides, demanding proficiency in field sharpening techniques. A dull knife compromises safety and efficiency during game processing. Guides often rely on portable sharpening stones, specifically diamond stones, for their durability and effectiveness in restoring a keen edge.

The technique involves establishing a consistent angle – typically around 20 degrees – and drawing the blade across the stone in a controlled manner. Light pressure is key, focusing on removing minimal steel to avoid altering the blade’s geometry. Alternating sides with each stroke ensures even sharpening.

Stropping with a leather strop after sharpening refines the edge, removing any remaining burrs and achieving a polished finish. Some guides also utilize field-expedient methods, like using the smooth underside of a ceramic mug, though these are less precise. Regular, brief sharpening sessions are far more effective than infrequent, extensive ones, preserving the knife’s performance throughout a hunt.

Cleaning and Preventing Corrosion

The harsh Alaskan environment, with its moisture and exposure to organic matter, necessitates diligent knife cleaning and corrosion prevention for hunting guides. After each use, a Buck knife should be thoroughly cleaned with warm water and mild soap to remove blood, tissue, and debris. Avoid abrasive cleaners that can damage the blade finish.

Complete drying is crucial; even residual moisture can initiate rust. A soft cloth should be used to wipe the blade and handle meticulously. Applying a thin coat of a quality knife oil, like mineral oil or a specialized corrosion inhibitor, forms a protective barrier against moisture and salt air.

Regular oiling is especially important during prolonged storage or in humid conditions. Leather sheaths, while convenient, can trap moisture, so periodic removal of the knife and sheath cleaning is recommended. Proper care extends the life of a Buck knife, ensuring its reliability for years of service in the field.

Proper Sheath and Carry Systems

For Alaskan hunting guides, a secure and accessible knife carry system is paramount. Leather sheaths are traditional, offering durability and protection, but nylon or Kydex options provide lighter weight and faster draw times. The chosen sheath must securely retain the Buck knife, preventing accidental deployment during rigorous activity.

Carry location depends on personal preference and hunting style. Many guides favor a vertical sheath on their strong-side hip, allowing quick access while maintaining maneuverability. Others opt for chest carry systems for even faster deployment, particularly useful during processing game.

Regardless of the method, ensure the sheath doesn’t interfere with other gear or restrict movement. Regularly inspect the sheath’s retention straps and hardware for wear and tear. A well-maintained sheath, combined with a strategic carry position, ensures a guide’s Buck knife is always ready when needed in the Alaskan wilderness.

Guide

class b license florida study guide

Class B License Florida Study Guide: A Comprehensive Plan

Embarking on a Class B CDL journey in Florida requires diligent preparation! This comprehensive guide outlines essential steps, from eligibility and required documentation to mastering vehicle systems and safe driving practices․

Success hinges on understanding Florida-specific regulations, passing rigorous skills testing, and utilizing available study resources for a rewarding career as a commercial driver․

The Florida Class B Commercial Driver’s License (CDL) is your gateway to operating larger vehicles, specifically those exceeding 26,000 pounds Gross Vehicle Weight Rating (GVWR), or vehicles designed to transport more than 15 passengers, including the driver․ Unlike a Class A CDL, a Class B license doesn’t require you to pull a full trailer, but it does allow for towing smaller trailers with a GVWR of less than 10,000 pounds․

This license is crucial for various professional driving roles, including bus drivers, delivery drivers, dump truck operators, and those in specialized hauling services․ Obtaining a Class B CDL in Florida involves a structured process encompassing written knowledge tests, a Department of Transportation (DOT) physical examination, and comprehensive behind-the-wheel skills testing․

Successful candidates demonstrate proficiency in vehicle inspection, safe operating procedures, and a thorough understanding of both federal and Florida-specific commercial driving regulations․ Preparation is key, utilizing the Florida CDL Handbook and supplemental materials to ensure you’re well-equipped to pass each stage of the licensing process․ A commitment to safety and adherence to the law are paramount for all Class B CDL holders․

II․ Eligibility Requirements for a Class B License

To qualify for a Florida Class B CDL, several key requirements must be met․ First and foremost, applicants must possess a valid Florida Driver’s License and maintain a clean driving record – free from serious traffic violations or a history of reckless driving․ A Commercial Learner’s Permit (CLP) is a mandatory prerequisite before undertaking any skills testing․


Furthermore, all candidates are required to successfully pass a rigorous DOT Physical Examination conducted by a certified medical examiner․ This ensures you are physically capable of safely operating a commercial vehicle․ You must also clear a DOT Drug and Alcohol Test, demonstrating a commitment to substance-free driving․

Attendance and active participation in a CDL training program are highly recommended, as they provide essential knowledge and practical skills․ Students should prioritize completing all assignments diligently․ Finally, you must be at least 18 years old to operate vehicles intrastate (within Florida) and 21 years old for interstate commerce․ Meeting these criteria is the first step towards a successful CDL career․

III․ Age and Driver’s License Requirements

Florida’s Class B CDL has specific age and licensing stipulations․ To begin the process, you absolutely must hold a currently valid Florida Driver’s License – an identification card is not sufficient․ This existing license serves as the foundation for obtaining your commercial privileges․ A good driving record is paramount; any history of suspensions, revocations, or significant traffic offenses will likely disqualify you․

Regarding age, the requirements differ based on the scope of your intended operation․ If you plan to drive solely within the state of Florida – intrastate commerce – you must be at least 18 years of age․ However, if your commercial driving will involve crossing state lines – interstate commerce – the minimum age increases to 21 years․

It’s crucial to verify your license status is current and in good standing before applying for a CLP․ Any lapses in licensure or outstanding violations must be resolved․ Maintaining a valid Florida driver’s license throughout the CDL process is non-negotiable and a fundamental eligibility criterion․

IV․ Medical Examination (DOT Physical)

A Department of Transportation (DOT) physical examination is a mandatory requirement for anyone seeking a Class B Commercial Driver’s License in Florida․ This isn’t your standard annual check-up; it’s a comprehensive assessment designed to ensure you’re physically capable of safely operating a commercial vehicle․

You must be examined by a licensed physician certified by the Federal Motor Carrier Safety Administration (FMCSA)․ These certified medical examiners are listed on the FMCSA National Registry․ The examination covers various aspects of your health, including vision, hearing, cardiovascular function, neurological health, and overall physical condition․

Passing the DOT physical is crucial․ Conditions like uncontrolled high blood pressure, diabetes requiring insulin, or certain vision impairments can disqualify you․ If you have a medical condition, it doesn’t automatically mean you’re ineligible, but you may need to provide additional documentation or obtain a waiver․ The medical certificate is valid for a specific period, typically 24 months, and must be renewed before it expires․

V․ Drug and Alcohol Testing

Compliance with drug and alcohol testing regulations is non-negotiable for obtaining and maintaining a Florida Class B CDL․ The FMCSA mandates a strict drug and alcohol testing program for all commercial drivers to ensure public safety on the roadways․

As a prospective driver, you’ll be required to undergo a pre-employment drug test, typically a urine analysis, to screen for prohibited substances․ Random drug and alcohol tests are also conducted throughout your career as a CDL holder․ Refusal to submit to testing carries severe penalties, including license suspension or revocation․

The prohibited substances include marijuana, cocaine, amphetamines, opiates, and PCP․ A positive test result, or a violation of alcohol regulations (a blood alcohol concentration of 0․04 or higher), will result in disqualification․ Drivers who successfully complete a Substance Abuse Professional (SAP) program may be eligible for reinstatement, but the process is rigorous․ Maintaining a clean record is paramount for a successful CDL career․

VI․ Obtaining a Commercial Learner’s Permit (CLP)

Securing a Commercial Learner’s Permit (CLP) is the crucial first step towards earning your Florida Class B CDL․ The CLP allows you to begin supervised driving practice, preparing you for the skills test․ Before applying, ensure you meet all eligibility requirements, including age and a valid Florida driver’s license․

The application process involves visiting a Florida Highway Safety and Motor Vehicles (FLHSMV) office and completing the necessary paperwork․ You’ll need to demonstrate knowledge of general CDL regulations and specific requirements for a Class B license by passing a written knowledge test․

Thorough preparation using the Florida CDL Handbook is essential․ The CLP test covers topics like vehicle inspection, safe driving practices, and cargo handling․ Once you pass the knowledge test and meet all requirements, you’ll receive your CLP, granting you the privilege to practice driving with a licensed CDL holder in the passenger seat, adhering to all restrictions․

VII․ CLP Application Process

The Florida CLP application process requires a systematic approach․ Begin by visiting your local FLHSMV office; appointments are often recommended to minimize wait times․ You’ll need to complete a Commercial Driver License Application (Form HSMV 82600), available online or at the office․

Accuracy is paramount – ensure all information provided matches your official documentation; You’ll be required to present proof of identity, social security number, and legal presence in the United States․ A current Florida driver’s license is essential, and you must declare any previous license suspensions or revocations․

Following the application submission, you’ll need to pass vision and knowledge tests․ The knowledge test assesses your understanding of CDL regulations and safe driving practices․ Payment of applicable fees is required before test administration․ Upon successful completion of all requirements, your CLP will be issued, allowing you to begin supervised driving practice․

VIII․ Required Documentation for CLP

Gathering the correct documentation is crucial for a smooth CLP application․ You must present proof of identity, such as a valid Florida driver’s license or a state-issued identification card․ A certified copy of your birth certificate or a valid U․S․ passport is also generally accepted․

Proof of Social Security Number is mandatory; your Social Security card or a W-2 form displaying your full number will suffice․ You’ll also need to demonstrate legal presence in the United States, which can be established with a birth certificate, passport, or permanent resident card․

A current Florida driver’s license with a good driving record is essential․ Any previous license suspensions or revocations must be disclosed․ Furthermore, you may need to provide documentation related to any medical waivers or certifications․ Ensure all documents are original or certified copies to avoid delays in processing your application․ Finally, be prepared to pay the required CLP application fee․

IX․ Core Curriculum: What You’ll Study

The core curriculum for a Florida Class B CDL is comprehensive, designed to equip drivers with the knowledge and skills for safe and responsible operation of commercial vehicles․ Students will delve into vehicle safety protocols, focusing on accident prevention techniques and understanding operating regulations․

Cargo handling procedures are a significant component, alongside mastering essential documentation processes․ Extensive training covers pre-trip vehicle inspection, ensuring thoroughness in identifying potential maintenance issues․ Control procedures, including backing and maneuvering, are honed through practical exercises․

Road and hazardous driving skills are emphasized, preparing drivers for diverse conditions․ Licensing requirements are thoroughly explained, ensuring full compliance․ The curriculum also includes detailed instruction on service procedures and vehicle maintenance․ Attendance and active participation are vital for success, alongside diligent completion of all assigned coursework․

X․ Vehicle System Knowledge

A robust understanding of vehicle systems is paramount for any Class B CDL holder in Florida․ This section focuses on the intricate workings of commercial vehicles, moving beyond basic operational knowledge to encompass detailed component understanding․ Students will learn about the engine, transmission, and drivetrain, including their maintenance requirements and common failure points․

Braking systems, particularly air brakes, receive significant attention, covering inspection, testing, and troubleshooting procedures․ Steering and suspension systems are also explored, emphasizing their impact on vehicle control and stability․ Electrical systems, lighting, and safety features are thoroughly examined, ensuring drivers can identify and address potential hazards․

Fluid systems – fuel, coolant, and lubricants – are covered, alongside tire maintenance and inspection protocols․ This knowledge empowers drivers to perform thorough pre-trip inspections and recognize potential mechanical issues before they escalate, contributing to safer operation and reduced downtime․

XI․ General Knowledge & Combination Vehicles

The General Knowledge section forms the bedrock of your Class B CDL preparation in Florida, covering fundamental principles applicable to all commercial vehicle operation․ This includes regulations, safe driving practices, and hazard recognition․ Expect questions on space management, defensive driving techniques, and sharing the road with other vehicles․

Understanding cargo handling is crucial, encompassing proper loading, securing, and weight distribution to maintain vehicle stability and prevent accidents․ You’ll delve into documentation requirements, including trip manifests, bills of lading, and driver logs, ensuring compliance with federal and state regulations․

For those operating combination vehicles – a Class B vehicle towing a trailer – additional knowledge is essential․ This includes understanding the effects of towing, proper coupling and uncoupling procedures, and specialized braking techniques․ Mastering these concepts ensures safe and controlled operation of these more complex vehicle configurations, vital for many commercial driving roles․

XII․ Air Brakes Endorsement

Securing an Air Brakes Endorsement is often mandatory for Class B CDL holders in Florida, particularly when operating vehicles equipped with air brake systems․ This endorsement demonstrates a specialized understanding of these critical safety components․

The curriculum focuses on the unique functionality of air brakes, including the components of the system – compressors, reservoirs, and brake chambers – and how they work together to stop the vehicle․ You’ll learn about low-pressure warnings, spring brakes, and proper inspection procedures to identify potential malfunctions․

Mastering air brake application and release techniques is paramount, understanding the lag time inherent in these systems and adjusting driving accordingly․ You’ll also study emergency procedures, including how to handle brake failure and perform proper emergency stops․ Thorough preparation and a solid grasp of air brake principles are essential for safe and compliant operation, ensuring both driver and public safety on Florida’s roadways․

XIII․ Skills Testing: Behind the Wheel

The practical skills test is the culmination of your Class B CDL preparation in Florida, evaluating your ability to safely operate a commercial vehicle․ This rigorous assessment comprises three distinct phases: pre-trip inspection, basic control skills, and on-road driving․

The pre-trip inspection demands a meticulous examination of the vehicle, identifying any defects that could compromise safety․ You’ll be expected to articulate your inspection process and explain the functionality of key components․ Basic control skills assess your proficiency in maneuvers like backing, precise maneuvering, and controlled stopping․

The on-road driving segment simulates real-world scenarios, evaluating your adherence to traffic laws, safe driving habits, and ability to navigate various road conditions․ Examiners will assess your observation skills, lane control, speed management, and overall judgment․ Successful completion of all three phases demonstrates competency and earns you your Class B CDL, paving the way for a professional driving career․

XIV․ Pre-Trip Inspection Procedures

A thorough pre-trip inspection is paramount for safe commercial vehicle operation and a critical component of the Florida Class B CDL skills test․ This systematic examination ensures the vehicle is fit for the road, identifying potential mechanical failures before they escalate into hazardous situations․

The inspection encompasses both the exterior and interior of the vehicle, covering areas like brakes, tires, lights, steering, and cargo securement․ You must verbally identify each component, explain its function, and demonstrate how to check for defects․ Pay close attention to fluid levels, tire pressure, and the condition of hoses and belts․

Documenting any discrepancies is crucial; accurately recording defects demonstrates professionalism and attention to detail․ Remember, the examiner isn’t just looking for what you inspect, but how you inspect it – a methodical, comprehensive approach is key to success․ Mastering this procedure is vital for a safe and compliant driving career․

XV․ Basic Control Skills (Backing, Maneuvering)

Demonstrating proficiency in basic control skills – specifically backing and maneuvering – is a significant portion of the Florida Class B CDL skills test․ These exercises assess your ability to control the vehicle in tight spaces and execute precise movements, crucial for navigating loading docks, parking areas, and congested roadways․

Backing requires slow, controlled movements, utilizing mirrors effectively and understanding the vehicle’s turning radius․ Avoid abrupt steering and maintain constant awareness of your surroundings․ Maneuvering skills will be tested through offset alley docking and straight-line backing exercises, demanding precision and spatial awareness․

Practice is essential for mastering these skills․ Focus on smooth transitions, proper use of signals, and maintaining a safe speed․ Remember to scan frequently and be prepared to stop immediately if obstacles appear․ A calm, deliberate approach will significantly improve your performance and build confidence behind the wheel․

XVI․ On-Road Driving Skills

The on-road driving portion of the Florida Class B CDL exam evaluates your ability to operate the vehicle safely and responsibly in real-world traffic conditions․ This assessment goes beyond basic vehicle control, focusing on your judgment, decision-making, and adherence to traffic laws․

Expect to demonstrate skills like lane changes, merging onto highways, navigating intersections, and maintaining a safe following distance․ Examiners will observe your ability to scan the road, anticipate potential hazards, and react appropriately․ Proper signaling, speed control, and adherence to posted speed limits are critical․

Safe driving practices are paramount․ This includes maintaining situational awareness, yielding the right-of-way when necessary, and demonstrating courteous driving behavior․ Be prepared for unexpected events and demonstrate your ability to handle them calmly and effectively․ Consistent practice and a focus on defensive driving techniques are key to success․

XVII․ Florida-Specific Regulations & Laws

Navigating Florida’s roadways as a Class B CDL holder demands a thorough understanding of state-specific regulations․ Beyond federal guidelines, Florida implements unique rules governing commercial vehicle operation, impacting hours of service and cargo securement․

Hours of Service (HOS) regulations dictate the maximum driving and on-duty hours permitted within a given period, preventing driver fatigue․ Florida adheres to federal HOS rules, but drivers must be aware of any state-level modifications or exemptions․ Accurate record-keeping is crucial for compliance․

Cargo securement rules are vital for preventing accidents caused by shifting or falling loads․ Florida’s regulations detail specific requirements for securing various types of cargo, including proper tie-down methods and weight distribution․ Understanding these rules ensures the safety of both the driver and other motorists․ Staying updated on changes to these laws is essential for maintaining a valid CDL and operating legally within the state․

XVIII․ Hours of Service (HOS) Regulations

Florida’s adherence to federal Hours of Service (HOS) regulations is paramount for Class B CDL drivers, aiming to combat fatigue and enhance road safety․ These rules govern maximum driving and on-duty times, alongside mandatory rest periods, impacting trip planning and scheduling․

Key HOS components include the 11-hour driving limit following 10 consecutive hours off-duty, and a 14-hour “driving window” starting after coming on-duty․ Drivers must meticulously track their hours using either Electronic Logging Devices (ELDs) or paper logs, ensuring accurate record-keeping for compliance․

Florida drivers must also understand short-haul operation exceptions, which offer limited flexibility for certain routes․ Violations of HOS regulations can result in significant penalties, including fines and potential CDL suspension․ Staying informed about updates and interpretations of HOS rules is crucial for all commercial drivers operating within the state, prioritizing both safety and legal compliance․

XIX․ Cargo Securement Rules

Proper cargo securement is a non-negotiable aspect of Class B CDL operation in Florida, directly impacting public safety and legal compliance․ Drivers are legally responsible for ensuring all cargo is adequately restrained to prevent shifting or loss during transit, adhering to stringent federal and state guidelines․

These rules dictate specific requirements based on cargo type – including flatbeds, box trucks, and tankers – covering tie-down methods, working load limits, and the number of securement points needed․ Understanding the appropriate use of straps, chains, and other securement devices is vital, alongside regular inspection for damage or wear․

Florida CDL holders must be proficient in identifying cargo securement deficiencies and correcting them before operating a vehicle․ Failure to comply with these regulations can lead to hefty fines, out-of-service orders, and potential liability in the event of an accident․ Thorough knowledge and consistent application of cargo securement principles are essential for every Class B driver․

XX․ Resources for Studying & Preparation

Success in obtaining your Florida Class B CDL hinges on utilizing available study resources․ The Florida CDL Handbook, available from the Florida Department of Highway Safety and Motor Vehicles, is the foundational text, covering all essential knowledge areas․ Supplement materials offer modernized versions and explanations, enhancing comprehension․

Beyond the handbook, numerous practice exams and study materials are accessible online and through commercial driving schools․ These resources simulate the actual CDL tests, allowing you to identify knowledge gaps and build confidence․ Miami Dade College’s LibGuides offer valuable program information and study aids․

Consider enrolling in a CDL preparation course for structured learning and hands-on training․ These courses often include pre-trip inspection practice and behind-the-wheel instruction․ Remember to explore online platforms offering lecture videos and unlimited access to study materials, like those for the Class B HVAC contractor license, to maximize your preparation efforts․

XXI․ Florida CDL Handbook & Supplements

The Florida CDL Handbook, published by the Florida Department of Highway Safety and Motor Vehicles, is your primary study resource․ It’s available in both English and Spanish, catering to a diverse range of learners․ This comprehensive guide details everything from general knowledge and combination vehicle operation to air brake systems and cargo securement․

Don’t overlook the supplemental materials! These resources often provide modernized versions of the handbook content, clarifying complex topics and incorporating recent regulatory updates․ They are crucial for staying current with Florida’s specific CDL requirements․ The handbook covers essential areas like vehicle inspection, accident prevention, and operating regulations․

Familiarize yourself with the handbook’s structure and utilize its index to quickly locate information․ Regularly review sections relevant to the Class B license, focusing on the knowledge areas tested during the CDL exams․ Mastering the handbook’s content is the cornerstone of your preparation, ensuring a solid foundation for success․

XXII․ Practice Exams & Study Materials

Supplementing the Florida CDL Handbook with practice exams is vital for exam success․ Numerous online platforms and study guides offer realistic simulations of the actual CDL tests, allowing you to assess your knowledge and identify areas needing improvement․ These resources often include questions mirroring those found on the official exams․

Look for study materials specifically tailored to the Class B license․ General CDL practice tests may not cover all the nuances of this particular endorsement․ Some providers, like Contractor Campus, offer dedicated exam prep courses with lecture videos and unlimited access to online materials․

Utilize a variety of study methods․ Combine practice tests with flashcards, study groups, and focused review sessions․ Analyze your incorrect answers to understand the underlying concepts and avoid repeating mistakes; Consistent practice builds confidence and reinforces your understanding of the material, maximizing your chances of passing the Florida Class B CDL exam․

Guide

na step working guide questions and answers

Article Plan: A Step Working Guide ー Questions and Answers

This guide explores a structured approach to navigating recovery, utilizing detailed questions for self-reflection and problem-solving, mirroring NA’s step work principles.

Step work, central to Narcotics Anonymous (NA) and Alcoholics Anonymous (AA), is a process of self-discovery and recovery guided by the Twelve Steps. It’s more than simply acknowledging problems; it’s a deep dive into personal history, beliefs, and behaviors. A Step Working Guide, often utilized with a sponsor, provides a framework for this journey, offering questions designed to prompt honest self-reflection.

However, as shared on Reddit (r/NarcoticsAnonymous), initial experiences don’t always necessitate a guide, yet exploring each question’s value is beneficial. The process isn’t always linear, with individuals sometimes restarting steps multiple times (r/REDDITORSINRECOVERY), highlighting the need for patience and self-compassion. Ultimately, step work aims to foster lasting change through rigorous introspection and spiritual growth, addressing core issues and building a foundation for a fulfilling, sober life.

What is a Step Working Guide?

A Step Working Guide is a structured resource designed to facilitate thorough exploration of the Twelve Steps of NA. It typically presents a series of probing questions related to each step, encouraging individuals to examine their past, present, and future with honesty and vulnerability. These guides aren’t rigid prescriptions, but rather tools to deepen understanding and promote personal growth.

As noted in online discussions (r/NarcoticsAnonymous), a guide can serve as a journaling prompt, allowing for detailed written responses. It’s a method to move beyond superficial answers and confront difficult truths. While some find success without a guide initially, its comprehensive nature ensures no crucial aspect of self-assessment is overlooked, supporting a more robust and lasting recovery.

The Importance of Answering Questions Thoroughly

Superficial responses hinder genuine progress in step work. Thoroughness unlocks deeper self-awareness, revealing patterns and triggers previously unnoticed. Skipping over difficult questions prevents confronting painful experiences, ultimately impeding lasting change. As highlighted in Reddit discussions (r/NarcoticsAnonymous), every question holds value, prompting introspection that strengthens recovery.

Detailed answers aren’t about finding “right” responses, but about honest self-exploration. This process, akin to troubleshooting (Global Tech Solutions), identifies the core issues fueling addiction. A comprehensive approach, mirroring structured questioning in tech support, ensures a solid foundation for building a fulfilling, sober life.

Step 1: Defining the Problem ー Initial Questions

This initial phase focuses on pinpointing the core issues driving addictive behaviors. Questions should explore the specific problems created by substance use – financial, relational, legal, and emotional. What patterns emerge when considering triggers? When do cravings intensify? What situations consistently lead to relapse?

Initial inquiries should also address the individual’s understanding of addiction itself. What beliefs about substance use exist? What were the initial motivations for using? Acknowledging these foundational elements, similar to diagnostic questions in tech troubleshooting, sets the stage for targeted step work.

Identifying the Core Issue

Digging beneath surface-level problems is crucial; addiction is often a symptom, not the root cause. Questions should probe for underlying emotional pain, trauma, or unmet needs. What voids were substances attempting to fill? What fears or anxieties drive the behavior? Honest self-reflection, even if difficult, is paramount.

Consider exploring childhood experiences, relationship dynamics, and societal pressures. Are there recurring themes of shame, guilt, or inadequacy? Identifying these core issues, much like defining the problem in tech support, allows for focused healing and lasting change.

Recognizing Patterns and Triggers

Understanding the circumstances surrounding substance use is vital for breaking the cycle. What people, places, or emotions consistently precede cravings? Are there specific times of day or week when vulnerability increases? Identifying these patterns, similar to diagnostic questions in tech troubleshooting, reveals predictable vulnerabilities.

Explore internal triggers – thoughts, feelings, memories – and external triggers – environmental cues, social situations. Journaling can be immensely helpful in tracking these connections. Recognizing triggers isn’t about avoiding them entirely, but developing coping mechanisms and strategies for navigating challenging situations without resorting to substance use.

Step 2: Gathering Information ー Diagnostic Questions

This phase mirrors technical diagnostics, seeking comprehensive details about the problem. What specific behaviors led to seeking help? What are the immediate consequences of these behaviors? Explore the history of substance use – when did it begin, how has it evolved, and what attempts at stopping have been made?


Consider the broader context: relationships, work, finances, and legal issues. Like system specifications, understanding the environment is crucial. What support systems are available? What obstacles exist? Honest self-assessment, though challenging, is paramount. This detailed information forms the foundation for effective problem-solving.

System Specifications and Environment

Analogous to technical troubleshooting, understanding the “system” – your life – is vital. What are your core values and beliefs? What are your daily routines and habits? Describe your support network: family, friends, sponsor. What are the stressors in your life – work, relationships, finances?

Consider your emotional state: prevalent feelings, triggers, and coping mechanisms. What environments or situations exacerbate your addictive behaviors? Identifying these “specifications” and the surrounding “environment” provides crucial context. This detailed assessment reveals patterns and vulnerabilities, informing a targeted recovery plan.

Recent Changes and Updates

Just as software updates can introduce glitches, life changes can disrupt recovery. Have there been any significant alterations in your life recently – new job, relationship changes, relocation? What new people have entered your life, and how do they influence you? Have you altered your routines or habits?

Consider any shifts in your emotional state or coping mechanisms. Were there any recent traumas or stressful events? Identifying these “updates” helps pinpoint potential triggers for relapse. Acknowledging these changes allows for proactive adjustments to your recovery plan, ensuring continued progress and stability.

Step 3: Formulating a Hypothesis ー Analytical Questions

Now, let’s analyze the gathered information to pinpoint potential causes. Based on your answers, what do you believe is the root of the problem? What patterns emerged from the diagnostic questions? What specific thoughts, feelings, or behaviors precede the issue?

Consider multiple possibilities – don’t settle on the first explanation. Prioritize these potential causes; which seems most likely, and which would be easiest to address? Develop a plan to test each hypothesis. What steps can you take to confirm or refute your assumptions? This analytical stage is crucial for targeted troubleshooting.

Potential Causes and Solutions

Brainstorming potential causes requires honest self-assessment. Are there underlying fears, resentments, or character defects contributing to the problem? Consider external factors too – people, places, or situations that trigger negative behaviors. For each identified cause, explore possible solutions aligned with the principles of recovery.

These solutions might involve amends, changing your environment, or developing healthier coping mechanisms. Don’t dismiss seemingly small adjustments; they can have a significant impact. Remember, the goal isn’t perfection, but progress. Prioritize solutions that address the core issue, not just the symptoms.

Prioritizing Troubleshooting Steps

Effective step work demands a logical order. Begin with the most common and easily addressable potential causes. This minimizes wasted effort and builds momentum. Don’t immediately jump to complex solutions; start with simpler adjustments. Consider the potential impact of each step – which offers the greatest chance of positive change with the least disruption?

A structured approach, starting with general issues and narrowing down, is crucial. Document your prioritization rationale. This ensures clarity and allows for revisiting decisions if initial steps prove ineffective. Remember, flexibility is key; be prepared to adjust your plan based on new information.

Step 4: Testing the Hypothesis ー Implementation Questions

Now, translate your analytical insights into action. What specific steps will you take to implement the proposed solution? How will you measure the results objectively? What constitutes success, and what indicators suggest the hypothesis is incorrect? Document the implementation process meticulously, noting any unexpected challenges or deviations from the plan.

Consider a phased rollout, if possible, to minimize potential disruption. Continuously monitor the situation, gathering data to assess the effectiveness of the implemented solution. Be prepared to make adjustments based on observed outcomes, demonstrating adaptability and a commitment to finding the optimal path forward.

Implementing Potential Solutions

Carefully enact the chosen solution, documenting each action taken. What resources are required for successful implementation? Who is responsible for each task, and what is the timeline for completion? Anticipate potential roadblocks and develop contingency plans to address them proactively.

Begin with a small-scale test, if feasible, to validate the solution before widespread deployment. This minimizes risk and allows for refinement based on real-world feedback. Maintain clear communication throughout the process, keeping stakeholders informed of progress and any emerging issues. Remember, flexibility is key – be prepared to adapt your approach as needed.

Monitoring Results and Adjustments

After implementing a solution, diligent monitoring is crucial. What key indicators will demonstrate success or failure? Establish a system for tracking these metrics over time, allowing for objective assessment. Regularly review the data, looking for patterns and trends.

If the initial results are unsatisfactory, don’t hesitate to adjust the approach. This might involve refining the solution, exploring alternative strategies, or revisiting earlier steps in the process. Remember, troubleshooting is iterative – continuous improvement is the goal. Document all adjustments made and the rationale behind them for future reference.

Step 5: Documenting the Solution ー Reporting Questions

Thorough documentation is paramount for future reference and knowledge sharing. What specific problem was encountered, and what steps were taken to resolve it? Detail the implemented solution, including any adjustments made during the monitoring phase.

Consider creating a knowledge base entry, accessible to others, outlining the issue and its resolution. This fosters a collaborative learning environment. What lessons were learned from this experience? Documenting these insights prevents recurrence and improves overall efficiency. Accurate records are invaluable for tracking progress and demonstrating accountability.

Recording the Problem and Solution

Meticulously record the initial problem description, including all observed symptoms and relevant context. What were the precise circumstances leading to the issue? Document the hypothesis formulated and the rationale behind it. Detail each troubleshooting step undertaken, noting the results of each test.

Clearly articulate the final solution implemented, specifying any configuration changes or interventions. Include timestamps for each action taken. This creates a comprehensive audit trail. What specific data points confirmed the solution’s effectiveness? Accurate records are crucial for future analysis and preventing similar issues.

Creating a Knowledge Base Entry

Transform the documented problem and solution into a concise, easily searchable knowledge base entry. Use clear, non-technical language accessible to a broad audience. Include relevant keywords for efficient searching. Categorize the entry appropriately for easy navigation.

Detail the symptoms, causes, and resolution in a structured format – perhaps a FAQ style. Consider adding screenshots or diagrams for visual clarity. Regularly review and update entries to ensure accuracy and relevance. This collaborative effort builds a valuable resource, reducing repeat issues and empowering self-service troubleshooting.

Utilizing Step Working Guides in Recovery Programs (NA/AA)

Step working guides, like those used in Narcotics Anonymous (NA) and Alcoholics Anonymous (AA), provide a structured framework for personal exploration. They aren’t rigid rules, but tools to facilitate honest self-assessment. Some sponsors encourage thorough engagement with every question, viewing the guide as a comprehensive journaling prompt.

However, individual approaches vary; some find initial progress without strict adherence. Restarting steps is common, reflecting the ongoing nature of recovery. The guide supports identifying patterns, addressing beliefs, and fostering spiritual growth, particularly in Step Two, overcoming negative associations with higher power concepts.

The Role of a Sponsor in Step Work

A sponsor’s role in step work is to guide and support, not dictate. Experienced sponsors may share their personal journeys, acknowledging that initial step work doesn’t require a guide, but benefits from thorough questioning. They encourage sponsees to engage deeply with the step working guide, especially those who are internally motivated.

Crucially, a sponsor provides accountability and a safe space for honest self-reflection. They help navigate challenges like restarting steps – a frequent occurrence – and offer perspective when facing difficult questions. A sponsor’s integrity is paramount, as demonstrated by the need to find a new one when personal struggles interfere.

Common Challenges in Step Work

Step work isn’t always linear; roadblocks are common. Difficulty with honesty and genuine self-reflection frequently arises, hindering progress. Many individuals struggle to confront painful truths revealed through the guided questions. Another significant challenge is the need to restart steps multiple times – a testament to the process’s depth and the ongoing nature of recovery.

This isn’t failure, but a natural part of the journey. Step Two, in particular, can be difficult, often stemming from negative past experiences with religion or the concept of a Higher Power. Patience, self-compassion, and a supportive sponsor are vital for overcoming these hurdles.

Difficulty with Honesty and Self-Reflection

Truly honest self-assessment is the cornerstone of effective step work, yet it presents a significant challenge for many. Confronting past behaviors, acknowledging harmful patterns, and admitting character defects requires vulnerability. Individuals may minimize, rationalize, or outright deny uncomfortable truths, hindering their progress.

The step working guide’s probing questions are designed to bypass these defenses, but resistance is common. Fear of judgment, shame, and a desire to maintain a positive self-image can all contribute to dishonesty. A supportive sponsor can help navigate these difficulties, encouraging gentle but persistent self-exploration.

Restarting Steps Multiple Times

The journey through the twelve steps isn’t always linear; many individuals find themselves revisiting steps, sometimes multiple times; This isn’t a sign of failure, but rather an indication of deeper layers being uncovered. Initial attempts may lack the depth of honesty required for lasting change, or new insights may emerge later necessitating a re-evaluation.

As shared in online recovery communities, restarting can stem from external factors like a changing sponsor or relapse. However, it often reflects an evolving understanding of oneself. A step working guide facilitates this process, allowing for continuous refinement and growth. Patience and self-compassion are crucial during these cycles.

Step Two: Addressing Beliefs and Spirituality

Step Two, “Came to believe,” often presents unique challenges, particularly for those with negative experiences related to organized religion or the concept of God. This step isn’t about adopting a specific dogma, but rather opening oneself to the possibility of a Power greater than oneself – a source of strength and guidance.

Exploring personal beliefs and spirituality is crucial. This might involve redefining “God” in a way that resonates, focusing on principles of love and connection, or finding solace in nature. The step working guide encourages introspection, prompting individuals to examine their preconceived notions and embrace a broader perspective.

Using the Guide as a Journaling Prompt

The Step Working Guide isn’t merely a checklist; it’s a powerful tool for self-discovery when utilized as a journaling prompt. Sponsors often recommend engaging with each question thoughtfully, writing extensively about personal experiences and feelings. This process allows for deeper processing and honest self-reflection.

For those who are internally motivated, the guide provides a structured framework for exploring their past, present, and hopes for the future. Journaling facilitates identifying patterns, triggers, and areas needing growth. It’s a safe space to confront difficult emotions and build self-awareness, enhancing the benefits of step work.

Internal Motivation and Step Work

Genuine progress in step work hinges significantly on internal motivation, the intrinsic desire for change and recovery. While a sponsor provides guidance, the core work requires a personal commitment to honesty and self-reflection. Individuals driven by their own need for healing tend to engage more fully with the process.

Those with strong internal motivation often find the Step Working Guide particularly valuable as a journaling prompt, proactively exploring each question. This contrasts with relying solely on external accountability. Sponsors observe that internally motivated individuals often experience a more profound and lasting transformation through diligent self-exploration.

Troubleshooting Technology Problems ー A 5-Step Approach

Drawing parallels to step work, a systematic approach to tech issues involves defining the problem, gathering information, formulating a hypothesis, testing, and documenting the solution. This mirrors the analytical process used in recovery. Effective troubleshooting begins with structured questions, starting broadly and narrowing down potential causes.

Prioritizing common solutions first saves time and prevents unnecessary complexity. Detailed documentation is crucial, recording the issue, steps taken, and the final resolution. This prevents recurrence and aids future problem-solving, much like documenting progress in step work. Avoiding escalation relies on a methodical, step-by-step process.

Developing Structured Questions for Troubleshooting

Similar to a step working guide, creating a series of focused questions is paramount for efficient problem resolution. Begin with general inquiries – “What happened?”, “When did this start?” – then progressively refine them. These questions should guide the user (or oneself) through a logical process of elimination, mirroring the introspective nature of NA’s steps.

The goal is to isolate the root cause. Questions should cover system specifications, recent changes, and environmental factors. A well-structured set of questions ensures no crucial detail is overlooked, fostering a thorough and effective troubleshooting experience, much like a detailed fifth step.

Starting with General Issues and Narrowing Down

Effective troubleshooting, like step work, benefits from a broad-to-specific approach. Initially, focus on the overarching problem: “What isn’t working as expected?” Avoid immediate assumptions. This mirrors the initial honesty required in the first step – acknowledging the problem without judgment.

Subsequently, narrow the focus. Ask about specific symptoms, error messages, or unusual behaviors. This parallels the detailed self-inventory of later steps. By systematically eliminating possibilities, you isolate the core issue. Prioritize common solutions first, as suggested by tech guides, before exploring more complex scenarios, ensuring a pragmatic and efficient resolution process.

Prioritizing Common Solutions

Just as step work often begins with acknowledging basic principles, troubleshooting should start with readily available fixes. This means addressing frequently encountered issues first – checking connections, restarting devices, or ensuring software is updated. This approach mirrors the simplicity of early steps, focusing on foundational actions.

Resisting the urge to immediately delve into complex solutions saves time and prevents unnecessary complications. Like a sponsor guiding a sponsee, prioritize the most likely causes. This pragmatic strategy, highlighted in tech guides, ensures efficient problem resolution and avoids escalating issues, fostering a sense of progress and control.

The Value of Detailed Documentation

Similar to meticulously recording progress through the twelve steps, comprehensive documentation is crucial in troubleshooting. Detailed notes on the problem, attempted solutions, and observed results create a valuable resource for future reference and knowledge sharing. This parallels creating a knowledge base entry after resolving an issue.

Such records aid in identifying patterns, preventing recurrence, and facilitating collaboration. Documenting the process, like journaling in step work, promotes self-awareness and accountability. It also allows for a clearer understanding of the problem’s evolution, mirroring the reflective nature of NA’s step work, and ultimately, avoids repeated struggles.

Avoiding Escalation of Problems

Proactive troubleshooting, guided by structured questions, minimizes the risk of issues spiraling into larger, more complex problems. Addressing concerns early, much like confronting difficult truths in step work, prevents minor inconveniences from becoming crises. Prioritizing common solutions first, as suggested by tech guides, avoids unnecessary complexity.

A systematic approach, mirroring the methodical nature of the steps, ensures that potential consequences are considered before implementing solutions. Detailed documentation, as previously discussed, aids in identifying early warning signs. This preventative mindset, akin to sponsor guidance, fosters stability and reduces the likelihood of escalating issues requiring external intervention.

Adapting the Guide to Individual Needs

Recognizing that recovery, like technical troubleshooting, isn’t one-size-fits-all is crucial. The step working guide should be viewed as a flexible framework, not a rigid prescription. Individuals may progress at different paces, requiring adjustments to the questioning sequence or depth of exploration.

Some, like those with strong internal motivation, may benefit from using the guide as a journaling prompt, delving deeper into personal reflections. Others might require more direct sponsor guidance. The key is tailoring the process to address specific challenges and beliefs, acknowledging that past experiences – even restarts – shape the journey.

Resources for Step Working Guides

Numerous resources support individuals navigating the NA twelve steps. Official Narcotics Anonymous literature provides the foundational step working guide, offering core questions for self-assessment. Online communities, such as those found on Reddit (r/NarcoticsAnonymous, r/REDDITORSINRECOVERY), offer peer support and shared experiences, including discussions on guide utilization.

Travco Behavioral Health’s “First Step Recovery” provides in-depth analysis of individual steps, particularly Step Two, addressing common challenges with spirituality. Global Tech Solutions’ blog, while focused on technology, illustrates the value of structured questioning. Remember, a sponsor’s guidance is invaluable, adapting resources to individual needs.

The Ongoing Process of Step Work

Step work isn’t a one-time event, but a continuous journey of self-discovery and growth. As highlighted by experiences shared on Reddit, restarting steps is common, emphasizing the iterative nature of the process. Utilizing a step working guide, alongside a sponsor, facilitates honest self-reflection and addresses underlying beliefs, as seen in discussions around Step Two.

The structured questioning approach, borrowed from technology troubleshooting, aids in identifying core issues and potential solutions. Consistent documentation, like creating a knowledge base, reinforces learning. Embracing this ongoing process, with internal motivation, fosters lasting recovery.

Guide

antenna tv guide akron ohio

Antenna TV Guide Akron, Ohio: A Comprehensive Plan (as of 02/07/2026)

Akron viewers can access free, over-the-air TV broadcasts with an antenna. This guide details available channels, including CBS (19.1), Me-TV (19.2), and ESPN HD (23.2).

Understanding Over-the-Air TV in Akron

Over-the-air (OTA) television in Akron, Ohio, offers a fantastic, free alternative to cable and satellite subscriptions. Utilizing a digital TV antenna, residents can receive high-definition broadcasts of local channels without monthly fees. This method relies on signals transmitted from broadcasting towers, making signal strength and antenna placement crucial for optimal viewing. The digital transition has significantly improved picture and sound quality compared to older analog signals.

Akron’s geographical location and terrain can influence reception. Factors like distance from broadcast towers, buildings, and even weather conditions can affect signal clarity. Understanding these elements is key to maximizing your OTA experience. Fortunately, resources like signal strength maps (discussed later) can help pinpoint optimal antenna positioning. Furthermore, a rescan of your TV is periodically needed to ensure all available channels are tuned in, especially after broadcast changes. This guide will provide a comprehensive overview of navigating the world of OTA TV in Akron.

Local Broadcast Channels Available

Akron, Ohio, viewers have access to a diverse range of free broadcast channels via an antenna; As of February 7th, 2026, key channels include WOIO CBS (19.1), providing network programming, local news, and sports. Me-TV (19.2) offers classic television series and nostalgic entertainment. For science fiction and adventure enthusiasts, Comet TV (8.3) delivers genre programming. Antenna TV (8.2) focuses on classic movies and shows, appealing to a broad audience.

Sports fans can enjoy ESPN HD (23.2), broadcasting live sporting events in high definition. Beyond these, additional subchannels and networks may be available depending on antenna quality and location. Regularly scanning for channels is recommended to discover all accessible options. The availability of these channels is subject to change based on broadcaster decisions. Checking updated listings ensures you’re aware of any programming shifts or additions. This selection provides a solid foundation for cord-cutting and free TV viewing in the Akron area.

Channel Listings: WOIO CBS (19.1)

WOIO CBS (19.1) serves the Akron, Ohio, area with a comprehensive lineup of national and local programming. Primetime typically features CBS network shows, including dramas, comedies, and reality series. Local news broadcasts provide coverage of Akron and Northeast Ohio events, weather, and community stories. Morning news programs deliver up-to-date information to start the day.

Sports programming includes NFL football, college basketball, and other major sporting events broadcast by CBS Sports. Special events, such as the Grammy Awards and the Super Bowl, are also featured. Daytime programming consists of talk shows, game shows, and entertainment magazines. The channel also airs local public service announcements and community calendars. Check local listings for specific times and program details, as schedules are subject to change. Reliable reception ensures consistent access to WOIO CBS’s diverse content.

Channel Listings: Me-TV (19.2)

Me-TV (19.2), available via antenna in Akron, Ohio, offers a nostalgic journey through classic television. The channel’s programming primarily consists of iconic sitcoms, dramas, and westerns from the 1950s through the 1980s. Viewers can enjoy beloved shows like “I Love Lucy,” “The Andy Griffith Show,” “Gunsmoke,” and “Perry Mason.” Me-TV provides a curated selection of quality entertainment for audiences of all ages.

The schedule often features themed blocks of programming, such as “Classic Comedy Nights” or “Western Wednesdays.” Beyond the well-known series, Me-TV also showcases lesser-known gems and cult favorites. It’s a great option for those seeking a break from contemporary television and a trip down memory lane. Local broadcast times may vary, so consulting a current TV guide is recommended. Me-TV’s commitment to preserving television history makes it a unique and valuable channel for Akron viewers.

Channel Listings: Comet TV (8.3)

Comet TV (8.3), accessible through an antenna in Akron, Ohio, distinguishes itself with a unique blend of science fiction, fantasy, and action programming. Unlike channels focused on classic reruns, Comet presents a diverse range of genre entertainment, including both syndicated series and original productions. Viewers can anticipate finding shows like “Stargate SG-1,” “Farscape,” and various B-movie classics.

The channel’s schedule often incorporates themed marathons and special events catering to genre enthusiasts. Comet also actively cultivates a community through its social media presence, engaging with viewers and promoting its programming. It’s a compelling choice for those seeking thrilling adventures and otherworldly tales. Local broadcast schedules are subject to change, so checking a current TV listing is advisable. Comet TV offers a refreshing alternative to mainstream television, providing a dedicated space for sci-fi and fantasy fans in the Akron area.

Channel Listings: Antenna TV (8.2)

Antenna TV (8.2), a digital broadcast television network available via antenna in Akron, Ohio, specializes in classic television programming. It offers a curated selection of beloved sitcoms, dramas, and game shows from the mid-20th century, appealing to viewers seeking nostalgic entertainment. Expect to find iconic shows like “Leave it to Beaver,” “The Donna Reed Show,” and “Perry Mason” regularly featured in its schedule.

Antenna TV distinguishes itself by presenting these classic programs in their original broadcast format, preserving the authenticity of the viewing experience. The channel also incorporates lesser-known gems alongside popular favorites, offering a broader exploration of television history. It’s a fantastic option for families looking for wholesome entertainment or individuals wanting to revisit cherished memories. Local schedules may vary, so consulting a current TV guide is recommended. Antenna TV provides a comforting and familiar escape for classic TV enthusiasts throughout the Akron region.

Channel Listings: ESPN HD (23.2)

ESPN HD (23.2) delivers high-definition sports programming to viewers in the Akron, Ohio area via over-the-air antenna. This channel is a premier destination for live game coverage, studio analysis, and sports-related news. Expect a diverse range of sporting events, including professional football (NFL), college sports (NCAA football and basketball), baseball (MLB), basketball (NBA), and more.

ESPN HD doesn’t just broadcast live events; it also features in-depth studio shows like “SportsCenter,” providing highlights, analysis, and interviews. Viewers can stay up-to-date on the latest scores, standings, and breaking news in the sports world. The HD broadcast ensures a crisp and clear viewing experience, enhancing the excitement of the games. Availability and specific programming schedules can fluctuate, so checking a current TV guide is advisable. For sports fans in Akron, ESPN HD is a valuable addition to their over-the-air channel lineup, offering comprehensive sports coverage.

Optimizing Antenna Placement for Akron Reception

Achieving optimal over-the-air TV reception in Akron, Ohio, hinges on strategic antenna placement. Several factors influence signal strength, including distance from broadcast towers, terrain, and potential obstructions. Generally, higher locations yield better results; attics or rooftops are often preferable to basements.

Experiment with antenna direction. Scan for signals while slowly rotating the antenna to pinpoint the strongest reception for each desired channel. Obstructions like trees, buildings, and hills can weaken signals. Try to position the antenna with a clear line of sight to the broadcast towers. Consider using a signal locator app or website to identify tower locations.

For indoor antennas, proximity to windows is crucial. Outdoor antennas require secure mounting and proper grounding to protect against lightning. Adhesive weights may be needed to maintain guide rail clearance. Regularly rescan your TV after adjusting the antenna to ensure it picks up all available channels.

Antenna Types: Indoor vs. Outdoor

Choosing between an indoor and outdoor TV antenna for Akron, Ohio, depends on your location and reception needs. Indoor antennas are simpler to install and more affordable, suitable for urban areas with strong signals. They come in various forms – flat, multi-directional, and amplified – offering flexibility in placement near windows. However, their range is limited, and performance can be affected by building materials and interference.

Outdoor antennas, conversely, provide superior range and signal strength, ideal for suburban or rural locations, or areas with obstructions. They require professional installation for secure mounting and grounding, protecting against weather and electrical surges. Yagi-Uda and multi-directional outdoor antennas are common choices, offering targeted or broad signal reception.

Amplified antennas, both indoor and outdoor, can boost weak signals, but may also amplify noise. Consider signal strength maps for Akron to assess your needs. Ultimately, the best antenna type balances cost, ease of installation, and desired channel reception quality.

Signal Strength Maps for Akron, OH

Understanding TV signal strength in Akron, Ohio, is crucial for optimal over-the-air reception. Several online resources provide detailed signal maps, visualizing broadcast tower locations and coverage areas. These maps utilize predictive modeling based on terrain, building density, and atmospheric conditions, offering a general indication of signal availability.

Websites like AntennaWeb and TV Fool allow users to input their specific address to generate a customized report, displaying expected signal strength for each broadcast channel. Color-coded indicators – green, yellow, red – represent strong, marginal, and weak signals, respectively. Remember these are estimations; actual reception can vary.

Factors like foliage, weather, and antenna placement significantly impact signal quality. Consulting multiple maps and cross-referencing data provides a more accurate assessment. Utilizing these resources helps determine the appropriate antenna type (indoor vs. outdoor) and optimal positioning for maximizing channel availability in Akron.

Troubleshooting Reception Issues

Experiencing pixelation, freezing, or complete signal loss with your Akron antenna TV? Several troubleshooting steps can restore a clear picture. First, rescan your TV’s channel list; broadcast frequencies can change. Ensure your antenna is securely connected and properly oriented towards local broadcast towers – signal maps are helpful here.

Check the coaxial cable for damage or loose connections. Interference from electronic devices can also disrupt signals; move them away from the antenna and TV. For indoor antennas, experiment with different locations, ideally near a window. Outdoor antennas may require adjustments due to weather conditions like heavy rain or snow.

If issues persist, consider an antenna amplifier to boost weak signals. However, excessive amplification can introduce noise. Finally, verify that the broadcast towers are still operational; occasional outages occur. A systematic approach, combined with patience, usually resolves most reception problems in the Akron area.

Digital TV Transition and Rescan Information

The full digital TV transition is complete, but periodic channel re-allocations necessitate regular TV rescans in Akron, Ohio. Broadcasters occasionally adjust frequencies for technical improvements or regulatory compliance. A rescan ensures your TV receives the most current channel lineup and maintains optimal reception of available over-the-air signals.

To rescan, navigate to the “Channel Setup” or “Auto Program” menu on your TV. The exact wording varies by manufacturer. Select the “Antenna” or “Air” input source. The TV will automatically search for available digital channels. This process typically takes several minutes.

It’s recommended to rescan whenever you notice missing channels or experience signal issues. Even if you haven’t experienced problems, a periodic rescan – every few months – is a good practice. Staying updated guarantees access to all free, local TV broadcasts available via antenna in the Akron viewing area.

Free TV Channels Available via Antenna in Akron

Akron, Ohio residents can access a surprising number of free TV channels using a digital antenna. Beyond major networks, several subchannels offer diverse programming. Currently, viewers can reliably receive CBS (WOIO 19.1), providing network shows and local news. Me-TV (19.2) delivers classic television series, appealing to nostalgia buffs.

For sci-fi and action enthusiasts, Comet TV (8.3) broadcasts genre favorites. Antenna TV (8.2) focuses on vintage comedies and dramas. Sports fans can enjoy ESPN HD (23.2), offering live games and sports analysis. These are the core channels consistently available, but reception can vary based on location and antenna quality.

Additionally, occasional special broadcasts and limited-run channels may appear during rescans. Regularly checking the updated channel lineup is recommended. Utilizing a high-quality antenna and optimizing its placement significantly improves the number and clarity of free TV channels accessible in Akron.

Akron Area Antenna Retailers & Installation Services

For Akron residents seeking to embrace over-the-air TV, several retailers offer antennas and accessories. Best Buy, located at 2640 W Market St, carries a range of indoor and outdoor antennas suitable for varying reception needs. Additionally, Walmart stores throughout the Akron area stock basic antenna options at competitive prices.

If professional installation is desired, several local companies provide services. Mosher Media, serving Akron and surrounding areas, offers antenna installation alongside video production services. Other options include local handyman services often advertising TV antenna installation. It’s crucial to verify licensing and insurance before hiring any installer.

Before purchasing, consider signal strength in your specific location. Many retailers offer assistance in selecting the appropriate antenna type. Professional installation ensures optimal placement for maximum channel reception, potentially saving time and frustration. Online resources also provide guidance on self-installation if you’re comfortable with DIY projects.

Cable TV Alternatives: Cutting the Cord in Akron

Akron residents are increasingly exploring alternatives to traditional cable TV, seeking cost savings and greater control over their viewing options. Utilizing an over-the-air antenna is a primary method for “cutting the cord,” providing access to free local channels like CBS, Me-TV, and ESPN HD.

However, streaming services present another compelling alternative. Popular platforms such as Netflix, Hulu, and Disney+ offer extensive on-demand libraries, though require a monthly subscription. Services like Sling TV and YouTube TV provide live TV packages, mimicking a cable experience at a potentially lower cost.

Combining an antenna with a streaming service offers a balanced approach. An antenna covers local broadcasts, while streaming fills gaps with specialized content or channels not readily available over-the-air. Careful consideration of viewing habits and budget is key to determining the optimal combination for Akron households. Comparing costs and content offerings is highly recommended.

Comparing Streaming Services to Over-the-Air TV

For Akron viewers, deciding between streaming services and over-the-air (OTA) TV involves weighing distinct advantages. OTA TV, accessed via an antenna, is entirely free after the initial antenna purchase, offering local channels like CBS (19.1), Me-TV (19.2), and ESPN HD (23.2) without monthly fees.

Streaming services, conversely, require subscriptions but provide on-demand libraries and often, live TV options. Platforms like Netflix excel in original content, while Sling TV and YouTube TV mimic traditional cable packages. However, streaming relies on a stable internet connection, a potential drawback for some Akron residents.

A key difference lies in content control. OTA TV broadcasts are scheduled, while streaming offers on-demand viewing. Streaming also provides portability, accessible on various devices. Ultimately, the best choice depends on individual preferences – free local channels versus curated content and convenience, factoring in internet reliability and budget.

Campus Information Channel Availability

For students and faculty in Akron, accessing campus information channels via an antenna presents a unique opportunity. While dedicated campus TV channels aren’t universally broadcast, some universities utilize local digital subchannels for announcements, emergency alerts, and student programming. These are often available through OTA reception.

Checking with the specific Akron-area college or university is crucial. The University of Akron, for example, may broadcast information on a local digital subchannel accessible with a digital antenna. This complements online resources and provides a passive way to stay informed.

Beyond campus-specific channels, standard OTA broadcasts include local news (accessible with an antenna) covering campus events. Furthermore, services like ESPN HD (23.2) often carry collegiate sports, appealing to students and alumni. Investigating local broadcast listings and university communications will reveal available campus information channels in the Akron area.


Local News Channels Accessible with an Antenna

Akron residents utilizing an antenna have several options for accessing local news broadcasts over-the-air. WOIO CBS (19.1) is a primary source, delivering local news coverage throughout the day. This channel provides essential updates on community events, weather, and local investigations.

Beyond WOIO, viewers can often receive news programming from neighboring markets via an antenna, expanding their coverage area. Depending on antenna placement and signal strength, Cleveland-based news channels may also be accessible, offering alternative perspectives on regional stories.

Furthermore, many local news stations now broadcast multiple digital subchannels. These subchannels may feature extended news coverage, weather updates, or specialized reporting. Regularly scanning for available channels with your antenna ensures you’re receiving the most comprehensive local news offerings in the Akron, Ohio area. Staying informed is readily achievable with a simple antenna setup.

Guide

fink’s guide to predators

Fink’s Guide to Predators: An Overview

Fink’s comprehensive guide delves into the thrilling world of gaming predators, examining their behaviors and strategies as showcased in recent releases and promotions.

From Borderlands to Battlefield and Arknights, this overview explores how developers craft compelling antagonists, offering insights into their tactics.

Recent Epic Games Store freebies, like Hogwarts Legacy and Disco Elysium, often feature formidable foes, enriching the player experience with challenging encounters.

Understanding Predator Behavior

Predator behavior in games isn’t simply about aggression; it’s a complex interplay of calculated movements, strategic positioning, and exploiting player vulnerabilities. Analyzing recent titles reveals a shift towards more intelligent AI, moving beyond predictable patterns.

The Epic Games Store’s free game promotions, such as Hogwarts Legacy, showcase predators that adapt to player tactics, forcing dynamic gameplay. This contrasts with older designs relying on brute force. Observing titles like Battlefield 6 (in pre-release trials) highlights a return to core team-based strategies, where coordinated predator actions are key.

Furthermore, games like Arknights demonstrate how predator behavior can be integrated into tower defense mechanics, requiring players to anticipate and counter enemy movements. The Borderlands series consistently features unique predator types, each demanding a specific approach. Understanding these nuances is crucial for survival and mastery.

Predator Types in Gaming

Gaming predators broadly fall into three categories: Humanoid, Creature-Based, and Technological, each presenting unique challenges and requiring distinct player strategies for success.

Humanoid Predators

Humanoid predators represent a significant threat in many games, often exhibiting cunning intelligence and tactical prowess. These adversaries frequently employ ambush techniques and coordinated hunting patterns, demanding careful player observation and strategic counterplay.

Examples can be found across diverse titles; the Borderlands series features bandits and psychos who utilize cover and flanking maneuvers, while the Battlefield franchise showcases opposing soldiers employing realistic combat tactics. Their strength lies in adaptability and exploiting player weaknesses.

The appeal of humanoid predators stems from their relatable nature – players can anticipate their actions based on human behavior, yet still be surprised by their ruthlessness. Recent Epic Games Store promotions, including free game offerings, often highlight encounters with these challenging foes, enhancing the immersive experience.

Creature-Based Predators

Creature-based predators introduce a primal fear factor into gaming experiences, relying on instinct, brute force, and unique biological advantages. These entities often deviate from predictable human behavior, creating unpredictable and terrifying encounters for players.

Within Arknights, operators face a diverse range of infected creatures, each possessing distinct abilities and attack patterns. Similarly, titles available through Epic Games Store free promotions frequently feature monstrous adversaries demanding specialized strategies. Their designs often emphasize visual horror and unsettling movements.

The effectiveness of creature predators lies in their ability to disrupt player expectations and capitalize on vulnerabilities. They represent a raw, untamed threat, forcing players to adapt and overcome challenges beyond simple tactical maneuvers, offering a thrilling gameplay dynamic.

Technological Predators

Technological predators represent a chilling evolution of threat, utilizing advanced machinery, artificial intelligence, and networked systems to hunt and eliminate targets. Unlike organic predators, these entities often lack empathy or discernible motives, operating purely on programmed directives.

Games like Battlefield frequently showcase automated drones and robotic sentinels acting as formidable opponents. The Borderlands series also incorporates robotic enemies with complex behaviors and devastating weaponry. Epic Games Store promotions occasionally include titles featuring rogue AI or malfunctioning technology turned hostile.

The strength of technological predators lies in their precision, adaptability, and relentless pursuit. They embody a fear of unchecked technological advancement and the potential for machines to surpass human control, creating a uniquely unsettling gameplay experience.

Predator Tactics and Strategies

Predator tactics range from cunning ambush techniques to calculated hunting patterns, often focused on exploiting weaknesses in prey, as seen in recent game releases.

Ambush Techniques

Ambush techniques are a cornerstone of predator design in gaming, creating tense and unpredictable encounters for players. Many predators utilize environmental cover – shadows, dense foliage, or structural elements – to conceal their presence before striking.

This often involves setting traps or utilizing flanking maneuvers to gain a tactical advantage. The element of surprise is crucial; a well-executed ambush can quickly turn the tide of battle, forcing players to react swiftly and decisively.

Recent games, like those featured in Epic Games Store promotions and the Battlefield series, demonstrate sophisticated ambush AI, where predators learn player movement patterns and adapt their strategies accordingly. Successful ambushes rely on careful observation, patience, and a deep understanding of the game environment.

Hunting Patterns

Hunting patterns define how predators pursue their prey within a game world, ranging from methodical tracking to aggressive, relentless assaults. Some predators exhibit pack behavior, coordinating attacks to overwhelm their targets, mirroring real-world animal strategies.

Others prefer solitary hunts, relying on stealth and cunning to isolate and eliminate their prey. Observing these patterns is vital for players; recognizing a predator’s typical approach allows for proactive defense and counter-strategies.

Games like Arknights often feature enemies with distinct patrol routes and engagement triggers, demanding careful planning. The Epic Games Store’s free game offerings frequently showcase diverse hunting styles, challenging players to adapt and survive against varied threats.

Exploiting Weaknesses


Exploiting weaknesses is paramount to survival when facing formidable predators in gaming. Understanding a predator’s vulnerabilities – be it elemental susceptibility, armor gaps, or predictable attack patterns – is crucial for turning the tables.

Many games, such as those featured in Epic Games Store promotions like Borderlands, encourage players to experiment with different weapon types and tactical approaches to uncover these weaknesses. Observing enemy behavior during encounters provides valuable clues.

For instance, a heavily armored predator might be slow and vulnerable to flanking maneuvers. Recognizing these flaws allows players to optimize their strategies and achieve victory against seemingly insurmountable odds, enhancing the overall gameplay experience.

Popular Predators in Specific Games

Fink’s guide spotlights iconic predators across diverse titles – Borderlands’ relentless bandits, Battlefield’s skilled operatives, and Arknights’ challenging enemies.

These games showcase unique predator designs and tactical approaches, offering varied gameplay experiences for players.

Borderlands Series Predators

Fink’s guide highlights the diverse and often chaotic predators within the Borderlands universe. From the relentless Bandit clans, driven by greed and a thirst for mayhem, to the imposing presence of the Crimson Raiders’ adversaries, danger lurks around every corner.

Borderlands 4, slated for release on September 12, 2025, for PS5, Xbox Series X/S, and PC (Steam/Epic Games Store), promises to introduce even more formidable foes. These predators aren’t simply enemies; they’re integral to the narrative, often possessing unique behaviors and challenging combat styles.

Players will encounter heavily armed bandits, mutated creatures, and powerful bosses, each demanding strategic thinking and skillful execution. The series excels at creating memorable predator encounters, pushing players to adapt and overcome.

Battlefield Series Predators

Fink’s guide recognizes the human element as a primary predator within the Battlefield franchise. Unlike creature-based threats, the danger in Battlefield stems from opposing players, each a cunning and adaptable adversary.

The upcoming Battlefield 6, currently in deep-dive testing, aims to recapture the series’ core essence, emphasizing intense player-versus-player combat. This iteration promises a return to form, delivering a visceral and challenging experience where every encounter feels high-stakes.

Predator tactics in Battlefield revolve around strategic positioning, coordinated assaults, and exploiting environmental advantages. Players must anticipate enemy movements, utilize cover effectively, and master a diverse arsenal to survive and dominate the battlefield.

Arknights Predators

Fink’s analysis of Arknights reveals a unique predator dynamic centered around infected creatures and hostile forces threatening the world of Terra. These enemies aren’t simply monsters; they represent a systemic threat, demanding strategic deployment of Operators to contain outbreaks.

The recent launch of Arknights: Endfield, now available for pre-order on App Store, Google Play, Epic Games Store, and PS5, introduces new and challenging predator types. Players must adapt to evolving enemy behaviors and utilize specialized Operator skills.

Predator tactics in Arknights involve understanding enemy movement patterns, exploiting weaknesses with elemental damage, and carefully managing Operator positioning to prevent breaches and secure vital points.

Epic Games Store & Predator-Focused Games

Fink’s guide highlights the Epic Games Store’s frequent free game promotions, including titles with intense predator encounters and DLC expansions, offering great value.

Free Game Promotions Featuring Predators

Fink’s guide observes that the Epic Games Store consistently delivers value through its free weekly game offerings, frequently including titles where players face challenging predators.

The Holiday Sale 2024 showcased nine freebies, hinting at a pattern of predator-rich content distribution. More recently, the store gifted Hogwarts Legacy and Disco Elysium, both containing significant antagonistic forces that players must overcome.

Furthermore, promotions extend beyond PC, with a growing selection of free mobile games also appearing. These events often coincide with larger industry releases, like the anticipated Battlefield 6, potentially driving interest in predator-focused gameplay.

Keep an eye on RFD forums for up-to-date information on these deals, ensuring you don’t miss out on opportunities to experience thrilling predator encounters at no cost!

DLC & Add-On Content with Predator Elements

Fink’s research reveals that downloadable content (DLC) frequently expands upon existing predator encounters within games, or introduces entirely new threats. The recent availability of the “Steam Spirit Liverpool Lime Street ‒ Crewe Route Add-On” for Train Sim World 6, though seemingly unrelated, demonstrates the breadth of DLC offerings.

These additions often deepen the lore surrounding antagonists, providing players with more challenging battles and intricate storylines. The upcoming Borderlands 4, slated for release in September 2025, is expected to feature substantial DLC packs, potentially introducing unique predator types.

Monitoring Epic Games Store updates and community discussions on platforms like RFD is crucial for discovering predator-focused DLC releases and maximizing your gaming experience.

Predator Game Availability on Epic Games Store

Fink’s investigations show the Epic Games Store is a key platform for accessing predator-focused titles, often through generous free game promotions. Recent examples include Hogwarts Legacy and Disco Elysium, showcasing a commitment to offering high-quality gaming experiences.

Several upcoming releases, such as Battlefield 6 and Arknights’ public test, will be available directly through the Epic Games Store, alongside Steam, Xbox, and PlayStation platforms. Independent titles like Blood West have also benefited from Epic’s free game initiatives, gaining significant player exposure.

Regularly checking the Epic Games Store and utilizing RFD forums for deal alerts is recommended to stay informed about predator game availability.

Community Discussions & Deals

Fink’s research reveals RFD forums are a prime Canadian source for Epic Games deals, alongside trending social media discussions about predator games and freebies.

RFD Forums & Epic Games Deals

RFD (RedFlagDeals) forums serve as a central hub for Canadian gamers seeking the best deals on Epic Games offerings, particularly those related to predator-focused titles or games featuring compelling antagonists.

Recent discussions highlight the success of the Epic Games Holiday Sale 2024, which included numerous freebies and in-game content. Users actively share information about daily free PC games, like Hogwarts Legacy and Disco Elysium, and DLC promotions.

Forum members also track wishlists and social media campaigns, such as the Seven Knights Re:BIRTH event, where adding the game to a wishlist and sharing on SNS could yield rewards. The community diligently posts about limited-time free DLC, like the Train Sim World 6 add-on, and monitors new releases like Battlefield 6.

RFD provides a valuable resource for staying informed about Epic Games Store updates and maximizing savings on predator-themed gaming experiences.

Social Media Trends Regarding Predator Games

Social media platforms are buzzing with discussions surrounding games featuring formidable predators, fueled by recent Epic Games Store promotions and upcoming releases. Trends indicate heightened interest in titles like Borderlands 4, slated for release in September 2025, and the early access period for Arknights: Endfield.

The free giveaway of Blood West on the Epic Games Store sparked significant conversation, demonstrating the power of free promotions to drive engagement. Users actively share screenshots and gameplay clips, highlighting challenging encounters with in-game antagonists.

Campaigns encouraging wishlist additions, like the one for Seven Knights Re:BIRTH, leverage social sharing for increased visibility. Discussions also center around the immersive experiences offered by franchises like Battlefield, with players anticipating the return to core gameplay elements.

Future Trends in Predator Game Design

Looking ahead, predator game design is poised for innovation, building upon recent successes and addressing evolving player expectations. We anticipate a greater emphasis on adaptive AI, creating predators that learn and react to player strategies, moving beyond predictable patterns.

The success of free game promotions on the Epic Games Store suggests a continued trend towards accessibility, potentially influencing the development of predator-focused demos or introductory content. Expect more dynamic environments that offer predators tactical advantages, fostering emergent gameplay.

Furthermore, integrating elements from diverse genres – like the blend of RPG and shooter in Borderlands – could yield unique predator encounters. The demand for challenging, yet fair, experiences will likely drive a focus on nuanced predator behaviors and exploitable weaknesses.

Guide

salvation army donation guide printable

Salvation Army Donation Guide: A Comprehensive Overview (2026)

Today’s date is 02/07/2026. This guide details donating to the Salvation Army, supporting their Adult Rehabilitation Centers and vital community programs through your contributions.

Understanding the Salvation Army’s Mission & Donation Impact

The Salvation Army’s core mission revolves around addressing societal needs – providing assistance to those experiencing poverty, homelessness, substance abuse, and disaster relief. Approximately 100% of proceeds from donated goods directly fund their Adult Rehabilitation Centers, offering crucial support and tools for individuals striving to rebuild their lives.

Donations aren’t simply discarded items; they are transformed into opportunities. They provide shelter, meals, addiction treatment, job training, and a pathway back to self-sufficiency. Your contributions empower the Salvation Army to offer these life-changing services, impacting countless individuals and families within communities nationwide. Every item, big or small, plays a vital role in this impactful cycle of giving and renewal.


Why Donate to the Salvation Army?

Donating to the Salvation Army offers a powerful way to directly support individuals facing significant life challenges. Your unwanted items are repurposed to fund vital programs, including addiction treatment and support services for those struggling with various life issues. A substantial 100% of proceeds from sales directly benefit these Adult Rehabilitation Centers, providing a tangible impact.

Beyond financial support, donating declutters your home while contributing to a worthy cause. The Salvation Army provides a convenient and accessible donation process, with both drop-off locations and pickup services available. Choosing to donate is choosing to invest in hope, recovery, and a brighter future for those in need within your community and beyond.

Accepted Clothing Donations

The Salvation Army gratefully accepts all clothing for men, women, infants, and children. This includes everyday wear, formal attire, and outerwear – essentially, any garment you no longer need. Donated clothing provides affordable options for individuals and families in need, while also funding the organization’s crucial programs.

Consider the condition of the items; donations should be clean and in wearable condition. While seasonal needs fluctuate, all clothing types are generally welcome year-round. Donating a variety ensures a wider range of options are available to those they serve. Remember, your gently used clothing can make a significant difference in someone’s life!

Men’s, Women’s, and Children’s Clothing

The Salvation Army welcomes a broad spectrum of apparel for all ages and genders. Men’s donations include shirts, pants, suits, and coats. Women’s clothing accepted encompasses dresses, blouses, skirts, and jackets. For children, they gladly receive everything from baby clothes to teen apparel, ensuring families have access to affordable necessities.

Donations of all sizes are appreciated, catering to diverse body types and preferences. Gently used, clean items are preferred, allowing them to be readily available for those in need. Remember that baby clothes are particularly in high demand! Your contribution directly supports individuals and families within your community.

Seasonal Clothing Needs

The Salvation Army experiences fluctuating needs based on the time of year. During winter months, donations of warm coats, hats, gloves, scarves, and sweaters are critically important to support individuals facing cold weather conditions. As spring approaches, lighter jackets, rainwear, and transitional clothing become highly sought after.

Summer brings a need for shorts, t-shirts, and breathable fabrics, while fall requires warmer layers like fleece and long-sleeved shirts. Donating seasonally appropriate clothing ensures the Salvation Army can immediately meet the current demands of the community. Consider what you no longer need as the seasons change and donate accordingly!

Household Items: What They Will Take

The Salvation Army gratefully accepts a wide variety of household items to support their programs. This includes small kitchen appliances, cookware, dishes, and decorative items. Furniture donations are welcome, though guidelines and restrictions apply based on condition and space availability at local centers.

Donors are encouraged to ensure all electrical and battery-operated equipment is tested and in working order before donation. Including manuals and all accompanying parts is also greatly appreciated. Clean, non-soiled items are preferred. Remember to call ahead to the specific donation center to confirm acceptance, especially for larger items.

Furniture Donations – Guidelines & Restrictions

The Salvation Army accepts furniture donations, but certain guidelines apply. Items must be in good, usable condition – free from significant damage, stains, or odors. They generally accept sofas, chairs, tables, dressers, and beds. However, acceptance can vary significantly by location due to storage capacity and operational capabilities.

Large or specialty furniture items may be declined. It’s crucial to call your local Salvation Army center before attempting a drop-off to confirm they can accommodate your furniture. They evaluate if items align with their ability to resell them, avoiding items they aren’t permitted to sell.

Electronics & Small Appliances (Testing Required)

The Salvation Army welcomes donations of electronics and small appliances, but a crucial step is required: testing. Before donating, please ensure all electrical and battery-operated items are in working order. Non-functional items cannot be accepted as they pose a disposal challenge.

Include all original manuals and any accompanying parts or accessories whenever possible. This enhances the item’s value and usability for potential buyers. Accepted items typically include televisions, stereos, microwaves, toasters, and blenders. Remember to clean the items before donation, presenting them in a presentable condition.

Items Commonly Accepted

The Salvation Army gratefully accepts a wide variety of donations to support its programs. All clothing for men, women, and children is consistently needed, providing essential resources for individuals in need. Beyond apparel, they readily take books, magazines, and various media, offering affordable reading and entertainment options.

Household linens and textiles, such as bedding, towels, and curtains, are also highly valued. These items directly benefit families transitioning into new homes or facing financial hardship. Donated goods are sold in their thrift stores, with proceeds funding vital services like substance abuse rehabilitation and disaster relief efforts.

Books, Magazines, and Media

The Salvation Army welcomes donations of books, magazines, and various media formats. Hardcover and paperback books of all genres are accepted, providing affordable reading material to the community. Current magazines, though sometimes subject to local demand, are generally appreciated.

Donations of CDs, DVDs, and vinyl records are also gratefully received, offering entertainment options at low cost. These items are sold in Salvation Army thrift stores, generating funds for their Adult Rehabilitation Centers and other crucial social service programs. Ensure media is in reasonably good condition – no broken cases or severely damaged discs, please.

Household Linens & Textiles

The Salvation Army gladly accepts a wide range of household linens and textiles. This includes gently used blankets, bed sheets, pillowcases, towels, and tablecloths. These items are highly sought after and provide essential comfort to individuals and families in need.

Donations of curtains, throw rugs (clean and in good repair), and even fabric scraps can be repurposed or sold to support the organization’s programs. Please ensure all linens are clean and dry before donating. Items with significant stains, tears, or odors may not be usable and could be discarded. Your contribution directly impacts those served by the Adult Rehabilitation Centers.

Donation Restrictions: Items NOT Accepted

The Salvation Army, while appreciative of all offers, has specific donation restrictions for safety and operational reasons. Toys and baby items like car seats and high chairs are not accepted due to stringent safety regulations and liability concerns. Large or specialty items may also be declined, depending on local staffing, storage, and regulations.

Items that cannot be legally sold, or those the stores are prohibited from offering, will not be accepted. Acceptance can vary by location, so contacting your local center is advised. It’s crucial to avoid donating items that are broken, soiled, or pose a hazard. Prioritizing safe and usable donations maximizes impact.

Safety Concerns: Car Seats & High Chairs

Car seats and high chairs are consistently excluded from Salvation Army donations due to evolving safety standards and potential liability. These items are subject to recalls and changing regulations, making it difficult to guarantee their safety for future users. Even seemingly undamaged seats may lack crucial safety features or have hidden defects.

The Salvation Army prioritizes child safety above all else. Accepting these items could pose a significant risk to a child’s well-being. While baby clothing is gratefully accepted, these specific safety-regulated items cannot be resold or redistributed. This policy ensures responsible donation practices and protects vulnerable children.

Items with Operational Limitations: Large/Specialty Items

The Salvation Army evaluates each donation based on its operational capabilities and local resources. Large or specialty items, even if usable, may be declined due to staffing limitations, storage capacity, or local regulations. Acceptance isn’t guaranteed and varies significantly by location.

Items requiring specialized handling, disassembly, or transportation often present logistical challenges. Before donating, it’s crucial to call ahead to confirm acceptance, especially for uncommon or bulky items. This prevents wasted trips and ensures your donation can be effectively utilized. The Salvation Army aims to maximize the impact of donations within their operational framework.

Preparing Your Donation for Drop-Off or Pickup

Ensure all items are clean and in non-soiled condition before donating to the Salvation Army. This simple step significantly increases the likelihood of acceptance and resale. Test all electrical and battery-operated equipment to confirm it’s functioning correctly; non-working items are often rejected.

Include all manuals, pieces, and parts whenever possible. Complete items are more appealing to buyers and maximize the donation’s value. Bringing an itemized list of your donation is highly recommended, especially for tax deduction purposes. Consider calling ahead to the donation center or store to confirm drop-off procedures.

Cleaning & Condition Requirements

Donated items must be in clean, usable condition. The Salvation Army appreciates donations that are ready for resale, directly benefiting their programs. While minor wear is acceptable, heavily soiled or damaged goods may be declined. Thoroughly wash or launder clothing, linens, and other textiles before donating.

Ensure furniture is free of stains and odors. For electronics and appliances, a functional state is crucial; items that don’t work are often unable to be accepted. Prioritizing cleanliness and good repair demonstrates respect for the organization and maximizes the impact of your generous contribution.

Including Manuals & Parts

Maximize the value of your donation by including all available manuals and accompanying parts. Complete items are significantly more appealing to buyers and easier for the Salvation Army to process for resale. For electronics, appliances, and assembled furniture, having the original instructions is incredibly helpful.

Missing components can diminish an item’s usability and saleability. If you have screws, remotes, cords, or other related pieces, please include them with the corresponding item. This simple step ensures a smoother resale process and helps the Salvation Army generate more funds for their vital programs and services.

Donation Logistics: Drop-Off vs. Pickup

The Salvation Army offers convenient donation options: drop-off or scheduled pickup. To find the nearest donation center, utilize their online locator tool on the official website; Drop-offs allow immediate contribution, but confirm operating hours beforehand, as centers may have specific intake times.

For larger items or limited mobility, a donation pickup is ideal. Scheduling a pickup requires contacting your local Salvation Army division to arrange a suitable date and time. Remember to call ahead before dropping off items to ensure the center is accepting donations and to inquire about any specific guidelines.

Locating Your Nearest Salvation Army Donation Center

Finding a convenient donation location is simple! The Salvation Army provides an online search tool on their website to pinpoint the closest drop-off center. This tool allows you to enter your zip code or city and state to generate a list of nearby locations, complete with addresses and contact information.

Alternatively, a quick online map search for “Salvation Army Donation Center near me” will yield results. Remember that acceptance criteria can vary by location, so a quick phone call to confirm they’re accepting your specific items is always recommended. Prioritizing a call avoids wasted trips and ensures your generosity directly benefits those in need.

Scheduling a Donation Pickup

For larger items or if transportation is a challenge, the Salvation Army often offers donation pickup services! Availability varies significantly by location, so checking your local division’s website is crucial. Many areas require scheduling pickups online or by phone, and there may be specific requirements regarding item size or quantity.

Be prepared to provide details about your donation when scheduling, including a general list of items. Pickup services are typically free, but some locations may accept voluntary donations to cover fuel costs. Remember to have your items readily accessible and in good condition for the scheduled pickup time to ensure a smooth process.

Creating an Itemized List for Tax Purposes

To claim a tax deduction for your Salvation Army donation, meticulous record-keeping is essential. The IRS requires donors to maintain an itemized list detailing each donated item. Include a description of each item – for example, “Men’s blue jeans, size 32×30,” or “Women’s red sweater, size medium.”

Estimate the fair market value of each item at the time of donation. Online resources can assist with valuation. The Salvation Army provides donation receipts, but they generally do not assign values. It’s your responsibility to determine and document these values accurately for potential tax benefits. Keep this list with your receipt!

Tax Deduction Information & Receipts

The Salvation Army is a 501(c)(3) nonprofit organization, meaning your donations are generally tax-deductible to the extent allowed by law. Obtain a receipt from the donation center or request one when scheduling a pickup. This receipt serves as proof of your contribution.

For donations exceeding $250, the IRS requires a written acknowledgment from the Salvation Army specifying the date of the contribution and a description of the donated property; Maintain this acknowledgment with your tax records. Remember, you can only deduct the fair market value of the items donated, and accurate record-keeping is crucial for substantiation.

Contacting the Salvation Army for Specific Questions

Direct inquiries regarding donation acceptance, particularly for larger or unusual items, to your local Salvation Army center. Acceptance policies can vary based on location, staffing, storage, and local regulations. Calling ahead avoids potential disappointments when donating.

For general inquiries or to locate a center, visit the national Salvation Army website or utilize their donation locator tool. You can also contact the Northeast Ohio Division directly for regional-specific questions. Don’t hesitate to reach out; they are happy to clarify donation guidelines and ensure your contribution effectively supports their programs.

Regional Variations in Donation Acceptance

Donation acceptance isn’t uniform across all Salvation Army locations. Factors like local needs, storage capacity, staffing levels, and specific regional regulations influence what items are accepted. The Austin Salvation Army highlights that some donations may be turned away if they cannot legally be sold.

Always verify with your local center before donating, especially larger or specialty items. While a location might accept a particular item generally, a specific store may have limitations. This ensures a smooth donation process and maximizes the impact of your generosity, directly supporting local community programs and the Adult Rehabilitation Centers.

The Adult Rehabilitation Centers Program & Your Donations

A significant portion of proceeds – approximately 100% – from the sale of donated items directly funds the Salvation Army’s Adult Rehabilitation Centers (ARCs). These centers provide crucial support to individuals battling substance abuse and other life challenges.

The ARCs offer comprehensive services, equipping individuals with the tools and resources needed to reintegrate into society and lead productive lives. Your donations aren’t just discarded items; they are vital components in a transformative program offering hope and a pathway to recovery for those in need within our communities.

Staying Updated on Donation Needs (Seasonal & Local)

Donation acceptance can fluctuate based on seasonal requirements and the specific needs of your local Salvation Army branch. It’s always prudent to check with your nearest center before making a large donation, particularly regarding larger or unusual items.

Staffing levels, storage capacity, and local regulations all influence what can be accepted. Calling ahead prevents potential disappointment and ensures your generosity directly benefits those served. Regularly checking the Salvation Army’s website or contacting them directly will provide the most current information regarding their evolving needs within your community.

PreviousNext

You Want To Have Your Favorite Car?

We have a big list of modern & classic cars in both used and new categories.