Australia

dracula’s gold coast menu pdf

Draculas Gold Coast Menu PDF: A Comprehensive Overview (Updated 02/07/2026)

Discover the current Draculas Gold Coast dinner menu online as a PDF! Explore a quality three-course dining experience, easily accessible via their official website, draculas․com․au․

Draculas Gold Coast isn’t merely a restaurant; it’s a theatrical dining experience, a vibrant cabaret, and a unique menagerie all rolled into one unforgettable night․ Located at 1 Hooker Bvd, Broadbeach, Queensland, Australia, Draculas has become a landmark destination for both locals and tourists seeking entertainment alongside a quality meal․ The venue consistently ranks highly among Broadbeach attractions, boasting over 20 of 66 attractions in the area․

Central to the Draculas experience is, of course, the food․ Guests enjoy a comprehensive three-course dinner as part of their show ticket, and accessing the current menu is straightforward․ While the full experience is immersive, understanding the dining options beforehand enhances anticipation․ The official website, draculas․com․au, provides access to the latest menu PDF, allowing patrons to preview the culinary delights awaiting them․ This commitment to transparency ensures a delightful and informed dining experience before the show even begins;

Locating the Draculas Menu PDF

Finding the most up-to-date Draculas Gold Coast menu in PDF format is a simple process, primarily directed through their official website: draculas․com․au․ The website serves as the central hub for all information regarding show times, bookings, and, crucially, the current dining options․ Navigation is intuitive; look for dedicated sections labeled “Menu” or “Dining,” often found within the “Explore” or “About” areas of the site․

Direct links to the PDF menu are frequently featured on the homepage and booking confirmation pages․ Alternatively, a quick site search using keywords like “menu PDF” will swiftly locate the document․ It’s recommended to check for the date of the menu to ensure you’re viewing the most current offerings, as changes occur periodically․ Downloading the PDF allows offline viewing and convenient pre-show meal planning, enhancing your overall Draculas experience․

Understanding the Draculas Experience

Draculas Gold Coast isn’t merely a dinner; it’s a fully immersive theatrical experience․ Before delving into the menu, understanding this context is vital․ The evening combines a high-energy cabaret show with a three-course meal, creating a unique and memorable night․ Expect elaborate costumes, stunning sets, and thrilling performances from a talented cast of acrobats, singers, and dancers․

The dining component is seamlessly integrated into the show, with performances unfolding around and even above the diners․ The menu itself is designed to complement the theatrical atmosphere, offering a range of options to suit various tastes․ Reviewing the menu PDF beforehand allows you to pre-select your choices, maximizing your enjoyment of the show without interruption․ It’s a feast for all senses – sight, sound, and taste – making Draculas a truly unforgettable destination․

The Dinner Show Format

Draculas Gold Coast’s dinner show follows a carefully orchestrated format designed to maximize entertainment․ Upon arrival, guests are seated and provided with the menu, often available as a convenient PDF download for pre-show browsing․ The evening commences with a welcome drink, setting the stage for the spectacle to unfold․ Throughout the three-course meal, a continuous stream of cabaret performances takes place, interwoven with interactions between the cast and the audience․

The show isn’t simply during dinner; it is the dinner experience․ Performances occur on stage, amongst the tables, and even overhead, creating a dynamic and immersive atmosphere․ Selecting your meal from the menu (available online as a PDF) is just the first step․ Expect a fast-paced, energetic show, so reviewing the menu beforehand allows you to fully enjoy the captivating performances without mealtime decisions interrupting the fun․ It’s a seamless blend of dining and dazzling entertainment․

Cabaret Performances & Menagerie

Draculas Gold Coast is renowned for its spectacular cabaret performances, a vibrant mix of song, dance, and theatrical illusions․ These aren’t merely interludes between courses; they are integral to the dining experience, unfolding throughout your three-course meal – conveniently selected after reviewing the menu, often available as a downloadable PDF․ The performances are known for their elaborate costumes, energetic choreography, and interactive elements, drawing the audience into the show․

Adding to the unique atmosphere is the ‘Menagerie’ – a collection of bizarre and fascinating creatures displayed throughout the venue․ While enjoying your meal (after perusing the menu PDF), guests can observe these curiosities, enhancing the gothic and theatrical ambiance․ The combination of captivating performances and the intriguing Menagerie creates an unforgettable evening․ It’s a feast for all the senses, perfectly complementing the culinary offerings detailed in the readily available menu․

Draculas Gold Coast Menu: General Information

Draculas Gold Coast presents a fixed-price, three-course dining experience, designed to complement the immersive cabaret show․ The current menu, frequently updated and available as a PDF download from their official website (draculas․com․au), offers a selection of appetizers, main courses, and decadent desserts․ While specific dishes may vary, the menu consistently features options catering to diverse palates․

Guests typically choose one item from each course, with vegetarian options generally available․ The menu PDF provides detailed descriptions of each dish, including allergy information․ It’s advisable to review the menu beforehand, especially if you have dietary restrictions or preferences․ The pricing structure encompasses both the meal and the entertainment, offering a complete night out․ Accessing the menu PDF allows for informed pre-planning, ensuring a delightful and seamless experience at Draculas․

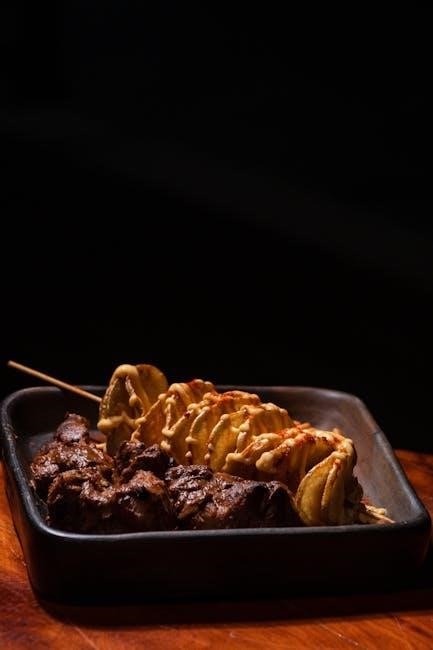
Appetizers & Entrees

Draculas Gold Coast’s menu PDF showcases a tempting array of appetizers to begin your evening․ Expect choices designed to awaken the palate, often featuring fresh, seasonal ingredients․ Entrees typically include options like soups, salads, or lighter bites, providing a flavorful prelude to the main course․ The current menu, downloadable from draculas․com․au, details these starting selections․

Recent offerings have included selections with creamed fetta, red pepper oil, and balsamic glaze, demonstrating a focus on balanced flavors․ These initial courses are crafted to be both delicious and visually appealing, setting the stage for the theatrical dining experience․ The appetizer and entree selections are thoughtfully curated to complement the broader menu and cater to a range of tastes․ Reviewing the PDF menu allows guests to pre-select their preferred starters, enhancing their overall enjoyment․
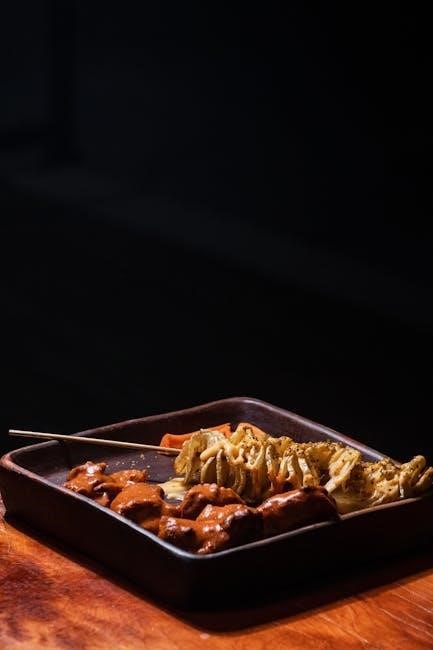
Main Course Options

Draculas Gold Coast’s menu PDF reveals a diverse selection of main courses, designed to satisfy a variety of preferences․ Guests can choose from a range of expertly prepared dishes, encompassing both classic and contemporary culinary styles․ The downloadable menu, available at draculas․com․au, provides a detailed overview of the current offerings, including descriptions and any dietary information․

Notably, the menu features a dedicated section for Thai-inspired dishes, showcasing vibrant flavors and aromatic spices․ These options often include popular Thai classics, prepared with authentic ingredients․ Alongside these, a selection of fig tart options provides a unique and sophisticated choice․ The main course selection is a cornerstone of the Draculas dining experience, promising a memorable and flavorful centerpiece to the evening․ Careful consideration is given to presentation and quality, ensuring each dish is both visually stunning and exceptionally tasty․

Thai Inspired Dishes

Draculas Gold Coast’s menu PDF highlights a captivating selection of Thai-inspired dishes, offering a vibrant culinary journey․ These options showcase authentic Thai flavors, expertly blended with fresh ingredients and aromatic spices․ The downloadable menu, accessible via draculas․com․au, details each dish, providing descriptions of the unique flavor profiles and preparation methods․

Expect to find classic Thai curries, perhaps a fragrant green curry with tender chicken or a rich red curry with succulent beef․ Pad Thai, a beloved noodle dish, is also frequently featured, alongside other popular choices like Tom Yum soup․ These dishes are carefully crafted to deliver an authentic Thai experience, complementing the overall theatrical ambiance of Draculas․ The Thai-inspired selections represent a popular choice for diners seeking a flavorful and exotic main course, adding a delightful dimension to the evening’s entertainment․

Fig Tart Selection

Draculas Gold Coast’s menu PDF showcases an exquisite Fig Tart selection, a testament to their commitment to refined dining․ These tarts are described as featuring a delicate pastry base, generously filled with sweet, ripe figs․ The downloadable menu, found on draculas․com․au, details the specific preparation of each tart, highlighting the quality of ingredients used․

Expect a delightful combination of flavors and textures – the sweetness of the figs beautifully balanced by a creamy cheese component, often a creamed fetta․ A drizzle of red pepper oil and balsamic glaze adds a touch of complexity and visual appeal․ These tarts are presented as a sophisticated vegetarian option, appealing to those seeking a lighter yet flavorful main course․ The Fig Tart selection embodies Draculas’ dedication to providing a memorable culinary experience, perfectly complementing the captivating cabaret show and overall atmosphere․

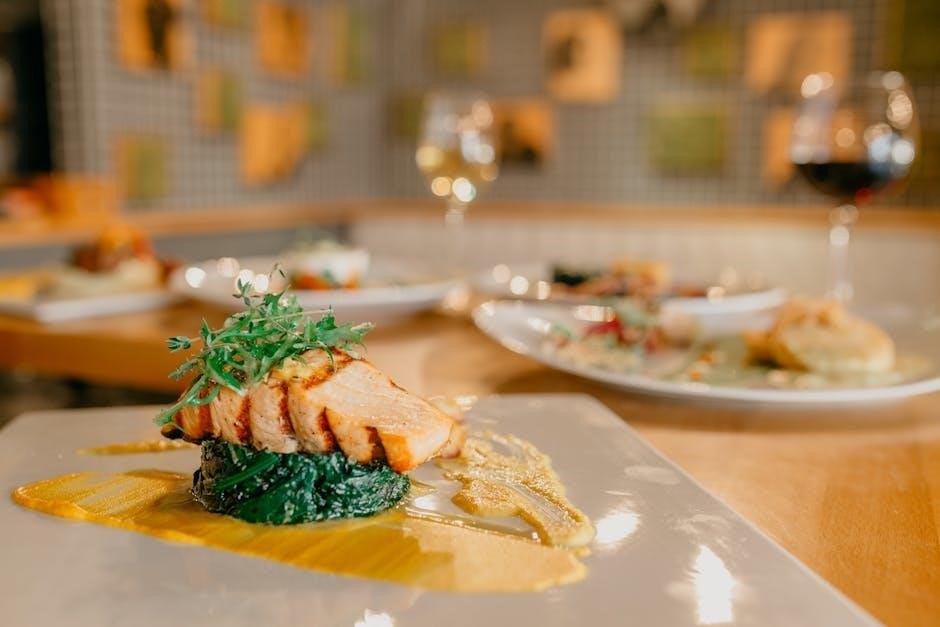
Desserts: A Signature Feature

Draculas Gold Coast truly elevates the dining experience with its signature desserts, prominently featured in their downloadable menu PDF available at draculas․com․au․ Desserts aren’t merely an afterthought; they are a carefully crafted finale to the three-course meal, designed to be as visually stunning as they are delicious․

The dessert selection consistently receives high praise, with a particular standout being the Dark Chocolate Coffin․ This decadent creation is a masterpiece of pastry artistry, filled with layers of caramel, crème patisserie, and a salted caramel liquor-infused mousse․ Topped with fresh cream, it’s a chocolate lover’s dream․ Beyond the coffin, the menu often includes other tempting options, showcasing the pastry chef’s skill and creativity․ These desserts perfectly encapsulate the theatrical and indulgent spirit of Draculas, leaving a lasting impression on every guest․

The Dark Chocolate Coffin Dessert

Draculas Gold Coast’s most iconic dessert, the Dark Chocolate Coffin, is a show-stopping finale detailed within their menu PDF, accessible on their website, draculas․com․au․ This isn’t simply a dessert; it’s an experience, embodying the theatrical essence of the cabaret․ The coffin itself is constructed from rich, dark chocolate, providing a satisfying snap with every bite․

Inside this edible crypt lies a treasure trove of flavors․ Layers of smooth caramel intertwine with delicate crème patisserie, all infused with a subtly intoxicating salted caramel liquor mousse․ The dessert is finished with a generous swirl of fresh cream, balancing the richness of the chocolate․ It’s a visually dramatic and incredibly flavorful creation, consistently highlighted as a must-try item by visitors; The detailed description in the menu PDF doesn’t fully capture the sheer indulgence of this signature treat․

Drinks Menu Overview

Draculas Gold Coast boasts an extensive drinks menu, complementing their theatrical dining experience, and details are available within the comprehensive menu PDF found on draculas․com․au․ Beyond standard beverages, expect a selection designed to enhance the cabaret atmosphere․ The drinks list features a range of cocktails, many with darkly whimsical names fitting the venue’s theme – think potent potions and mysterious mixes․

Beer selections include both local and international options, catering to diverse preferences․ Wine lovers will find a curated list of reds, whites, and sparkling wines, chosen to pair well with the three-course dinner․ Non-alcoholic options are also plentiful, ensuring everyone can enjoy a refreshing beverage․ The menu PDF provides pricing and specific details on available drinks, though seasonal specials may not always be listed․ Expect premium spirits and attentive bar service throughout the evening, adding to the overall immersive experience․

Pricing and Packages

Draculas Gold Coast offers various pricing tiers and packages, detailed within the downloadable menu PDF available at draculas․com․au․ Generally, pricing covers admission to the cabaret show alongside a quality three-course dinner․ Standard admission with dinner typically falls within a specific range, though prices can fluctuate based on the night and any special events․

Premium packages are also available, often including reserved seating closer to the stage for an enhanced viewing experience․ These packages may also incorporate additional perks, such as pre-show drinks or merchandise vouchers․ Group discounts are frequently offered for larger bookings, making it an attractive option for celebrations or corporate events․ The menu PDF outlines the current pricing structure for each package, including any associated terms and conditions․ It’s advisable to book in advance, especially during peak seasons, to secure your preferred package and seating․

Booking Information & Reservations

Reservations for Draculas Gold Coast are essential, particularly during peak seasons and for special events․ Bookings can be conveniently made online through the official website, draculas․com․au, where you can also view the current menu PDF․ The online booking system allows you to select your preferred date, show time, and seating package․

Alternatively, reservations can be secured via phone by contacting Draculas directly․ A dedicated reservations team is available to assist with your booking and answer any queries regarding packages, pricing, or dietary requirements․ It’s recommended to book well in advance to guarantee your desired seating arrangement․ A deposit may be required to confirm your reservation, with the balance payable upon arrival․ Detailed booking terms and conditions, including cancellation policies, are available on the website and within the menu PDF download․

Frequently Asked Questions (FAQs)

Q: Where can I find the Draculas Gold Coast menu? A: The current dinner menu is readily available as a PDF download on the official Draculas website, draculas․com․au․ It showcases the three-course dining options․

Q: Is online booking required? A: While not always mandatory, online booking is highly recommended to secure your preferred date and show time․ The website facilitates easy reservation management․

Q: What’s included in the dinner packages? A: Packages typically include a three-course meal, the spectacular cabaret show, and access to the menagerie․ Specific inclusions vary by package; details are on the website and within the menu PDF․

Q: Can I view the menu before booking? A: Absolutely! The complete menu PDF is accessible before booking, allowing you to plan your dining experience․ Dietary requirements can often be accommodated – please inquire during booking․

Draculas History & Background

Draculas Cabaret and Restaurant on the Gold Coast has a rich history, evolving into a renowned entertainment destination․ Established to provide a unique dining and show experience, it quickly gained popularity for its theatrical performances and immersive atmosphere․ The venue’s commitment to quality extends to its culinary offerings, reflected in the regularly updated menu․

Over the years, Draculas has continually refined its cabaret shows, incorporating elaborate sets, costumes, and talented performers․ The menu has also adapted, showcasing diverse cuisine while maintaining signature dishes like the Dark Chocolate Coffin․ The current menu PDF available online represents this ongoing evolution․

Located at 1 Hooker Bvd, Broadbeach, the establishment has become a Gold Coast landmark․ Its enduring success stems from a dedication to providing unforgettable nights, blending exceptional dining with captivating entertainment․ Accessing the menu PDF allows patrons to preview the culinary delights awaiting them;

Photo Studio Details

Draculas Gold Coast offers a unique photo studio experience, allowing guests to capture memories of their evening․ Professional photographers are available to create portraits with a theatrical flair, utilizing props and backdrops inspired by the cabaret’s dark and glamorous aesthetic․ These photos serve as lasting souvenirs of a memorable night․

While browsing the menu PDF online, consider pre-booking a photo session to ensure availability․ Packages often include prints and digital copies, providing options to suit different preferences․ The studio aims to enhance the overall Draculas experience, adding a personalized touch to your visit․

The photo studio complements the immersive atmosphere of the cabaret and restaurant․ It’s a popular choice for individuals, couples, and groups wanting to commemorate their time at Draculas․ Details regarding pricing and available packages can be found on the official website alongside the current menu․

Shop & Merchandise

Draculas Gold Coast boasts an enticing shop offering a range of merchandise to extend the experience beyond the dinner and show․ Guests can browse items reflecting the cabaret’s gothic and theatrical themes, including apparel, accessories, and unique collectibles․ It’s a perfect place to find a memento of your evening or a gift for a fellow enthusiast․

While reviewing the menu PDF online, consider exploring the available merchandise options․ The shop complements the immersive atmosphere of Draculas, offering items that capture the spirit of the venue․ You can find branded clothing, jewelry, and novelty items․

The shop is conveniently located within the Draculas complex, allowing easy access before or after the show․ Details regarding specific items and availability can be found on their official website, often alongside information about the current menu and upcoming performances․ It’s a fantastic way to support the venue and take home a piece of the magic․

Contact Information & Location (1 Hooker Bvd, Broadbeach)

Draculas Gold Coast is prominently located at 1 Hooker Boulevard, Broadbeach, Queensland 4218, Australia․ This central Gold Coast location makes it easily accessible for both locals and tourists seeking a unique entertainment experience․ When planning your visit and reviewing the menu PDF, keep this address in mind for navigation․

For inquiries regarding bookings, the menu, or general information, you can reach Draculas via phone․ While a specific phone number wasn’t directly provided, their website, draculas․com․au, is the best resource for current contact details․ It’s advisable to check the website for the most up-to-date information․

The venue’s website also provides comprehensive directions and transportation options to 1 Hooker Bvd․ Planning your route beforehand ensures a smooth arrival, allowing you to fully enjoy the show and the delectable offerings detailed in the menu PDF․ Remember to confirm operating hours before your visit․

Accessibility & Special Requests

Draculas Gold Coast strives to accommodate all guests, ensuring a comfortable and enjoyable experience alongside the captivating cabaret and delicious menu options detailed in their PDF․ While specific accessibility features aren’t explicitly detailed online, it’s highly recommended to contact the venue directly to discuss individual needs․

For guests with dietary requirements or allergies, Draculas is generally receptive to special requests․ Reviewing the menu PDF beforehand allows you to identify potential concerns and communicate them to the staff during the booking process or upon arrival․ They aim to cater to various dietary preferences whenever possible․

To inquire about wheelchair access, seating arrangements for guests with mobility issues, or specific allergen information related to the menu, contacting Draculas directly via their website (draculas․com․au) is the most effective approach․ Early communication ensures they can prepare to meet your requirements and enhance your overall experience․

PDF Menu Availability & Updates

The Draculas Gold Coast menu is readily available for download in PDF format directly from their official website, draculas․com․au․ This allows prospective diners to conveniently preview the dining options before booking their tickets to the renowned cabaret show․ The PDF showcases the complete three-course menu, including appetizers, main courses – with a focus on Thai-inspired dishes and fig tart selections – and their signature desserts․

Regarding updates, Draculas frequently revises its menu to incorporate seasonal ingredients and innovative culinary creations․ Therefore, it’s advisable to download the latest version of the PDF prior to your visit to ensure you have the most current information․ The date of the last update, currently 02/07/2026, is prominently displayed on the document․

Regularly checking the website for a newer PDF guarantees you’re aware of any changes to pricing, dish availability, or special menu offerings․ This proactive approach ensures a seamless and informed dining experience at Draculas Gold Coast․

Australia

yard maintenance ndis price guide

NDIS Yard Maintenance Price Guide: A Comprehensive Overview (Updated 02/07/2026)

Navigating NDIS funding for yard upkeep requires understanding current price structures, which vary by location; standard areas see rates around $55.21 per hour, as of July 2025;

The National Disability Insurance Scheme (NDIS) recognizes the significant impact a well-maintained yard can have on a participant’s quality of life, accessibility, and overall wellbeing. Funding for yard maintenance is available to individuals whose disability prevents them from safely or independently completing these tasks themselves. This support aims to ensure participants can enjoy their outdoor spaces without facing undue hardship or risk.

The NDIS acknowledges that yard work isn’t merely cosmetic; it’s often crucial for safety – preventing falls due to overgrown vegetation, maintaining access for mobility aids, and reducing fire hazards. Accessing this funding requires demonstrating a clear link between the disability and the inability to perform yard maintenance. Understanding the NDIS Price Guide and associated support item codes is essential for successful plan management and claiming appropriate reimbursement for services rendered. The scheme strives to empower participants to live more independently and participate fully in their communities, and a safe, accessible yard contributes directly to this goal.

Eligibility for Yard Maintenance under NDIS

To be eligible for NDIS funding for yard maintenance, participants must demonstrate a disability-related need. This means the disability directly impacts their ability to safely and independently manage tasks like mowing, weeding, pruning, and general garden upkeep. The NDIS doesn’t fund yard work simply because someone prefers not to do it; a clear connection to the disability is paramount.

Eligibility is assessed during the planning process, considering the participant’s individual circumstances and functional capacity. If a participant’s disability prevents them from performing these tasks, or places them at risk while attempting to do so, yard maintenance can be included in their plan. Factors considered include mobility limitations, cognitive impairments, and other disability-related challenges. Evidence supporting the need, such as medical reports or assessments from allied health professionals, strengthens the application. Ultimately, the goal is to enable participation in the community and improve quality of life.

What Yard Maintenance Tasks are Typically Funded?

NDIS funding commonly covers essential yard maintenance tasks directly linked to a participant’s disability-related needs. These include regular lawn mowing to maintain a safe and accessible outdoor space, weeding to prevent hazards and overgrowth, and pruning shrubs and trees for safety and visibility. Tasks like edging, leaf clearing, and general garden tidying are also frequently approved.

Funding can extend to maintaining vegetable gardens, enabling participants to grow their own food, promoting independence and wellbeing. However, purely aesthetic landscaping or extensive garden redesigns are generally not funded. The focus remains on maintaining a safe, functional, and accessible yard. Support may also include the removal of hazards like fallen branches or overgrown vegetation, ensuring a safe environment for the participant and visitors. The scope of funded tasks is always determined on an individual basis, aligned with the participant’s specific needs and goals.

Tasks NOT Typically Funded by NDIS

The NDIS generally does not fund yard maintenance tasks considered ‘reasonable personal maintenance’ or those unrelated to a participant’s disability. This explicitly excludes services like air conditioning servicing, carpet or upholstery cleaning, and pest control, as these are considered household tasks. Extensive landscaping projects, including tree trimming beyond safety concerns or stump removal, typically fall outside funding parameters.

Purely cosmetic gardening, such as creating elaborate flowerbeds solely for aesthetic appeal, is unlikely to be approved. Similarly, general home improvements disguised as yard maintenance won’t receive funding. The NDIS focuses on supports that directly address a disability-related need, not general property upkeep. Routine maintenance that could reasonably be undertaken by the participant without undue difficulty is also typically excluded. Funding decisions prioritize safety, accessibility, and participation, not simply a well-maintained yard;

Understanding the NDIS Price Guide for Yard Maintenance

The NDIS Price Guide dictates allowable costs for yard work, with rates differing based on geographic location; remote areas incur higher hourly charges.

Current Hourly Rates (Standard Areas)

For participants residing in standard areas, the NDIS Price Guide establishes a capped hourly rate for gardening and yard maintenance services. As of July 2025, this rate generally falls between $54.30 and $56.98 per hour. However, it’s crucial to remember that these figures represent the maximum allowable cost, and individual providers may offer services at a lower rate.

The specific rate within this range can fluctuate depending on the provider’s operational costs and the complexity of the tasks involved. Participants should always obtain a clear quote from their chosen provider before commencing any work. It’s also important to note that these rates apply to direct service delivery, meaning the cost covers the labour of the yard maintenance worker. Any associated material costs, such as plants or mulch, are typically separate and require additional budgeting within the NDIS plan.

Hourly Rates for Remote Locations

The NDIS Price Guide acknowledges the increased costs associated with providing services in remote areas, and consequently, offers higher hourly rates for yard maintenance. As of July 2025, participants in remote locations can generally expect to pay between $77.29 per hour for gardening and yard upkeep. This represents a significant increase compared to standard area rates, reflecting the challenges providers face in accessing these communities.

These higher rates are designed to attract and retain skilled workers willing to travel to remote locations, ensuring that NDIS participants have access to essential yard maintenance services. As with standard areas, the quoted rate should encompass direct labour costs, and materials will likely be billed separately. Participants should proactively discuss all potential costs with their provider to avoid unexpected expenses and ensure effective budget management within their NDIS plan.

Hourly Rates for Very Remote Locations

For NDIS participants residing in very remote areas, yard maintenance services command the highest hourly rates, reflecting the substantial logistical challenges and costs involved in service delivery. Current pricing, as of July 2025, typically falls around $85.47 per hour for gardening and related yard work. This premium rate acknowledges the significant travel distances, accommodation requirements, and potential difficulties in sourcing materials and skilled labour in these regions.

Providers operating in very remote locations often incur considerable expenses, and the NDIS Price Guide aims to ensure they can sustainably offer services to participants. It’s crucial for participants to confirm the all-inclusive rate with their provider, clarifying what expenses are covered beyond direct labour. Thorough communication and detailed quotes are essential for effective budget planning and maximizing the value of NDIS funding.

Factors Influencing the Final Price

Several key factors beyond the standard hourly rates impact the ultimate cost of NDIS-funded yard maintenance. Location is paramount, with remote and very remote areas attracting higher prices due to increased travel and logistical expenses. The complexity of the tasks also plays a significant role; extensive landscaping or overgrown gardens will naturally require more time and expertise, increasing the overall cost.

Furthermore, the provider’s individual pricing structure, their overheads, and any specialized equipment needed can influence the final price. Participants requiring assistance with tasks beyond basic gardening – such as tree trimming or stump removal – should anticipate higher charges. Always obtain a detailed quote outlining all anticipated costs before commencing work, ensuring transparency and effective budget management within your NDIS plan.

Specific NDIS Support Item Codes for Yard Work

The primary NDIS support item code for gardening services is 01_019_0120_1_1, covering essential yard maintenance tasks for eligible participants’ needs.

Support Item Code: 01_019_0120_1_1 ‒ Gardening Services

This NDIS support item code, 01_019_0120_1_1, specifically addresses gardening services, enabling participants to maintain their yards and gardens when they are unable to do so independently. It’s crucial to understand the scope of what falls under this code to effectively utilize NDIS funding. Generally, this encompasses tasks like mowing lawns, weeding gardens, pruning bushes, and general tidying of outdoor spaces.

However, it’s important to note that certain activities are typically not covered under this code. These exclusions often include larger landscaping projects, tree trimming, stump removal, or pest control. The focus remains on routine maintenance to ensure a safe and accessible outdoor environment for the participant. Current hourly rates for these gardening services, as of late 2025, range from approximately $56.98 to $85.47, depending on location and service specifics, as outlined in the NDIS Price Guide.

Understanding the Scope of Gardening Services

The NDIS support item code 01_019_0120_1_1 for Gardening Services covers a defined range of tasks aimed at maintaining a safe and accessible outdoor space for participants. This typically includes essential yard work like regular lawn mowing, weeding flowerbeds and vegetable gardens, pruning shrubs and small trees, and sweeping pathways to remove debris. The goal is to support participants in enjoying their outdoor areas without posing risks to their health or mobility.

However, it’s vital to recognize the boundaries of this funding. Activities like extensive landscaping, significant tree work (trimming large branches or removal), stump grinding, installing irrigation systems, or pest control are generally not included. These are considered home improvement projects rather than routine maintenance. Understanding these distinctions ensures appropriate use of NDIS funds and avoids potential claim rejections, with hourly rates fluctuating between $56.98 and $85.47 based on location.

How to Budget for Yard Maintenance within Your NDIS Plan

Effective planning involves utilizing the NDIS Budget Calculator to estimate costs, factoring in hourly rates (around $54.30 ‒ $85.47) and task frequency.

Using the NDIS Budget Calculator

The NDIS Budget Calculator is an invaluable tool for participants seeking to allocate funds for yard maintenance effectively. It allows you to estimate the potential costs associated with various gardening and upkeep tasks, based on current NDIS pricing guidelines.

When utilizing the calculator, remember that hourly rates for yard work fluctuate depending on your location. Standard areas currently fall around $55.21 to $56.98 per hour, while remote locations may see rates of $77.29 to $85.47. Very remote areas will likely incur even higher costs.

Input the estimated number of hours required for tasks like mowing, weeding, pruning, and general garden cleanup. The calculator will then provide a projected cost, helping you determine how much of your NDIS plan funding to dedicate to yard maintenance. Regularly reviewing and adjusting your budget based on actual service delivery is crucial for optimal financial management.

Maximizing Your NDIS Funding for Yard Work

To effectively maximize your NDIS funding for yard maintenance, prioritize essential tasks directly linked to your disability-related needs. Focus on maintaining a safe and accessible outdoor environment, ensuring mobility and participation. Consider bundling tasks with your provider to potentially secure more favorable hourly rates.

Explore options for shared services if appropriate, potentially reducing individual costs. Regularly review your plan and adjust funding allocations as needed, based on changing requirements and service delivery costs. Remember that the NDIS aims to support reasonable and necessary supports.

Document all yard maintenance activities and associated costs meticulously, providing clear justification for funding requests. Understanding the NDIS Price Guide and current hourly rates (ranging from $55.21 to $85.47 depending on location) is vital for accurate budgeting and maximizing your available funds.

Finding Registered NDIS Yard Maintenance Providers

Locating registered providers is crucial; verify their NDIS registration status through the NDIS Commission website to ensure quality and compliance with pricing guidelines;

Checking Provider Registration Status

Ensuring a yard maintenance provider is registered with the National Disability Insurance Scheme (NDIS) is paramount for participant safety and funding eligibility. The NDIS Commission maintains a public register of registered providers, accessible through their website.

This register allows you to verify a provider’s registration status, scope of registration (the services they are approved to deliver), and any conditions or restrictions associated with their registration. It’s vital to confirm the provider is registered to deliver gardening or yard maintenance services specifically.


A registered provider has been assessed against quality and safeguarding standards, offering greater assurance of service quality. Always cross-reference the provider’s stated NDIS provider number with the information listed on the NDIS Commission website. Unregistered providers cannot directly invoice the NDIS for services, meaning participants would need to self-fund those services.

Questions to Ask Potential Providers

Before engaging a yard maintenance provider funded by the NDIS, thorough questioning is crucial to ensure they meet your specific needs and understand NDIS requirements. Inquire about their experience working with NDIS participants and their familiarity with relevant support item codes, such as 01_019_0120_1_1 for gardening services.

Specifically, ask how they calculate their hourly rates, whether they include travel costs, and if they offer quotes detailing the scope of work; Clarify their cancellation policy and process for addressing any service-related issues.

It’s also important to understand their approach to safety, including risk assessments and any necessary personal protective equipment. Confirm their insurance coverage and ask for references from other NDIS participants. Finally, discuss how they will communicate progress and ensure your satisfaction with the completed work.

NDIS Pricing Arrangements and Price Limits

The NDIS employs price controls for supports, including yard work, ensuring reasonable costs and participant access; these arrangements, formerly the Price Guide, regulate service fees.

How Price Controls Work in the NDIS

The NDIS utilizes price controls to maintain the sustainability of the scheme and ensure participants receive value for money when accessing supports like yard maintenance. These controls aren’t fixed prices, but rather limits on what providers can charge. The Agency sets maximum prices for specific support items, categorized by location – standard, remote, and very remote – reflecting differing operational costs.

For yard maintenance, these price limits are typically expressed as hourly rates. Providers can charge less than the maximum price, but exceeding it requires justification and pre-approval from the NDIS. Price regulation aims to prevent excessive charging and promote fair market practices. The NDIS regularly reviews and updates these price limits, considering factors like inflation, service demand, and provider feedback. Understanding these controls empowers participants to budget effectively and negotiate reasonable rates with providers for essential yard upkeep services.

Reviewing the NDIS Pricing Arrangements

The NDIS Pricing Arrangements, formerly known as the Price Guide, are crucial for understanding allowable costs for yard maintenance. These arrangements detail how price controls operate and outline the specific support item codes relevant to gardening and related tasks. Regularly reviewing these arrangements is vital, as they are subject to updates reflecting economic changes and scheme improvements.

Currently (as of late 2025), the arrangements categorize yard maintenance under support item code 01_019_0120_1_1, with hourly rates varying significantly based on location. Standard areas typically see capped rates around $56.98 to $85.47, while remote and very remote locations command higher prices. Participants should consult the latest published arrangements on the NDIS website to confirm current rates and ensure their plan adequately covers necessary yard work.

Common Issues and Troubleshooting

Disputes regarding yard maintenance pricing can arise; plan management assistance and careful review of NDIS arrangements are key to resolving these challenges effectively.

Disputes Regarding Pricing

Addressing pricing disagreements with your NDIS yard maintenance provider requires a systematic approach. Initially, directly communicate your concerns with the provider, seeking clarification on the invoiced amount and how it aligns with your NDIS plan and the current Price Guide.

If direct communication doesn’t resolve the issue, escalate it through your Plan Manager, if you have one. They can advocate on your behalf and negotiate with the provider.

The NDIS Commission offers a dispute resolution pathway for more complex cases. Document all communication, invoices, and relevant details. Understand that price controls exist, and providers must adhere to the capped hourly rates outlined in the NDIS Pricing Arrangements.

Ensure the services delivered fall within the scope of your plan funding; tasks outside the funded scope are not covered. Thorough record-keeping and proactive communication are vital for preventing and resolving pricing disputes.

Plan Management and Yard Maintenance Costs

Utilizing a Plan Manager streamlines yard maintenance cost management under the NDIS. They handle invoice processing, ensuring claims align with your plan budget and the NDIS Price Guide’s capped hourly rates – currently around $55.21 for standard areas and higher for remote locations.

A Plan Manager can proactively monitor spending, alerting you to potential budget overruns and assisting with negotiating service agreements. They also ensure providers are registered NDIS providers, verifying their compliance.

With Plan Management, you avoid direct invoice payment and claim submission, reducing administrative burden. They can also assist with understanding what yard work is typically funded, differentiating between maintenance and non-funded landscaping.

Effective Plan Management optimizes your NDIS funding, maximizing the value you receive for essential yard maintenance services, contributing to your overall wellbeing and independence.

Future Changes to NDIS Pricing (Potential Updates)

The NDIS pricing landscape is dynamic, with potential adjustments to yard maintenance costs anticipated. While current rates (as of July 2025) hover around $55.21/hour in standard areas, and escalate for remote regions, ongoing reviews may influence these figures.

Factors driving potential changes include inflation, provider costs, and evolving participant needs. The NDIS regularly assesses price controls to ensure sustainability and accessibility of services.

Participants should proactively monitor updates to the NDIS Pricing Arrangements (formerly the Price Guide) for any revisions impacting yard work funding.

It’s crucial to stay informed about potential changes to maximize your plan’s effectiveness and ensure continued access to necessary yard maintenance support.

Australia

mantra club croc menu pdf

Mantra Club Croc Menu PDF: A Comprehensive Overview (Updated 02/07/2026)

Discover the Mantra Club Croc’s dining experience! Access the current menu, featuring good value and a relaxing atmosphere, conveniently as a downloadable PDF.

Mantra Club Croc, situated in the beautiful Airlie Beach, Queensland, presents a unique blend of comfortable accommodation and a delightful dining experience. As of today, February 7th, 2026, it stands as a popular choice for travelers seeking relaxation and convenience. With an average customer rating of 3.9/5 based on 1335 reviews, the establishment consistently receives positive feedback regarding its atmosphere and value.

Central to the Mantra Club Croc experience is its restaurant, offering a menu designed to cater to diverse tastes and budgets. The restaurant’s appeal lies in its ability to provide “good food for all” at reasonable prices, creating a welcoming environment for families, couples, and solo diners alike. Understanding the menu options is key to maximizing your visit, and accessing a current PDF version ensures you’re well-prepared to explore the culinary offerings.

This overview will delve into the specifics of the Mantra Club Croc menu, including availability, price ranges, highlights, and how to access the official PDF document. We will also briefly touch upon the broader Mantra brand and its connection to wellbeing, hinting at the holistic experience the club aims to provide.

Location and General Information: Airlie Beach

Mantra Club Croc enjoys a prime location at 240 Shute Harbour Road, Airlie Beach, placing it just 1.7 kilometers from the town center. This strategic positioning offers guests convenient access to the vibrant marina, stunning beaches, and a wide array of local attractions. Airlie Beach itself is a renowned gateway to the Whitsunday Islands, attracting tourists from around the globe seeking tropical paradise and adventure.

The hotel consistently receives “Excellent” ratings, scoring 8.5/10 based on guest reviews, with nightly rates starting from approximately 6660 RUB. This makes Mantra Club Croc a competitively priced option within the Airlie Beach accommodation landscape. While enjoying your stay, exploring the dining options is essential, and the on-site restaurant’s menu is a key component of that experience.

Accessing the latest Mantra Club Croc menu PDF allows you to plan your meals in advance, ensuring a seamless and satisfying culinary journey. The proximity to Marina Shores also provides alternative dining choices, which will be discussed later in this comprehensive overview.

Understanding the “Croc” in Mantra Club Croc

The inclusion of “Croc” in Mantra Club Croc’s name is intriguing, and while not directly linked to the menu offerings, it subtly hints at the tropical, Australian environment of Airlie Beach. Crocodiles are iconic creatures of northern Australia, symbolizing the region’s unique wildlife and natural beauty. The name likely aims to evoke a sense of adventure and connection to the local ecosystem.

However, the focus remains firmly on providing a relaxing and enjoyable experience for guests, and the menu reflects this. While the “Croc” branding creates a memorable identity, it doesn’t necessarily translate into crocodile meat dishes on the PDF menu. Instead, the restaurant emphasizes a diverse selection of appealing options for all palates.

Understanding this branding element helps appreciate the overall atmosphere of Mantra Club Croc. It’s a clever marketing tactic that ties the establishment to its location, enhancing the guest experience and subtly promoting the region’s natural wonders. Accessing the menu PDF allows you to focus on the culinary delights available.

The Restaurant at Mantra Club Croc

The restaurant within Mantra Club Croc in Airlie Beach offers a welcoming dining experience, characterized by a good atmosphere and a menu designed to appeal to a broad range of tastes. Customer feedback consistently highlights the value proposition – a good menu at a reasonable price. It’s a place where both guests and locals can enjoy a satisfying meal in comfortable surroundings.

While specific details of the menu are best viewed in the downloadable PDF, the restaurant aims to provide options for everyone. Expect a selection of appetizers, entrees, and desserts, catering to various dietary preferences. The ambiance is conducive to relaxation, potentially enhanced by the subtle influence of mantra-inspired wellbeing.

The restaurant serves as a central hub within the Mantra Club Croc, offering a convenient dining option for hotel guests and visitors alike. Exploring the PDF menu reveals the current offerings and pricing, allowing diners to plan their visit accordingly. It’s a key component of the overall guest experience.

Menu Availability & PDF Access


Accessing the most current Mantra Club Croc menu is straightforward. The restaurant provides a readily available PDF version of their menu for convenient viewing and planning. This digital format ensures diners have up-to-date information on all available dishes, pricing, and potential seasonal changes.

The PDF menu can be easily downloaded from various online platforms and resources. A quick online search for “Mantra Club Croc menu PDF” will yield direct links to the document. This accessibility allows potential customers to browse the offerings before visiting the restaurant in Airlie Beach.

Regular updates to the PDF ensure accuracy, reflecting any menu modifications or special promotions. Checking the PDF before your visit is recommended to confirm availability and pricing. This proactive approach enhances the dining experience and avoids any potential discrepancies. The PDF is a vital resource for informed dining decisions.

Price Range and Value Proposition

Mantra Club Croc presents a compelling value proposition, offering a good menu at a reasonable price point. Current pricing indicates meals start from approximately 6660 rubles per night when booking accommodation, suggesting an accessible dining experience for a range of budgets.

The restaurant aims to provide “affordable…food for all,” indicating a commitment to inclusivity and value. While specific menu item prices aren’t explicitly detailed, the overall sentiment points towards competitive pricing within the Airlie Beach dining scene. This affordability doesn’t compromise on quality or atmosphere.

Considering the positive customer feedback highlighting the “good menu at a good price,” diners can expect a satisfying experience without excessive expenditure. The value extends beyond just cost, encompassing the ambiance and overall dining experience. Mantra Club Croc strives to deliver quality and enjoyment at a fair price.

Menu Highlights: Food Options

Mantra Club Croc’s menu, while a detailed PDF isn’t readily available publicly as of today’s date (02/07/2026), is described as “good” and catering to “all.” This suggests a diverse selection designed to appeal to a broad range of palates and dietary preferences. Expect a variety of dishes, likely encompassing both local Australian cuisine and internationally inspired options.

Although specific dishes aren’t listed, the restaurant’s positioning within a tourist destination like Airlie Beach implies a focus on fresh, quality ingredients. Given the positive customer reviews, anticipate well-prepared meals with attention to presentation and flavor. The menu likely features both familiar favorites and potentially some unique, regionally-inspired creations.

The emphasis on affordability suggests a menu that balances quality with accessibility, offering options for different budgets. Expect appetizers, entrees, and desserts, providing a complete dining experience. Further details would be found within the official PDF menu.

Appetizers and Entrees

While the precise Mantra Club Croc menu PDF details remain unavailable publicly today (02/07/2026), we can infer likely appetizer and entree offerings based on the restaurant’s location and general dining trends. Expect a selection of lighter starters designed to stimulate the appetite, potentially including seafood-based options reflecting Airlie Beach’s coastal setting.

Entrees likely showcase a range of proteins – fish, chicken, beef – prepared with diverse flavors and cooking techniques. Given the positive customer feedback regarding the “excellent atmosphere and food for all,” vegetarian and potentially vegan options are probable. These could include pasta dishes, salads, or creatively prepared vegetable-centric entrees.

The menu’s affordability suggests reasonably priced appetizers and entrees, offering good value for diners. Expect portion sizes to be satisfying without being overly large, allowing guests to enjoy a multi-course meal comfortably. A downloadable PDF would confirm these details.

Main Course Selections

Based on available information and typical restaurant offerings, the Mantra Club Croc’s main course selections, detailed in their PDF menu, likely feature a diverse range of dishes to cater to varied palates. Expect a strong emphasis on fresh, locally sourced ingredients, particularly seafood, given the Airlie Beach location.

Grilled fish, perhaps Barramundi or Coral Trout, would be a logical inclusion, alongside classic Australian pub-style fare like steak and chips. Chicken dishes, prepared with flavorful marinades or sauces, are also probable. Vegetarian options, reflecting the “food for all” sentiment in customer reviews, could include pasta primavera or a substantial vegetable curry.

The menu’s pricing suggests main courses will be positioned as offering good value. Portion sizes are anticipated to be generous, providing a satisfying dining experience. Accessing the official PDF menu would reveal the precise selection and pricing details.

Dessert Options

While the precise Mantra Club Croc dessert menu isn’t publicly detailed outside the PDF, we can infer likely offerings based on standard restaurant practices and customer expectations. Expect a selection designed to provide a sweet conclusion to the meal, complementing the overall dining experience.

Classic desserts like chocolate brownies with ice cream, or a sticky date pudding with butterscotch sauce, are highly probable inclusions. Fruit-based options, such as a seasonal fruit crumble or a refreshing sorbet, would cater to lighter preferences. A cheesecake, perhaps with a tropical fruit topping, aligns with the Airlie Beach location.

Given the menu’s focus on value, dessert pricing is likely to be reasonable. The PDF menu will confirm portion sizes and any special dessert features, such as daily specials or seasonal creations. These sweet treats aim to enhance the relaxing atmosphere.

Mantra Meditation & Relaxation Connection

The name “Mantra Club Croc” subtly hints at a deeper connection beyond dining – the ancient practice of mantra meditation. Mantras, traditionally repeated sounds or phrases, are believed to promote relaxation, reduce stress, and enhance focus. This aligns with a desire for wellbeing and a peaceful atmosphere.

The restaurant likely aims to create a calming environment, perhaps through décor, lighting, or even ambient sound. This intentional atmosphere complements the benefits of mantra meditation, offering a holistic experience. The PDF menu itself doesn’t detail meditation practices, but the branding suggests an awareness of these principles.

By associating with mantras, the club subtly encourages guests to embrace mindfulness. This connection could be a unique selling point, attracting those seeking a restorative dining experience. It’s a clever branding strategy, linking a pleasant meal with inner peace.

The Role of Mantras in Wellbeing

Mantras, originating from ancient traditions, are powerful linguistic tools used to cultivate a state of focused awareness and inner peace. Repeated recitation of a mantra is believed to quiet the mind, reducing mental chatter and promoting emotional stability. This practice has gained modern popularity due to its accessible and demonstrable benefits for wellbeing.

The core principle lies in the vibrational effect of sound. Specific mantras are thought to resonate with particular energies, influencing mood and physiological responses. While the Mantra Club Croc’s PDF menu doesn’t explicitly detail mantra usage, the name itself suggests an understanding of this potent practice.

Research indicates mantra meditation can lower blood pressure, decrease anxiety, and improve sleep quality. The club’s branding cleverly taps into this growing interest in holistic health, subtly positioning itself as a haven for relaxation and mindful enjoyment. It’s a sophisticated approach to creating a positive brand association.

Mantra Meditation for Stress Reduction

Mantra meditation is a remarkably effective technique for mitigating stress, offering a readily available antidote to the pressures of modern life. The repetitive nature of mantra recitation anchors the mind, diverting attention from stressful thoughts and fostering a sense of calm. This focused attention activates the parasympathetic nervous system, often referred to as the “rest and digest” system, counteracting the body’s stress response.

While browsing the Mantra Club Croc’s PDF menu, one can envision a tranquil dining experience designed to complement this inner peace. The restaurant’s ambiance, coupled with mindful eating, could amplify the stress-reducing benefits. The very name evokes a sense of serenity.

Studies demonstrate that regular mantra practice can lower cortisol levels – the primary stress hormone – and increase feelings of wellbeing. It’s a proactive approach to mental health, easily integrated into daily routines. The club’s branding subtly suggests a commitment to holistic wellness, extending beyond just culinary offerings.

Connecting Mantra Club Croc’s Atmosphere to Relaxation

Mantra Club Croc, situated in Airlie Beach, appears designed to foster a relaxing environment, extending beyond simply providing a PDF menu of dining options. The name itself suggests a connection to mindful practices, hinting at a space intentionally curated for tranquility. Customer reviews consistently praise the “excellent atmosphere,” indicating a successful implementation of this design philosophy.

Imagine reviewing the menu – perhaps while anticipating a meal – in a setting that actively encourages calm. This synergy between mindful dining and a peaceful ambiance could elevate the overall experience. The restaurant’s location, while convenient (1.7 km from the center), doesn’t necessarily imply a bustling, high-energy environment.

Furthermore, the MANTRA brand’s focus on lighting solutions suggests an attention to detail that extends to creating a soothing sensory experience. Thoughtful lighting, combined with potentially calming décor, could contribute significantly to stress reduction and overall wellbeing, complementing the menu’s offerings.

Nearby Dining Options: Marina Shores

Mantra Club Croc isn’t the only dining destination in Airlie Beach; Marina Shores presents a collection of alternative restaurants for guests considering options beyond the PDF menu available at the club. While Mantra Club Croc receives an average customer rating of 3.9/5, exploring nearby establishments allows for comparison and caters to diverse preferences.

Marina Shores offers a variety of cuisines and price points, potentially appealing to those seeking different culinary experiences. Investigating these alternatives is prudent, especially when planning meals throughout a stay. Accessing menus for Marina Shores restaurants online, similar to the Mantra Club Croc PDF, facilitates informed decision-making.

Considering factors like ambiance, customer reviews, and menu variety within Marina Shores provides a broader perspective. Ultimately, the best dining choice depends on individual tastes and budget. Comparing options ensures a satisfying culinary experience during your visit to Airlie Beach, complementing the convenience of the Mantra Club Croc menu.

Comparing Mantra Club Croc to Local Restaurants

Mantra Club Croc distinguishes itself with a menu focused on providing good value and a relaxing atmosphere, readily accessible via a downloadable PDF. However, comparing it to other Airlie Beach restaurants reveals a nuanced landscape of dining options.

Local establishments may specialize in specific cuisines or offer unique dining experiences not reflected in the Mantra Club Croc PDF. Customer reviews indicate a 3.9/5 rating for Mantra Club Croc, suggesting generally positive experiences, but individual preferences vary.

Price points are a key differentiator; some local restaurants may be more budget-friendly, while others cater to a higher-end clientele. Considering ambiance and service style is also crucial. While the Mantra Club Croc menu offers convenience, exploring local alternatives provides a broader culinary adventure. Ultimately, the “best” restaurant depends on individual priorities and desired dining experience, supplementing the information found in the PDF.

Customer Reviews and Ratings (Average 3.9/5)

Mantra Club Croc currently holds an average customer rating of 3.9 out of 5 stars, based on 1,335 reviews. These reviews frequently mention the restaurant’s good menu pricing and the overall pleasant atmosphere, details readily available when reviewing the PDF menu.

While the majority of feedback is positive, indicating satisfaction with the food and ambiance, some reviewers note areas for potential improvement. Accessing the PDF menu doesn’t reveal customer opinions, but online platforms provide a wealth of insights.

Common themes in reviews include praise for the affordability and suitability of the menu for diverse tastes. However, some guests suggest exploring nearby Marina Shores restaurants for alternative dining experiences. The PDF serves as a starting point, but customer feedback offers a more comprehensive understanding of the dining experience at Mantra Club Croc.

Mantra Brand & Product Range (Beyond the Restaurant)

Mantra extends far beyond the Croc restaurant, encompassing a diverse range of products, notably in the lighting sector. MANTRA lighting solutions are characterized as stylish, dynamic, and visually striking, designed by leading Spanish designers utilizing cutting-edge technology. While the PDF menu focuses on culinary offerings, understanding the broader Mantra brand reveals a commitment to aesthetic excellence.

The official Mantra dealer network provides access to over 2635 original products, with pricing starting from 483 rubles. This includes lamps and chandeliers, showcasing the brand’s dedication to innovative design. The PDF menu doesn’t reflect this product range, but it’s indicative of the overall Mantra ethos.

Interestingly, online searches alongside “Mantra” frequently include interests in footwear like Nike Air Force 1 and Adidas Adi2000, suggesting a broad consumer base. The Mantra brand clearly aims for a modern, design-conscious audience.

MANTRA Lighting Solutions

MANTRA lighting represents a significant facet of the brand, distinct from the culinary experience detailed in the Mantra Club Croc menu PDF. These aren’t merely functional fixtures; they are described as “stylish, dynamic, and very effective” lamps and chandeliers. Spanish designers employ the latest technologies to create these unique and extraordinary pieces.

The range showcases an emphasis on aesthetic innovation, appealing to a modern sensibility. While the PDF menu highlights food and beverage options at Airlie Beach, the lighting division demonstrates Mantra’s broader design philosophy. The products are available through official dealers, offering a catalog of over 2635 original items.

Pricing begins at 483 rubles, with options for corporate clients including deferred payment terms. This suggests a commitment to both individual consumers and larger-scale projects. The lighting solutions embody the same attention to detail found, albeit in a different form, within the Croc restaurant.

MANTRA Products: Official Dealer Information

Beyond the dining experience detailed in the Mantra Club Croc menu PDF, MANTRA extends into a diverse product range, primarily focused on lighting solutions. Accessing these products requires engaging with authorized dealers, ensuring authenticity and quality.

Currently, the official dealer network boasts a catalog of over 2635 original MANTRA items. These range from lamps to chandeliers, reflecting the brand’s commitment to stylish and innovative design. Pricing starts at 483 rubles, making the products accessible to a broad customer base.

Corporate clients benefit from deferred payment options, facilitating larger-scale projects. Dealers provide comprehensive support, including product specifications, instructions, and photographic representations. This ensures informed purchasing decisions, separate from reviewing the Croc restaurant’s menu PDF. Detailed information and contact details for official dealers are readily available online.

Related Searches & Online Resources

While exploring the Mantra Club Croc menu PDF, visitors often express interest in related areas. Common searches include accessing mantra audio for relaxation and exploring the broader MANTRA brand offerings. Online resources cater to these diverse interests.

Numerous platforms offer free, unlimited access to mantra music streaming. These resources allow users to listen to mantras online without registration, providing a convenient way to enhance wellbeing. Video compilations of mantras, categorized for daily use, are also readily available on channels like MANTRA – मंत्र.

Furthermore, academic research on mantra meditation, such as studies on Eastern and Christian practices, can be found through online archives. For those interested in related lifestyle products, searches for Nike Air Force 1 and Adidas Adi2000 sneakers frequently occur alongside inquiries about the Mantra Club Croc and its menu PDF.

Listening to Mantras Online

Complementing your dining experience at Mantra Club Croc, or while reviewing the menu PDF, is the opportunity to immerse yourself in the soothing power of mantras. Online platforms provide readily accessible mantra audio, enhancing relaxation and wellbeing.

Several websites and channels, such as the MANTRA – मंत्र channel, offer extensive libraries of mantra recordings. These resources allow for free, unlimited streaming without requiring registration. Users can easily access and enjoy mantras tailored for various purposes, including daily practice and stress reduction.

The availability of online mantra players simplifies the listening experience, integrating seamlessly with other online activities. Whether seeking background ambience or dedicated meditation sessions, these resources provide a convenient pathway to inner peace. Exploring these audio options can further connect you to the holistic atmosphere inspired by Mantra Club Croc.

Nike Air Force 1 & Adidas Adi2000 (Potential Customer Interests)

While browsing the Mantra Club Croc menu PDF and planning your visit to Airlie Beach, it’s interesting to note concurrent consumer interests. Current trends indicate strong demand for popular sneaker brands like Nike and Adidas, specifically the Air Force 1 and Adi2000 models.

These footwear choices suggest a demographic valuing both style and comfort – qualities that align with the relaxed atmosphere of Mantra Club Croc. Individuals researching dining options in the area may also be actively seeking fashionable footwear for their travels and leisure activities.

The availability of original Nike Air Force 1s and Adidas Adi2000 sneakers online demonstrates a broader consumer focus on brand authenticity and contemporary design. Recognizing these parallel interests provides insight into the lifestyle preferences of potential Mantra Club Croc patrons, informing marketing and customer engagement strategies.

Australia

as/nzs 3000:2018 pdf free download

AS/NZS 3000:2018 PDF Free Download: A Comprehensive Plan

AS/NZS 3000:2018 details crucial wiring rule changes‚ offering an overview of electrical installations and connectors․ Amendment 3 (2023) revises clauses‚ impacting Australian and New Zealand electrical engineering․

This standard‚ known as the Australian/New Zealand Wiring Rules‚ is a FOREIGN STANDARD‚ and provides authoritative information for electrical professionals․

AS/NZS 3000:2018‚ often referred to as the Wiring Rules‚ represents the cornerstone of electrical safety standards across Australia and New Zealand․ This comprehensive document dictates the design‚ construction‚ and verification of electrical installations‚ ensuring the safety of people and property․ It’s a pivotal standard for electricians‚ electrical engineers‚ inspectors‚ and anyone involved in the electrical industry․

The standard isn’t static; it undergoes periodic revisions to incorporate advancements in technology‚ address emerging safety concerns‚ and reflect best practices․ The 2018 edition brought significant updates‚ and further refinements arrived with Amendment 3 in 2023․ Understanding these changes is paramount for compliance and maintaining a safe electrical environment․

At its core‚ AS/NZS 3000:2018 aims to minimize electrical hazards such as electric shock‚ fire‚ and equipment damage․ It achieves this through detailed specifications for wiring methods‚ protective devices‚ earthing systems‚ and testing procedures․ The standard’s scope is broad‚ covering everything from residential installations to large-scale industrial facilities․ Accessing the official PDF version is crucial for accurate interpretation and implementation of these vital regulations․

The document defines key terms like “accessible” and “alteration” to ensure clarity and consistent application of the rules․

Importance of the Wiring Rules

The AS/NZS 3000:2018 Wiring Rules are fundamentally important for safeguarding lives and property from electrical hazards․ Non-compliance can lead to severe consequences‚ including electrical fires‚ shocks‚ and even fatalities․ Adhering to these standards isn’t merely a legal requirement; it’s a moral obligation for anyone working with electricity․

These rules establish a consistent framework for electrical work‚ ensuring that installations are safe‚ reliable‚ and durable․ They provide a benchmark for quality and competence within the electrical industry‚ protecting both consumers and practitioners․ Proper implementation minimizes the risk of equipment failure and downtime‚ contributing to economic efficiency․

Furthermore‚ AS/NZS 3000:2018 facilitates interstate and international recognition of electrical work‚ promoting trade and collaboration․ Staying current with amendments‚ like Amendment 3 (2023)‚ is vital‚ as these updates address new technologies and evolving safety concerns․ Access to the official PDF document is essential for understanding these critical revisions and ensuring installations meet the latest requirements․ Ignoring these standards can invalidate insurance claims and lead to significant legal penalties․

The standard’s revisions impact electrical installations throughout Australia and New Zealand․

Scope of AS/NZS 3000:2018

AS/NZS 3000:2018 encompasses the design‚ construction‚ and verification of electrical installations‚ including fixed wiring for domestic‚ commercial‚ and industrial premises․ It covers a broad spectrum of electrical equipment connected to low-voltage installations‚ up to 1000V AC and 1500V DC․ This includes wiring systems‚ switchboards‚ protective devices‚ and earthing arrangements․

The standard’s scope extends to alterations‚ repairs‚ and extensions of existing installations‚ ensuring that any modifications maintain the overall safety and integrity of the electrical system․ It doesn’t‚ however‚ cover installations in ships‚ railways‚ aircraft‚ or medical equipment – these are governed by separate standards․

AS/NZS 3000:2018 also addresses special electrical installations‚ such as those in hazardous areas‚ requiring specific precautions due to the presence of flammable materials․ Understanding the document’s boundaries is crucial; Amendment 3 (2023) clarifies certain aspects of its application․ Accessing the official PDF allows professionals to precisely define the scope of work and ensure full compliance with the relevant regulations․ The standard is a FOREIGN STANDARD‚ and its application is vital for safe electrical practices․

The standard’s revisions impact electrical installations throughout Australia and New Zealand;

Key Changes in the 2018 Edition

The AS/NZS 3000:2018 edition introduced significant updates‚ including new definitions for terms like “accessible” and “alteration‚” clarifying their application in electrical work․ A major shift involved enhanced requirements for Arc Fault Detection Devices (AFDDs)‚ aiming to improve safety by detecting dangerous arcing faults․ The standard also placed greater emphasis on Residual Current Devices (RCDs)‚ with updated regulations for their selection and installation․

Changes were made to earthing and bonding requirements‚ ensuring more effective protection against electric shock․ Cable selection and installation practices were refined‚ addressing modern cable types and installation methods․ Switchboards and protective devices received updated guidelines‚ reflecting advancements in technology and safety standards․

Furthermore‚ the 2018 edition clarified wiring methods and installation practices‚ providing more detailed guidance for installers․ These changes‚ detailed within the official FOREIGN STANDARD PDF‚ aimed to enhance the safety and reliability of electrical installations across Australia and New Zealand․ Amendment 3 (2023) builds upon these foundations‚ necessitating a thorough understanding of the 2018 revisions․

These updates are crucial for all electrical professionals․

Amendment 3 (2023) Overview


Amendment 3 to AS/NZS 3000:2018‚ released in 2023‚ introduces revisions to numerous clauses and appendices impacting electrical installations throughout Australia and New Zealand․ This update isn’t a complete rewrite‚ but rather a refinement of the 2018 standard‚ addressing areas needing clarification or improvement based on industry feedback and evolving safety concerns․

Key areas addressed include alterations and repairs‚ with new requirements designed to ensure that any modifications to existing installations meet current safety standards․ The amendment provides further guidance on the application of Arc Fault Detection Devices (AFDDs) and Residual Current Devices (RCDs)‚ solidifying their role in protecting against electrical hazards․

Significant attention is given to accessible electrical installations‚ ensuring inclusivity and safety for all users․ The FOREIGN STANDARD amendment also clarifies earthing and bonding procedures‚ cable selection criteria‚ and switchboard requirements․ Understanding these changes‚ as detailed in the official PDF‚ is vital for compliance and safe electrical practices․ It builds upon the foundational changes of the 2018 edition․

Staying current with these amendments is essential for all professionals․

Impact of Amendments on Electrical Installations

The implementation of Amendment 3 (2023) to AS/NZS 3000:2018 has a substantial impact on both new and existing electrical installations․ Existing installations undergoing alterations or repairs now face stricter scrutiny‚ demanding compliance with the updated requirements for modifications․ This means a more thorough assessment of the existing system is needed before any work commences․

The increased emphasis on AFDDs and RCDs necessitates a review of protective device selection and installation practices․ Electricians must ensure that these devices are appropriately chosen and correctly installed to provide optimal protection against arc faults and residual currents․ Accessibility requirements now demand greater consideration for users with disabilities‚ influencing switchboard heights and socket outlet placements․

Furthermore‚ the clarified earthing and bonding procedures require careful attention to detail during installation and verification․ The FOREIGN STANDARD amendment impacts cable selection‚ demanding adherence to updated specifications․ Ultimately‚ these changes aim to elevate the overall safety and reliability of electrical systems across Australia and New Zealand‚ demanding a proactive approach to compliance․

Understanding these impacts is crucial for all electrical professionals․

Accessible Electrical Installations

AS/NZS 3000:2018‚ particularly with Amendment 3 (2023)‚ places a heightened focus on creating electrical installations accessible to all users‚ including those with disabilities․ This extends beyond simply meeting minimum requirements; it’s about fostering inclusivity and ensuring safe operation for everyone․

Key considerations include the height and location of switchboards‚ ensuring they are within reach for individuals using wheelchairs․ Socket outlets must also be positioned at accessible heights‚ minimizing strain and maximizing usability․ Clearances around electrical equipment are crucial‚ allowing for easy access for maintenance and operation․

The standard addresses tactile indicators and contrasting colors to aid individuals with visual impairments․ Emergency switches and controls must be easily identifiable and operable․ These changes reflect a broader commitment to universal design principles within the electrical industry․

Compliance with these accessibility provisions isn’t merely a legal obligation; it’s a demonstration of responsible and considerate electrical practice․ The FOREIGN STANDARD promotes a more equitable and user-friendly built environment․

Prioritizing accessibility enhances safety and usability for all․

Alterations and Repairs – New Requirements

AS/NZS 3000:2018‚ and significantly updated by Amendment 3 (2023)‚ introduces stricter requirements for alterations and repairs to existing electrical installations․ These changes aim to address safety concerns arising from modifications that may not meet current standards․

Any alteration‚ regardless of its size‚ now necessitates a thorough assessment of the existing installation to ensure compatibility and compliance․ This includes verifying the adequacy of the supply‚ the condition of existing wiring‚ and the suitability of protective devices․ Repairs must restore the installation to its original safety level‚ or better․

The standard clarifies the definition of “alteration‚” encompassing not only additions but also replacements and modifications to existing circuits․ Documentation is paramount; detailed records of all alterations and repairs must be maintained‚ including test results and compliance verification․

A key focus is on ensuring that any modifications do not compromise the overall safety and integrity of the electrical system․ The FOREIGN STANDARD emphasizes the importance of qualified electrical workers performing all alteration and repair work․

These updates aim to minimize risks associated with aging or poorly maintained installations․

Arc Fault Detection Devices (AFDDs)

AS/NZS 3000:2018‚ particularly with Amendment 3 (2023)‚ places increased emphasis on the use of Arc Fault Detection Devices (AFDDs) as a crucial layer of fire protection in electrical installations․ AFDDs are designed to detect dangerous arcing faults – a common cause of electrical fires – that traditional circuit breakers may not identify․

The standard doesn’t mandate AFDDs universally‚ but specifies situations where their installation is highly recommended‚ or even required․ These include circuits supplying high-risk areas like bedrooms‚ living rooms‚ and areas with combustible materials․ The aim is to proactively mitigate fire hazards․

AFDDs operate by distinguishing between normal arcing (e․g․‚ switching appliances on/off) and dangerous‚ sustained arcing indicative of a fault․ Proper selection and installation are critical for effective operation․ Compatibility with existing circuit breakers and RCDs must be verified․

As a FOREIGN STANDARD‚ the implementation guidelines are detailed‚ requiring qualified electricians to understand the technology and apply it correctly․ The standard provides guidance on testing and maintenance of AFDDs to ensure continued functionality․

AFDDs represent a significant advancement in electrical safety․

Residual Current Devices (RCDs) – Updated Regulations

AS/NZS 3000:2018‚ and further refined by Amendment 3 (2023)‚ features significant updates to regulations surrounding Residual Current Devices (RCDs)․ RCDs remain a cornerstone of electrical safety‚ protecting against electric shock by quickly disconnecting the circuit when an earth leakage current is detected․

The updated standard clarifies requirements for RCD selection‚ installation‚ and testing․ There’s a move towards Type A RCDs as the standard‚ offering broader protection against various fault currents․ Specific applications‚ like those involving Variable Frequency Drives (VFDs)‚ may necessitate Type B RCDs․

The regulations detail circuit arrangements and the need for RCD protection in specific areas‚ including bathrooms‚ kitchens‚ and outdoor circuits․ Increased attention is given to avoiding nuisance tripping‚ ensuring reliable operation without compromising safety․

As a FOREIGN STANDARD‚ adherence to these regulations is crucial for compliance․ Electricians must be fully conversant with the updated requirements to ensure installations meet the necessary safety standards․ Regular testing and maintenance of RCDs are also emphasized․

Proper RCD implementation is vital for safeguarding lives and property․

Earthing and Bonding Requirements

AS/NZS 3000:2018‚ with Amendment 3 (2023)‚ provides detailed stipulations regarding earthing and bonding – fundamental aspects of electrical safety․ These requirements aim to establish a low-impedance path for fault currents‚ facilitating the operation of protective devices like circuit breakers and RCDs․

The standard clarifies the types of earthing systems permitted‚ including TN-S‚ TN-C-S‚ and TT systems‚ outlining the specific requirements for each․ Bonding ensures equipotentiality‚ minimizing touch voltage risks by connecting extraneous conductive parts to the earthing system․

Updates address the bonding of metallic water pipes‚ gas pipes‚ and structural steelwork‚ ensuring comprehensive protection․ Specific attention is given to the sizing of earthing conductors and the methods for achieving reliable connections․

As a FOREIGN STANDARD‚ strict adherence is paramount․ The regulations emphasize the importance of proper earthing electrode installation and regular inspection to maintain its effectiveness․ Correct earthing and bonding are critical for preventing electric shock and minimizing damage from fault currents․

Effective implementation safeguards both people and electrical infrastructure․

Cable Selection and Installation

AS/NZS 3000:2018‚ incorporating Amendment 3 (2023)‚ dedicates significant detail to cable selection and installation practices․ Correct cable choice is crucial‚ considering factors like current-carrying capacity‚ voltage drop‚ environmental conditions‚ and mechanical stress․

The standard specifies acceptable cable types for various applications‚ including TPS‚ VSD‚ and XLPE cables‚ outlining their respective limitations․ Installation methods are rigorously defined‚ covering aspects like cable support spacing‚ bending radii‚ and protection against damage․

Updates address the installation of cables in concealed spaces‚ ensuring fire safety and preventing the spread of flames․ Requirements for cable identification‚ labeling‚ and segregation are also detailed‚ promoting clarity and ease of maintenance․

As a FOREIGN STANDARD‚ compliance is non-negotiable․ The regulations emphasize the importance of using appropriate cable accessories‚ such as glands and terminations‚ and ensuring they are correctly installed․ Proper cable selection and installation minimize the risk of overheating‚ short circuits‚ and electrical fires․

Adherence to these guidelines guarantees a safe and reliable electrical system․

Switchboards and Protective Devices

AS/NZS 3000:2018‚ with Amendment 3 (2023)‚ provides comprehensive guidelines for switchboard design‚ construction‚ and installation․ These regulations are vital for ensuring the safety and reliability of electrical distribution systems․ The standard details requirements for enclosure construction‚ ventilation‚ and accessibility for maintenance․

Crucially‚ the standard specifies the selection and application of protective devices‚ including circuit breakers‚ fuses‚ and residual current devices (RCDs)․ Correct sizing and coordination of these devices are paramount to prevent overcurrents and faults from causing damage or fire․

Updates within Amendment 3 address arc fault detection devices (AFDDs)‚ outlining their application in specific circuits to mitigate the risk of arc faults․ The standard also details requirements for switchboard labeling‚ busbar systems‚ and earthing arrangements․

As a FOREIGN STANDARD‚ strict adherence is essential․ Proper installation and testing of switchboards and protective devices are critical for protecting people and property․ Compliance ensures a robust and dependable electrical infrastructure․

Regular inspection and maintenance are also emphasized to maintain optimal performance․

Wiring Methods and Installation Practices

AS/NZS 3000:2018‚ incorporating Amendment 3 (2023)‚ meticulously details acceptable wiring methods and installation practices for electrical installations across Australia and New Zealand․ This encompasses cable support systems‚ installation clearances‚ and protection against mechanical damage․ The standard covers various wiring systems‚ including cable in conduit‚ cable tray‚ and direct burial․

Specific attention is given to cable selection based on voltage rating‚ current-carrying capacity‚ and environmental conditions․ Correct installation techniques‚ such as proper bending radii and securing methods‚ are crucial to maintain cable integrity and prevent overheating․

Amendment 3 introduces updates regarding arc fault detection devices (AFDDs) and their integration into wiring systems․ It also clarifies requirements for wiring in hazardous areas‚ ensuring appropriate protection against explosion risks․

As a FOREIGN STANDARD‚ adherence to these practices is non-negotiable․ Proper wiring methods and installation techniques are fundamental to ensuring electrical safety and preventing failures․ Detailed documentation and verification procedures are essential for demonstrating compliance․

Competent personnel must perform all work‚ adhering to the latest revisions of the standard․

Special Electrical Installations (Hazardous Areas)

AS/NZS 3000:2018‚ with Amendment 3 (2023)‚ provides stringent guidelines for electrical installations within hazardous areas – locations where flammable gases‚ vapors‚ or combustible dusts may be present․ These areas demand specialized equipment and installation practices to mitigate explosion risks․

The standard categorizes hazardous areas into zones based on the frequency and duration of explosive atmospheres․ Each zone dictates specific requirements for equipment protection‚ including explosion-proof enclosures‚ intrinsically safe circuits‚ and increased safety designs․

Amendment 3 clarifies the selection and installation of equipment suitable for each zone‚ emphasizing the importance of certified equipment and competent personnel․ Wiring methods must prevent ignition sources‚ utilizing appropriate cable glands and termination techniques․

As a FOREIGN STANDARD‚ strict adherence is paramount․ Regular inspection and maintenance are crucial to ensure continued safety and compliance․ Detailed documentation‚ including hazard area classifications and equipment certifications‚ is mandatory․

Failure to comply can result in severe consequences‚ including explosions‚ fires‚ and potential loss of life․

Testing and Verification Procedures

AS/NZS 3000:2018‚ incorporating Amendment 3 (2023)‚ mandates rigorous testing and verification procedures to ensure electrical installations meet safety and performance standards․ These procedures are critical for confirming compliance and minimizing risks․

Initial verification includes insulation resistance testing‚ polarity checks‚ earth continuity testing‚ and loop impedance measurements․ These tests confirm the integrity of wiring and protective devices․ Functional testing verifies the correct operation of RCDs‚ circuit breakers‚ and other safety mechanisms․

Amendment 3 emphasizes the importance of documenting all test results accurately and retaining them for future reference․ Periodic inspection and testing are also required to identify potential deterioration or faults․

As a FOREIGN STANDARD‚ adherence to these procedures is non-negotiable․ Competent persons‚ equipped with calibrated test instruments‚ must perform all testing․ Detailed test reports provide evidence of compliance and are essential for certification․

Proper testing safeguards against electrical hazards and ensures the long-term reliability of installations․

Documentation and Certification

AS/NZS 3000:2018‚ including Amendment 3 (2023)‚ places significant emphasis on comprehensive documentation and formal certification of electrical work․ Accurate records are vital for demonstrating compliance and ensuring accountability․

Detailed records must include design plans‚ installation diagrams‚ test results (insulation resistance‚ loop impedance‚ RCD operation)‚ and a schedule of electrical equipment; These documents serve as a historical record of the installation and aid in future maintenance or modifications․

Certification‚ performed by a licensed electrical worker‚ confirms that the installation meets the requirements of the Wiring Rules․ This certification must be provided to the property owner and relevant authorities․

As a FOREIGN STANDARD‚ proper documentation is crucial for legal and insurance purposes․ Amendment 3 reinforces the need for clear and concise record-keeping․ Maintaining these records demonstrates due diligence and protects all parties involved․

Complete documentation and certification are fundamental to safe and compliant electrical installations․

Compliance and Legal Considerations

Adherence to AS/NZS 3000:2018‚ including the latest Amendment 3 (2023)‚ is not merely best practice; it’s a legal obligation for all electrical work in Australia and New Zealand․ Non-compliance can result in substantial penalties‚ including fines‚ project delays‚ and even legal prosecution․

Electrical workers must be licensed and operate within the scope of their qualifications․ Installations must be inspected and certified to demonstrate conformity with the Wiring Rules․ This certification provides legal defensibility in case of incidents․

As a FOREIGN STANDARD‚ understanding the specific jurisdictional requirements is crucial‚ as local regulations may supplement or clarify the standard’s provisions․ Staying updated with amendments is paramount․

Amendment 3 introduces changes that directly impact legal compliance‚ particularly regarding AFDDs and RCDs․ Ignoring these updates can lead to immediate legal repercussions․ Proper documentation‚ as outlined in the standard‚ is also a key legal consideration․

Prioritizing compliance safeguards both individuals and businesses‚ ensuring a safe and legally sound electrical environment․

Obtaining the AS/NZS 3000:2018 PDF

Accessing the official AS/NZS 3000:2018 PDF requires purchasing it from authorized sources like Standards Australia․ While numerous websites offer “free downloads‚” these are often unauthorized‚ potentially outdated‚ or even contain malware‚ posing significant risks․

Downloading from unofficial sources can lead to legal issues due to copyright infringement․ Furthermore‚ using an incorrect or incomplete version of the standard compromises safety and compliance‚ potentially resulting in fines or liability․

Standards Australia provides various purchase options‚ including individual copies‚ subscriptions‚ and read-only access․ These options ensure you receive the most current and accurate version of the standard‚ including Amendment 3 (2023)․

Consider the long-term benefits of a legitimate purchase: access to updates‚ reliable information‚ and peace of mind knowing you’re working with a legally sound document․ Investing in the official PDF is a crucial step for any electrical professional․

Prioritize safety and legality by obtaining the standard through authorized channels․

Free Download Resources and Risks

The internet abounds with websites claiming to offer free AS/NZS 3000:2018 PDF downloads․ These resources‚ while tempting‚ present substantial risks to users․ Often‚ these downloads are unauthorized copies‚ violating copyright laws and potentially lacking crucial updates like Amendment 3 (2023)․

A primary concern is malware․ Unofficial websites frequently bundle malicious software with the PDF‚ compromising your computer’s security and potentially stealing sensitive data․ Outdated versions can lead to non-compliance with current regulations‚ resulting in fines and legal repercussions․

Furthermore‚ relying on inaccurate information from unofficial sources can jeopardize safety during electrical installations․ Incorrect wiring practices based on flawed standards can create fire hazards and endanger lives․ The potential consequences far outweigh the perceived benefit of a “free” download․

Standards Australia actively combats unauthorized distribution․ Utilizing legitimate sources guarantees access to the most current‚ accurate‚ and legally compliant version of AS/NZS 3000:2018‚ protecting both your security and professional integrity․

Exercise extreme caution and prioritize legitimate sources over free‚ potentially harmful downloads․

Alternatives to Free Downloads (Standards Australia)

Standards Australia provides several legitimate avenues for accessing the AS/NZS 3000:2018 standard‚ ensuring you receive a current and legally compliant document․ Purchasing directly from Standards Australia guarantees access to the complete standard‚ including all amendments like Amendment 3 (2023)‚ and ongoing updates․

Options include purchasing a digital copy (PDF) for immediate download‚ a hard copy for physical reference‚ or subscribing to the Standards Update service‚ which provides notifications of revisions․ While these options involve a cost‚ they offer peace of mind and eliminate the risks associated with unauthorized downloads․

Furthermore‚ many libraries and educational institutions subscribe to Standards Australia’s services‚ providing access to members․ Exploring these resources can offer a cost-effective alternative to individual purchase․ Utilizing these official channels ensures adherence to copyright laws and promotes safe‚ compliant electrical work․

Investing in a legitimate copy of AS/NZS 3000:2018 is an investment in safety‚ professionalism‚ and legal compliance․ Avoid the pitfalls of free downloads and prioritize reliable‚ authorized sources for this critical standard․

Prioritize safety and compliance by choosing official access methods․

Australia

villaboard installation guide wet area

Villaboard Installation Guide ― Wet Area: A Comprehensive Plan

Navigating Windows 10 & 11 accessibility features reveals options like the on-screen keyboard, crucial when physical keyboards fail, aiding password entry and text input.

Villaboard’s suitability for wet areas stems from its inherent resistance to moisture damage, a critical factor in bathrooms, showers, and laundries. Unlike standard plasterboard, Villaboard offers enhanced durability when exposed to prolonged humidity and occasional water contact. This guide details proper installation techniques, ensuring a waterproof and long-lasting result.

Accessibility features within Windows, like the on-screen keyboard, demonstrate the importance of adaptable solutions when standard tools falter. Similarly, Villaboard provides a robust alternative to conventional building materials in moisture-prone environments. Understanding its properties and correct installation procedures is paramount for preventing costly repairs and maintaining structural integrity. Proper preparation, fixing, and sealing are key to a successful wet area installation.

Understanding Villaboard Types for Wet Areas

Selecting the appropriate Villaboard type is crucial for wet area performance. Standard Villaboard offers good moisture resistance, suitable for areas with limited direct water exposure. However, Villaboard MR (Moisture Resistant) provides significantly enhanced protection, ideal for shower recesses and areas with frequent or prolonged water contact.

Considering the adaptability of Windows’ on-screen keyboard – offering multilingual support and customizable features – parallels the need for tailored Villaboard selection. MR variants are specifically engineered to withstand constant dampness, minimizing the risk of swelling, delamination, and mold growth. Carefully assess the specific wet area application to determine whether standard or MR grade Villaboard is the most appropriate choice for long-term durability and performance.

Standard Villaboard vs. Villaboard MR (Moisture Resistant)

The core difference lies in moisture resistance. Standard Villaboard utilizes a standard gypsum core, offering reasonable resistance to moisture, suitable for less exposed areas. Villaboard MR, however, incorporates a specialized moisture-resistant additive within its gypsum core and features a coating that significantly reduces water absorption.

Much like the Windows on-screen keyboard’s adaptability for various input needs, MR Villaboard adapts to consistently damp environments. This makes it ideal for shower walls, bathroom linings, and areas prone to splashing. While standard Villaboard is cost-effective, MR provides superior long-term performance and prevents structural degradation in wet conditions, ensuring a waterproof and durable finish.

Villaboard Linings ⎼ Specific Wet Area Applications

Villaboard excels in diverse wet area applications. Showers demand full lining – walls and floors – utilizing Villaboard MR for complete waterproofing, mirroring the Windows on-screen keyboard’s universal accessibility. Bath areas benefit from lining walls around the bath, extending a short distance beyond potential splash zones.

Laundry areas require lining walls near water connections. Kitchen splashbacks also benefit from Villaboard’s moisture resistance. Remember, proper sealing of joints is crucial in all wet areas. Like selecting the right keyboard layout, choosing the appropriate Villaboard application ensures optimal performance and longevity, preventing water damage and maintaining structural integrity.

Essential Tools and Materials

Successful Villaboard installation necessitates specific tools and materials. You’ll require a utility knife for precise cutting, similar to selecting the correct keyboard language. A measuring tape, pencil, straight edge, and safety glasses are fundamental. For fixing, a screw gun with adjustable clutch and appropriate screws are vital.

Jointing demands joint compound, taping tools, and a sanding block. Waterproofing requires a membrane, brush, and sealant. Don’t forget a primer for substrate preparation. Like having a functional mouse alongside a virtual keyboard, having all these tools readily available streamlines the process, ensuring a professional and durable finish.

Substrate Preparation ― Critical First Steps

Proper substrate preparation is paramount for a lasting Villaboard installation, much like ensuring a stable operating system for keyboard functionality. Begin by meticulously checking for structural integrity and ensuring the substrate is perfectly straight; any deviations will compromise the final result. Remove any loose debris, dust, or contaminants.

Cleaning is crucial – a thorough sweep and wipe-down are essential; Following cleaning, apply a suitable primer to enhance adhesion and create a barrier against moisture. This priming step, similar to activating accessibility features, prepares the surface for optimal performance and longevity of the Villaboard system.

Checking Substrate Integrity & Straightness

Assessing substrate integrity mirrors verifying keyboard functionality – a foundational step. Begin by visually inspecting for cracks, crumbling, or any signs of weakness. Gently tap the surface; a hollow sound indicates potential issues requiring repair before proceeding. Utilize a long straightedge or spirit level to identify any deviations from a perfectly flat plane.

Significant irregularities exceeding 3mm over 2 meters necessitate correction. This might involve patching low spots or grinding down high areas; A solid, straight substrate is vital for preventing cracking and ensuring a waterproof seal, much like a stable base for reliable input.

Cleaning and Priming the Substrate

Similar to clearing cache for optimal performance, substrate preparation is crucial. Thoroughly remove all dust, dirt, grease, oil, and any loose particles using a brush or vacuum. A clean surface ensures proper adhesion of the Villaboard adhesive and jointing compounds. Following cleaning, apply a suitable primer specifically designed for use with Villaboard and the substrate type.

Priming seals the surface, reduces porosity, and enhances the bond strength. Allow the primer to dry completely according to the manufacturer’s instructions before commencing Villaboard installation. This step is paramount for a durable, waterproof installation, mirroring the importance of a functional keyboard for input.

Villaboard Cutting and Handling

Precision is key, much like selecting the right key on a virtual keyboard. When cutting Villaboard, utilize a scoring knife and straight edge for clean, accurate cuts. For larger cuts or curves, a circular saw with a fiber cement blade is recommended. Always wear dust protection during cutting. Carefully lift and maneuver Villaboard sheets, avoiding impacts that could cause damage.

Support the sheets adequately during transport and installation to prevent cracking or chipping. Store Villaboard flat and protected from the elements. Handle with care, as damaged sheets compromise the waterproof integrity. Proper handling ensures a seamless, durable wet area lining.

Villaboard Fixing ⎼ Methods and Spacing

Just as a virtual keyboard requires precise input, Villaboard demands correct fixing. Utilize corrosion-resistant screws specifically designed for fiber cement sheeting. Screw spacing is crucial: typically 300mm apart along edges and 600mm apart in the field. Ensure screws penetrate framing members sufficiently – a minimum of 25mm is generally recommended.

For timber frames, use screws with a countersunk head. Metal frames require self-drilling screws. Avoid over-tightening, which can damage the board. Consistent spacing and appropriate screw depth are vital for a secure, stable installation, preventing movement and maintaining waterproofing integrity.

Screw Selection and Depth Control

Similar to selecting the right key on a virtual keyboard, screw choice is paramount. Employ corrosion-resistant screws specifically engineered for fiber cement, preventing rust and maintaining structural integrity in wet environments. Screw length must ensure adequate penetration into the framing – typically a minimum of 25mm is advised.

Depth control is equally vital; screws should be driven flush with the Villaboard surface, avoiding both protrusion and sinking. Over-tightening damages the board, while insufficient depth compromises holding power. Utilize a depth-sensing clutch on your drill for consistent results, ensuring a secure and waterproof fixing.

Fixing to Timber Frames

Just as a virtual keyboard adapts to input, Villaboard fixing adapts to framing. When securing to timber frames, prioritize locating screws into studs or noggings for maximum support. Maintain consistent fixing spacing – generally 300mm apart along edges and 450mm in the field – to distribute loads evenly.

Pre-drilling pilot holes is recommended, especially with hardwoods, to prevent splitting. Ensure screws are driven straight and at a 90-degree angle to the board. Avoid clustering screws, as this can weaken the timber. Proper fixing ensures a stable substrate ready for waterproofing and tiling, mirroring the reliability of a physical keyboard.

Fixing to Metal Frames

Similar to a virtual keyboard’s adaptability, Villaboard installation requires adjustments for metal frames. When fixing to metal frames, self-drilling screws designed for metal are essential. These screws create their own threads, ensuring a secure hold without damaging the frame. Maintain consistent spacing – typically 300mm along edges and 450mm in the field – mirroring timber frame practices.

Ensure screws penetrate sufficiently into the metal studs. Avoid over-tightening, which can strip the threads. Using a screw gun with adjustable clutch settings is highly recommended. Proper fixing to metal frames provides a robust and stable base, crucial for wet area performance, just as reliable input is vital for keyboard function.

Jointing and Sealing ― Waterproofing is Key

Much like a virtual keyboard adapts to user input, Villaboard jointing demands precision for waterproofing. Achieving a watertight seal is paramount in wet areas. Begin with taping all joints using Villaboard-specific joint tape, embedding it firmly in a base coat of joint compound. Apply multiple coats, feathering edges smoothly.

Utilize wet area-specific jointing compounds, formulated for enhanced moisture resistance. Pay close attention to corners and angles, reinforcing them with additional tape. Proper sealing prevents water penetration, protecting the substrate and ensuring longevity, mirroring the keyboard’s role in accurate data entry.


Taping and Top Coating Procedures

Similar to a keyboard’s responsive keys, meticulous taping and coating are vital. Begin by applying the first coat of Villaboard joint compound, embedding the tape fully and ensuring no air pockets remain. Allow to dry completely before applying subsequent coats. Feather each coat wider than the previous, creating a smooth transition.

Typically, three coats are recommended, sanding lightly between each application. The final top coat should extend sufficiently beyond the joint to create a seamless, waterproof surface. Inspect carefully for imperfections and re-coat as needed. This process, like precise typing, demands patience and attention to detail for optimal results.

Specific Wet Area Jointing Compounds

Choosing the right jointing compound is as crucial as selecting the correct keyboard layout. Standard joint compounds aren’t suitable for consistently wet environments; specialized, waterproof formulations are essential. Look for compounds specifically designed for wet areas, often polymer-modified for enhanced flexibility and water resistance.

These compounds create a durable, impermeable barrier, preventing water penetration behind the Villaboard. Ensure compatibility with your chosen waterproofing membrane. Application techniques remain similar to standard compounds, but thoroughness is paramount. Proper selection and application, like mastering touch-typing, are key to a lasting, watertight seal.

Waterproofing Membranes ― Application Techniques

Similar to activating a virtual keyboard for accessibility, waterproofing membranes provide a critical layer of protection. Application demands meticulous preparation; ensure the Villaboard surface is clean, dry, and primed. Apply the membrane according to the manufacturer’s instructions, typically using a roller or brush, ensuring complete coverage – particularly around joints and penetrations.

Multiple coats are often required, allowing each coat to dry fully before applying the next. Pay close attention to overlaps, maintaining the specified width. Proper application, like precise key presses, prevents leaks. Regular inspection during application is vital, mirroring the need to test keyboard functionality.

Waterproofing Around Fixtures (Baths, Showers, Basins)

Just as a functional keyboard enables input, meticulous waterproofing around fixtures is paramount. These areas experience concentrated water exposure, demanding extra attention. Extend the waterproofing membrane beyond the fixture’s flange, creating a watertight seal. Pay specific attention to corners and transitions where water can easily penetrate, similar to ensuring every key on a keyboard works.

Use a flexible sealant compatible with both the membrane and the fixture material. Inspect all seals thoroughly after installation and periodically thereafter. Proper detailing prevents costly water damage, mirroring the importance of a reliable input device.

Tile Preparation and Adhesion

Similar to a keyboard’s keys needing a firm base, proper tile preparation is crucial for long-lasting adhesion. Ensure the Villaboard surface is clean, dry, and free of dust or debris. Apply a suitable tile adhesive, selecting one specifically designed for wet areas and compatible with your chosen tiles.

Follow the adhesive manufacturer’s instructions regarding mixing ratios and application techniques. Use the correct notch size of the trowel to achieve full adhesive coverage. Allow the adhesive to cure fully before grouting, ensuring a strong, waterproof bond, much like a well-connected keyboard circuit.

Avoiding Common Installation Errors

Just as a mistyped character can disrupt a message, installation errors compromise Villaboard’s waterproof integrity. Incorrect screw depth is a frequent issue; screws shouldn’t break the paper face. Insufficient jointing compound or improper taping leads to water ingress, mirroring a faulty keyboard connection.

Failing to prime the substrate before installation hinders adhesion, and neglecting to waterproof around fixtures creates vulnerable points. Always check substrate straightness and ensure proper spacing of fixings. Diligence prevents costly rework and maintains the wet area’s protection, similar to careful proofreading.

Safety Precautions During Installation

Prioritizing safety during Villaboard installation is paramount, much like ensuring a stable connection before inputting sensitive data. Always wear appropriate personal protective equipment – safety glasses, dust masks, and gloves – to shield against dust and debris.

When cutting Villaboard, use tools designed for the material and follow manufacturer’s instructions to prevent breakage and injury. Be mindful of electrical wiring when fixing to frames, and avoid working in damp conditions. Secure ladders properly and maintain a clean, organized workspace, mirroring a tidy digital desktop for efficient operation.

Villaboard Installation in Shower Niches

Installing Villaboard within shower niches demands meticulous attention, similar to navigating complex keyboard layouts for specific characters. Ensure the niche framing is robust and level before commencing. Cut Villaboard pieces precisely to fit the niche’s dimensions, allowing for slight gaps for sealant.

Apply adhesive liberally to the back of the Villaboard and secure it firmly to the framing. Pay close attention to waterproofing around the niche opening, using appropriate jointing compounds and membranes. Proper sealing prevents water ingress, mirroring the function of a virtual keyboard protecting against erroneous input.

Dealing with Corners and Angles

Addressing corners and angles during Villaboard installation requires precision, much like selecting the correct key on a virtual keyboard. Accurate measurements and careful cutting are paramount to avoid unsightly gaps. Utilize a scoring tool for clean, controlled cuts, especially for internal corners.

For external corners, consider using angle beads for reinforcement and a professional finish. Apply adhesive generously to the edges and ensure a tight fit. Waterproofing these areas is critical; apply sealant liberally to prevent water penetration, functioning similarly to keyboard safeguards against accidental keystrokes.

Inspection and Quality Control

Thorough inspection post-installation is as vital as ensuring a functional virtual keyboard for accessibility. Carefully examine all joints, screw fixings, and sealed areas for any imperfections. Verify screws are correctly seated without breaking the paper face of the Villaboard.

Check for consistent waterproofing coverage, particularly around fixtures and corners, mirroring the need for complete key functionality. Address any gaps or inconsistencies immediately. A quality control checklist ensures adherence to standards, preventing future water damage – a preventative measure akin to regular software updates for optimal performance.

Maintenance and Care of Installed Villaboard

Regular maintenance extends Villaboard’s lifespan, much like keeping a virtual keyboard updated for seamless operation. Periodically inspect joints and sealant for cracks or deterioration, addressing them promptly to prevent water ingress. Clean surfaces with mild detergent and avoid abrasive cleaners, preserving the waterproof coating.

Promptly address any water leaks or spills to prevent prolonged exposure. Retighten any loose screws if detected. Maintaining a dry environment minimizes risk, similar to protecting electronic devices from moisture. Consistent care ensures long-term performance and prevents costly repairs, mirroring the benefits of proactive system maintenance.

Regulatory Compliance and Standards

Adhering to building codes is paramount, akin to ensuring software compatibility across different Windows versions. Villaboard installations in wet areas must comply with local building regulations concerning waterproofing and structural integrity. These standards dictate appropriate materials, fixing methods, and jointing procedures.

Consult local authorities or a qualified building professional to confirm specific requirements for your project. Proper documentation, including material certifications and installation records, is crucial for inspections. Compliance ensures safety, durability, and legal protection, mirroring the importance of software licensing and updates.

Australia

mgp10 span tables australia pdf

MGP10 Span Tables Australia PDF: A Comprehensive Guide

MGP10 span tables are crucial for Australian construction‚ aiding in safe and efficient timber design; downloadable PDF versions from manufacturers like Woodhouse are readily available.

Understanding Timber Grading: MGP10

MGP10 grading signifies a structurally graded timber‚ commonly used in Australia for various applications like decking‚ roofing‚ and flooring. Unlike older classifications like F7‚ MGP10 focuses on the timber’s mechanical properties‚ ensuring consistent performance. It’s predominantly found in solid timber‚ differing from laminated varieties.

Understanding MGP10 is vital when interpreting span tables‚ as these tables are specifically designed for this grade. Correctly identifying the timber grade is paramount for structural integrity and safety. Manufacturers provide detailed specifications‚ and resources like Bunnings Workshop offer guidance‚ but always prioritize official documentation for accurate project planning.

What are Span Tables and Why are They Important?

Span tables are essential tools for builders and designers‚ providing pre-calculated safe spanning distances for timber members. They dictate the maximum distance timber can bridge unsupported‚ based on factors like timber grade (MGP10‚ F7)‚ dimensions‚ and load type.

Using span tables ensures structural safety and compliance with building codes. Ignoring them can lead to floor or roof failure. Variations exist between manufacturers‚ so referencing the correct table for your timber supplier is crucial. Finding complete tables can be challenging‚ with resources scattered across manufacturer websites and platforms like Bunnings Workshop.

Factors Affecting Timber Span

Several key factors influence timber span capabilities‚ directly impacting the values found within MGP10 span tables. Timber species and grade – F7 versus MGP10 – are primary determinants‚ with higher grades allowing for greater spans.

Timber dimensions‚ specifically width and depth‚ also play a critical role; larger dimensions generally support heavier loads and longer spans. Load types‚ categorized as dead (permanent) and live (variable)‚ must be accurately assessed. Finally‚ understanding if the timber is treated (like H3) and the treatment process (LOSP) is vital‚ as this affects its long-term capacity.

Timber Species and Grade (F7 vs. MGP10)

F7 and MGP10 represent different timber grading standards impacting span capabilities. MGP10 and 12 are commonly used for solid timber‚ while F7 is often found in laminated products. F7‚ like a 280 x 42mm section‚ might be necessary for a five-meter span‚ demonstrating grade-specific requirements.

Higher grades‚ like MGP10‚ generally indicate greater strength and stiffness‚ allowing for longer spans with the same dimensions. Selecting the appropriate grade is crucial for structural integrity and safety‚ directly influencing load-bearing capacity as detailed in span tables. Always consult relevant documentation.

Timber Dimensions (Width and Depth)

Timber dimensions – specifically width and depth – are fundamental to span table calculations. A larger cross-sectional area generally translates to increased load-bearing capacity and longer achievable spans. For instance‚ a 280 x 42mm timber section‚ as referenced in Woodhouse span tables‚ demonstrates a specific capacity.

Span tables detail allowable spans for various timber sizes. Increasing either the width or depth (or both) will typically increase the span length a particular timber grade can support. Accurate dimensioning is vital for safe and compliant construction‚ directly impacting structural performance;

Load Types: Dead and Live Loads

Span tables account for two primary load types: dead loads and live loads. Dead loads represent the static weight of the structure itself – roofing materials‚ flooring‚ and the timber components. Live loads are variable‚ encompassing furniture‚ occupants‚ and potential snow or wind loads.

MGP10 span tables specify allowable spans based on combinations of these loads. Correctly estimating both dead and live loads is crucial for structural integrity. Underestimating live loads can lead to deflection or failure‚ while overestimating can result in unnecessarily conservative (and costly) designs.

Locating MGP10 Span Tables in Australia

Finding reliable MGP10 span tables in Australia requires checking several sources. Manufacturer-specific tables‚ like those from Woodhouse‚ provide detailed data for their products and are often available as PDF downloads. The Bunnings Workshop community forum is a valuable resource‚ with discussions pointing to various suppliers and differing manufacturer specifications.

It’s important to note variations exist between manufacturers; therefore‚ always use the span table corresponding to the timber supplier you’re using. Online searches for “MGP10 span tables Australia PDF” will yield numerous results‚ but verifying the source’s credibility is essential.

Manufacturer-Specific Span Tables

Manufacturer-specific span tables are the most reliable source for MGP10 timber data in Australia. Companies like Woodhouse provide detailed PDF documents outlining load capacities for various timber dimensions. These tables account for the specific timber grading and treatment processes used by that manufacturer.

Accessing these tables directly ensures accuracy‚ as variations exist between suppliers. The Bunnings Workshop forum highlights this‚ emphasizing the importance of using the correct table for your timber source. Always prioritize the span table provided by the timber’s manufacturer for safe and compliant construction.

Bunnings Workshop Resources

The Bunnings Workshop community forum is a valuable resource for finding information on MGP10 span tables. Users frequently discuss locating appropriate tables for decking‚ roofing‚ and flooring projects. While Bunnings doesn’t host a single comprehensive PDF‚ the forum directs users to manufacturer websites like Woodhouse for specific data.

Discussions reveal the challenges of finding consistent span tables‚ as variations exist between suppliers. The forum emphasizes the need to consult manufacturer-provided tables for accurate load capacity information. It’s a great place to ask questions and learn from other DIY enthusiasts’ experiences.

Interpreting MGP10 Span Tables

Understanding MGP10 span tables requires careful attention to table columns and terminology. Key elements include span length – the distance timber can safely bridge – and corresponding load capacity‚ indicating the weight it can support. These tables detail allowable stresses for different timber sizes and applications.

Accurately interpreting these values is vital for structural integrity. Factors like dead loads (permanent weight) and live loads (variable weight) must be considered. Always refer to the specific table provided by the timber manufacturer‚ as variations exist‚ ensuring safe and compliant construction.

Understanding Table Columns and Terminology

MGP10 span tables utilize specific terminology; understanding these terms is essential. Columns detail ‘Span’‚ representing the maximum distance between supports. ‘Load’ indicates the distributed weight the timber can bear‚ often in kPa (kilopascals). ‘Timber Size’ specifies width and depth‚ like 280 x 42mm.

‘Grade’ confirms the timber’s structural quality. Familiarize yourself with terms like ‘Dead Load’ (permanent fixtures) and ‘Live Load’ (occupants/furniture). Variations between manufacturers necessitate careful review of each table’s definitions for accurate interpretation and safe structural design.

Span Length and Load Capacity

MGP10 span tables demonstrate an inverse relationship between span length and load capacity. Longer spans necessitate reduced loads‚ and vice versa. For a five-meter span‚ a higher grade timber like F7 280 x 42mm might be required‚ as noted by Woodhouse.

Tables detail permissible loads for specific spans‚ considering timber dimensions and grade. Exceeding these limits compromises structural integrity. Always consult the tables to determine the appropriate timber size and grade for your project’s span and anticipated load requirements‚ ensuring safety and compliance.

Span Tables for Different Applications

MGP10 span tables vary based on application – decking‚ roofing‚ and flooring each have unique requirements. Decking tables account for live loads from people and furniture‚ while roofing considers wind and snow loads. Flooring tables address both dead loads (the structure itself) and live loads (occupants and contents).

Manufacturers provide specific tables for each application‚ detailing permissible spans for different timber sizes and grades. Utilizing the correct table is vital for structural safety and compliance with Australian building codes. Always verify the table aligns with your project’s specific needs.

Decking Span Tables

MGP10 decking span tables are essential for safe outdoor construction‚ dictating maximum distances between supports. These tables consider typical live loads from foot traffic and outdoor furniture. Variations exist between manufacturers‚ so referencing the supplier’s specific PDF is crucial.

Factors like timber width‚ depth‚ and joist spacing significantly impact span capacity. Bunnings Workshop discussions highlight the need for complete span tables‚ as resources can be fragmented. Proper span selection prevents deflection and ensures a durable‚ safe deck. Always prioritize manufacturer guidelines.

Roofing Span Tables

MGP10 roofing span tables determine appropriate rafter and ceiling joist sizes‚ considering roof pitch and potential snow or wind loads. These tables are vital for structural integrity‚ preventing collapse. Accessing manufacturer-specific PDF documents is paramount‚ as variations exist.

The PlusSpec Forum emphasizes how floor thickness impacts overall structural design‚ influencing wall heights and roof support requirements. Correct span selection minimizes deflection and ensures a weatherproof roof. Always consult detailed tables and consider the roof’s total load when planning construction.

Flooring Span Tables

MGP10 flooring span tables are essential for determining joist sizes based on span length and anticipated live and dead loads. These tables ensure floors are strong and don’t excessively deflect under weight. Variations between manufacturers necessitate careful comparison of PDF documents.

The PlusSpec Forum highlights the significant impact of floor thickness on the entire structural model. Bunnings Workshop discussions reveal challenges in finding comprehensive span tables‚ emphasizing the need for accurate data. Proper joist spacing‚ guided by these tables‚ is crucial for a safe and stable floor.

The Impact of Floor Thickness on Structural Design

Floor thickness profoundly influences overall structural design‚ as noted in discussions on the PlusSpec Forum. A change in floor height directly impacts wall heights and the entire building model. Utilizing accurate MGP10 span tables‚ often found as PDF downloads from suppliers like Woodhouse‚ is vital for correct calculations.

Selecting appropriate timber dimensions – width and depth – based on span tables minimizes deflection and ensures structural integrity. Ignoring floor thickness can lead to underestimation of loads and potential structural failures‚ highlighting the importance of detailed PDF table analysis.

Treated Pine Span Tables: Considerations

When working with treated pine‚ referencing specific span tables is essential‚ as variations exist between manufacturers. Bunnings Workshop discussions highlight the difficulty in finding complete span tables‚ even for common grades like MGP10. Understanding the treatment level – such as H3 – is crucial‚ as it affects load-bearing capacity.

LOSP (Light Organic Solvent Preservative) treatment doesn’t inherently alter span capacity‚ but the timber grade (MGP10 vs. F7) does. Always consult PDF span tables from your supplier to ensure compliance and structural soundness‚ particularly for decking projects.

H3 Treated Pine and its Uses

H3 treated pine is commonly used for above-ground applications‚ including decking‚ landscaping‚ and general construction where contact with the ground is minimal. It’s protected against insect attack and fungal decay‚ extending its lifespan. However‚ H3 treatment doesn’t increase the structural capacity of the timber; span tables still rely on the timber’s grade – like MGP10 or F7 – and dimensions.

When sourcing PDF span tables‚ ensure they specifically address H3 treated pine. Remember‚ variations exist between manufacturers‚ so always prioritize the supplier’s documentation for accurate load calculations.

LOSP Treatment and Span Capacity

Light Organic Solvent Preservative (LOSP) treatment‚ like that used in Structura treated pine‚ protects timber from decay and insects‚ but crucially‚ it doesn’t alter its structural grading or span capacity. Span tables for MGP10 or F7 timber remain the same regardless of LOSP treatment.

When consulting PDF span tables‚ focus on the timber grade and dimensions‚ not just the treatment level. Always refer to the manufacturer’s documentation‚ as slight variations in LOSP application can exist. Correct span calculations are vital for safe and durable construction.

PDF Availability of MGP10 Span Tables


Finding MGP10 span tables in PDF format requires targeted searching. Manufacturer websites are the most reliable source‚ offering specific tables for their products. Resources like Bunnings Workshop often link to these manufacturer PDFs‚ though variations exist between brands.

Directly searching for “MGP10 span tables Australia PDF” yields numerous results‚ but verifying the source’s credibility is essential. Always prioritize official manufacturer documentation to ensure accurate load capacity information for your project. Beware of outdated or generic tables.

Searching for Downloadable PDFs

To locate downloadable PDFs of MGP10 span tables‚ begin with supplier websites. Woodhouse‚ for example‚ provides accessible tables directly on their platform. Utilize specific search terms like “MGP10 treated pine span tables PDF Australia” to refine results.

Explore forums like PlusSpec and Bunnings Workshop communities; users frequently share links to relevant PDF documents. However‚ always cross-reference information with the manufacturer’s official documentation to confirm accuracy and suitability for your specific building application. Prioritize official sources for reliable data.

Reliable Sources for PDF Documents

When seeking MGP10 span table PDFs‚ prioritize manufacturer websites as the most dependable source. Woodhouse is specifically mentioned as a provider within Bunnings Workshop discussions. Direct downloads from suppliers ensure the latest revisions and accurate data for your project.

Additionally‚ check with timber associations and building standards organizations in Australia. While forums like PlusSpec and Bunnings Workshop can offer leads‚ always verify information against official documentation. Beware of outdated or unverified tables; accuracy is paramount for structural integrity and safety.

Variations Between Manufacturers’ Span Tables

It’s crucial to acknowledge that MGP10 span tables aren’t universally standardized across Australian manufacturers. Discussions on Bunnings Workshop highlight slight variations in load capacities and recommended spans for identical timber sizes and grades. These differences stem from proprietary testing methods and design philosophies.

Therefore‚ always utilize the span tables provided by the specific timber supplier for your project. Don’t interchange tables from different sources‚ as this could lead to underestimation of loads or structural failure. Careful comparison and conservative design practices are recommended.

Using Span Tables at the Design Stage

Integrating MGP10 span tables early in the design process is paramount for structural integrity. The PlusSpec Forum emphasizes that floor thickness significantly impacts the entire model‚ influencing wall heights and overall structural requirements. Span tables help determine appropriate timber dimensions – width and depth – to safely support anticipated loads.

Consider both dead loads (permanent fixtures) and live loads (occupants‚ furniture). Accurate load assessment‚ combined with manufacturer-specific span tables‚ ensures a compliant and robust design. Ignoring this step can lead to costly rework or safety concerns.

Solid vs. Laminated Timber Grading (MGP10 & F7)

A key distinction exists between solid and laminated timber grading‚ impacting span table selection. MGP10 and F7 are commonly used for solid timber‚ while laminated timber often requires different considerations. The Bunnings Workshop community highlights that MGP10 and F12 gradings are predominantly found in solid timber‚ not laminated varieties.

For a five-meter span‚ Woodhouse suggests using F7 280 x 42mm timber. Understanding this difference is crucial; applying span tables intended for solid timber to laminated products can compromise structural safety and compliance with Australian building codes.

Woodhouse Span Table Example: F7 280 x 42mm

As referenced within the Bunnings Workshop discussions‚ Woodhouse provides a practical span table example. For a five-meter span‚ their data indicates the necessity of utilizing F7 280 x 42mm timber to ensure structural integrity. This specific recommendation highlights the importance of consulting manufacturer-specific span tables.

Variations between manufacturers exist‚ making a generalized approach unreliable. Woodhouse’s example demonstrates how timber dimensions and grade directly correlate to achievable spans. Always prioritize referencing the span tables provided by your timber supplier for accurate and safe construction practices.

Resources and Further Information

For comprehensive MGP10 span table information in Australia‚ begin with manufacturer websites like Woodhouse‚ offering detailed PDF documents. The Bunnings Workshop community forums are valuable‚ providing real-world discussions and user experiences regarding span table interpretation and application.

PlusSpec Forum also hosts discussions on timber span tables‚ particularly concerning their use during the design phase. Remember that floor thickness significantly impacts overall structural modeling. Always cross-reference information and prioritize supplier-provided data for accurate project planning and safe construction outcomes.

Australia

bearers and joists australian standards pdf

Australian Standards, like AS 1684-2006, detail crucial guidelines for bearers and joists, ensuring structural integrity and safety in residential timber framing construction.

Importance of Adhering to Standards

Adhering to Australian Standards for bearers and joists is paramount for building safety and longevity. Compliance, guided by documents like AS 1684, ensures structures can withstand anticipated loads – dead, live, and wind.

Properly designed and installed bearers and joists, following span tables and material specifications, prevent costly failures and maintain building code compliance. Ignoring these standards risks structural instability, potential collapse, and legal ramifications. Safe spans for Stress Grade 5 pine are crucial, as detailed in seasoned softwood span tables.

Scope of AS 1684 ⏤ 2006

AS 1684 ⏤ 2006, Residential Timber-Framed Construction, comprehensively covers the design and construction of timber floor, wall, and roof framing. It details requirements for materials, dimensions, and connections of bearers and joists.

The standard applies to standard timber buildings and decks, specifying common bearer sizes like 76x228mm supported every 2.4m. Span tables within AS 1684 provide safe spans for various timber grades, including Stress Grade 5 pine, for both internal floors, balconies, and decks.

Understanding Bearers

Bearers are horizontal timber members supporting floor joists, typically 76x228mm, and are crucial for distributing loads effectively within a timber-framed structure.

Bearer Material Specifications

Bearer materials must adhere to AS 2858 for softwood grading, ensuring quality and structural reliability. Commonly, seasoned softwood, specifically Stress Grade 5 (S5) pine, is utilized.

Timber selection considers factors like moisture content and freedom from defects. Bearers require appropriate preservative treatment, especially for external applications, to resist decay and insect attack.

Compliance with these specifications guarantees the bearer’s capacity to safely bear loads, contributing to the overall stability of the floor system, as outlined in AS 1684.

Common Bearer Dimensions (76x228mm)

76x228mm bearers are a frequently used size in standard timber buildings and decks, offering a balance of strength and cost-effectiveness. These dimensions are commonly supported at 2.4-meter intervals, as detailed in span tables derived from AS 1684-2006.

This sizing provides adequate support for typical floor loads, but specific requirements depend on joist spans and anticipated usage.

Proper installation and adherence to spacing guidelines are crucial for maximizing the bearer’s load-bearing capacity and ensuring structural integrity.

Bearer Spacing and Support

Bearer spacing is typically dictated by joist spans and load requirements, with 2.4 meters being a common interval for standard timber construction. Proper support is vital; bearers must rest securely on foundations or piers, ensuring load transfer.

AS 1684-2006 outlines acceptable support methods and details regarding fixing to prevent movement.

Adequate support minimizes deflection and maintains the structural integrity of the floor system, contributing to long-term durability and safety.

Joist Specifications and Types

Joists, crucial floor components, come in various grades like Stress Grade 5 (S5) pine, with dimensions and load capacity determined by span tables and AS 1684.

Joist Material Grades (Stress Grade 5 — S5 Pine)

Stress Grade 5 (S5) pine is a commonly utilized joist material in Australian residential construction, adhering to AS 1684 standards. This grade signifies a specific level of strength and stiffness, crucial for supporting floor loads safely.

S5 pine offers a balance between cost-effectiveness and structural performance, making it suitable for many applications. Span tables, derived from testing and standards, dictate maximum spans based on joist size and load conditions.

Proper selection of S5 pine, verified by grading rules (AS 2858), ensures compliance and structural reliability for floors, decks, and balconies.

Joist Dimensions and Load Capacity

Joist dimensions – depth and width – directly impact their load capacity. Deeper joists generally support heavier loads and longer spans. Australian Standards (AS 1684) and span tables (like Hyspan) correlate joist size with allowable loads.

Load capacity considers both dead loads (permanent fixtures) and live loads (occupants, furniture). Accurate load calculations, factoring in design actions (AS/NZS 1174), are vital.

Selecting appropriate joist dimensions ensures structural integrity and prevents floor deflection, adhering to safety regulations and building codes.

Span Tables for Floor Joists

Span tables, such as those from Hyspan, are essential tools for determining maximum safe spans for floor joists. These tables, derived from AS 1684, consider timber grade (e.g., Stress Grade 5 — S5 pine), joist dimensions, and applied loads.

They provide pre-calculated spans for various load types, simplifying design. However, users must carefully select the correct table based on timber seasoning and intended application (balconies, decks, internal floors).

Correctly interpreting span tables is crucial for compliant and safe floor construction.

Australian Standards Relevant to Bearers and Joists

AS 1684, AS/NZS 1174, and AS 2858 are key Australian Standards governing the design, construction, and grading of timber bearers and joists.

AS 1684 ⏤ Residential Timber-Framed Construction

AS 1684-2006 is the primary Australian Standard for residential timber framing, comprehensively covering the design and construction of timber floor, wall, and roof systems.

It details requirements for materials, dimensions, and connections, including specific guidance on bearer and joist spacing, sizing (often 76x228mm for bearers), and support.

The standard references span tables for different timber grades – like Stress Grade 5 pine – and load conditions, ensuring structural adequacy and safety. Adherence is mandatory for compliant building work.

AS/NZS 1174, Structural Design Actions

AS/NZS 1174 outlines the various loads that structures, including those with timber bearers and joists, must withstand. This includes dead loads (weight of the structure itself), live loads (occupants, furniture), and wind loads.

It provides methods for calculating these loads accurately, considering regional factors and building occupancy.

Correct load assessment, guided by AS/NZS 1174, is crucial for selecting appropriate timber sizes and spans, ensuring the bearer and joist system can safely support anticipated forces.

AS 2858 ⏤ Timber — Softwood — Grading Rules

AS 2858 establishes the rules for visually grading softwood timber, essential for bearers and joists. It defines different stress grades – like Stress Grade 5 (S5) pine – based on timber characteristics and strength.

This standard ensures timber used in construction meets specific mechanical properties, guaranteeing structural reliability.

Proper grading, according to AS 2858, allows engineers and builders to confidently select timber suitable for intended load-bearing applications, maximizing safety and performance.

Span Tables and Load Calculations

Span tables, like Hyspan, and load calculations are vital for determining safe bearer and joist spans, considering dead, live, and wind loads.

Using Hyspan Span Tables

Hyspan Span Tables are extensively used in Australia for calculating safe spans for bearers and joists, derived from AS 1684. These tables provide pre-calculated spans based on timber species, grade (like Stress Grade 5 pine), joist dimensions (e.g., 76x228mm), and applied loads.

Users must correctly identify the relevant table based on timber seasoning (seasoned softwood) and application (internal floors, decks, balconies). Careful attention to load factors and support conditions is crucial for accurate span determination, ensuring structural compliance with Australian building codes.

Calculating Safe Spans for Different Loads

Safe span calculations necessitate considering dead loads (permanent structure weight) and live loads (occupancy, furniture). AS/NZS 1174 guides determining these loads. Hyspan tables simplify this, offering spans for specific load combinations.

However, understanding load factors is vital. Increased loads require reduced spans. For decks and balconies, higher live load considerations are essential. Accurate load assessment, combined with correct table usage, guarantees structural safety and adherence to Australian standards for bearers and joists.

Impact of Timber Seasoning on Span

Timber seasoning – reducing moisture content – significantly impacts span capacity. Seasoned timber exhibits greater strength and stability compared to green timber. Span tables, like those from Hyspan, are specifically calibrated for seasoned softwood.

Using unseasoned timber with spans derived from seasoned tables compromises structural integrity. Moisture changes cause shrinkage and distortion, reducing load-bearing capability. AS 1684 emphasizes using appropriately seasoned timber to ensure compliance and long-term performance of bearers and joists.

Design Considerations for Decks and Balconies

Outdoor applications require specific bearer and joist designs, adhering to AS 1684, with appropriate timber treatment to resist weathering and insect damage.

Bearer and Joist Design for Outdoor Applications

Designing for decks and balconies necessitates careful consideration of exposure to the elements. Australian Standards, particularly AS 1684, dictate appropriate timber selection and dimensions. Bearers are commonly 76x228mm, supported every 2.4m, but this can vary based on load and span.

Joist spans are determined using Hyspan tables, factoring in timber grade (like S5 pine) and load types. Proper detailing is vital to prevent moisture accumulation and ensure longevity. External timber must receive suitable preservative treatment to guard against rot and insect attack, complying with relevant standards.

Treatment Requirements for External Timber

External timber, used for bearers and joists in decks and balconies, demands robust preservative treatment to resist decay and insect infestation. Australian Standards mandate specific treatment levels based on exposure risk – H1 for above-ground contact, H2 for in-ground contact.

Treatment involves applying chemicals like copper chrome arsenate (CCA) or alternative formulations. Proper application, penetration, and fixings are crucial for effectiveness. Always consult AS 1684 and relevant timber treatment guidelines to ensure compliance and long-term durability.

Balustrade and Handrail Standards

Australian Standards, particularly AS 1684, dictate stringent requirements for balustrades and handrails on decks and balconies, prioritizing safety. These standards specify minimum heights (typically 1 meter), maximum gaps (125mm to prevent children falling), and load resistance capabilities.

Handrails must provide a secure grip and withstand specified forces. Materials must be durable and non-slip. Compliance ensures protection against falls, safeguarding occupants and adhering to building regulations. Detailed guidance is available within the referenced standards.

Stair Construction Standards

Australian Standards provide design guidance for hardwood stairs, outlining regulatory requirements for rise, run, and headroom, ensuring safety and accessibility.

Design Guidance for Australian Hardwood Stairs

Hardwood stair construction demands adherence to specific Australian Standards, focusing on durability and safety. Design considerations include selecting appropriate timber grades – ensuring strength and stability – and calculating accurate rise and going dimensions for comfortable use.

Proper detailing of stringers, treads, and risers is vital, alongside secure fixing methods. Standards also address balustrade and handrail requirements, dictating height, spacing, and structural capacity to prevent falls. Utilizing seasoned timber minimizes movement and ensures longevity, while appropriate finishes protect against wear and environmental factors.

Regulatory Requirements for Stair Construction

Stair construction in Australia is heavily regulated, demanding compliance with the National Construction Code (NCC) and relevant Australian Standards. These regulations specify minimum tread depths, maximum riser heights, and mandatory handrail requirements for safety.

Building permits are often required, necessitating detailed plans demonstrating adherence to these codes. Inspections are conducted throughout the construction process to verify compliance. Failure to meet these standards can result in rectification orders or legal penalties, emphasizing the importance of thorough planning and execution.

Compliance and Tolerances

Compliance with Australian Standards, such as AS 1684, is mandatory for timber framing, including bearers and joists, alongside defined tolerances for construction.

Guide to Standards and Tolerances

Understanding tolerances is vital when working with bearers and joists, as deviations from standards can compromise structural performance. AS 1684 outlines acceptable variations in timber dimensions and installation.

Key areas include straightness, knot size, and moisture content, all impacting load-bearing capacity. Compliance ensures safety and longevity, preventing issues like deflection or failure. Regular inspections during construction verify adherence to these standards, guaranteeing a robust and reliable timber frame.

Proper detailing and workmanship are essential for meeting tolerance requirements.

Mandatory Australian Standards

AS 1684 Timber-Framed Construction is paramount, dictating design and installation of bearers and joists. AS/NZS 1174 defines structural design actions – loads like wind and gravity – crucial for calculations.

AS 2858 governs softwood grading, ensuring timber quality meets required stress grades. Compliance with these standards is legally required for building approvals. Ignoring them risks structural failure and voids insurance.

Adherence guarantees safety, durability, and legal protection for builders and homeowners alike.

Timber Microstructure Standards

Standards relating to tin bronze microstructures exist, though less directly linked to bearers and joists; they focus on material composition and quality control.

Standards of Microstructures of Tin Bronze

While seemingly distant from bearers and joists, standards governing tin bronze microstructures are vital for components within building materials. These standards, like those referenced in “Khudozhestvennoe nasledie,” focus on the alloy’s crystalline structure, porosity, and compositional uniformity.

These characteristics directly impact the bronze’s mechanical properties – strength, ductility, and corrosion resistance – crucial if bronze fasteners or supports are used in timber framing. Though not a primary focus of AS 1684, understanding these microstructural standards ensures overall system reliability and longevity.

Specific Applications

AS 1684 guides bearer and joist use in internal floors, decks, and balconies, dictating appropriate dimensions and spans based on load requirements and timber grading.


Floor Joists for Internal Floors

Internal floor joist design, per AS 1684, relies heavily on span tables considering timber grade (often Stress Grade 5 — S5 pine) and load types.

These tables provide safe spans for various joist dimensions, factoring in both dead loads (permanent fixtures) and live loads (occupants and furniture).

Seasoned softwood span tables are readily available, detailing maximum distances between supports.

Proper joist spacing (typically 450mm or 600mm) and adequate support from bearers are vital for floor stability and preventing deflection, ensuring compliance with Australian Standards.

Framework of Walls and Ridge Beams

AS 1684 governs the connection of wall frameworks and ridge beams to bearers and joists, emphasizing structural continuity and load transfer.

The framework must be securely fixed, utilizing appropriate fasteners and bracing techniques to resist racking and wind loads.

Ridge beams, supporting roof loads, require careful consideration of span and support conditions, referencing span tables for suitable timber sizes.

Proper detailing ensures the entire structure acts as a unified system, meeting Australian Standards for stability and safety.

Comparing Timber Options

Softwood (like pine) is common for bearers and joists, while hardwood offers greater strength and durability, influencing span capabilities and longevity.

Softwood vs. Hardwood Bearers and Joists

Softwood, particularly Stress Grade 5 (S5) pine, is frequently utilized due to its cost-effectiveness and workability, aligning with AS 1684 standards for typical residential applications. However, hardwood bearers and joists present superior strength, stiffness, and natural durability, reducing the need for chemical treatments.

While hardwood is more expensive, its extended lifespan and increased load-bearing capacity can justify the investment, especially for decks and balconies. Selecting the appropriate timber depends on the specific project requirements, load demands, and environmental exposure, always adhering to relevant Australian Standards.

Future Trends in Timber Framing

Sustainable timber practices are gaining prominence, focusing on responsibly sourced materials and innovative framing techniques to minimize environmental impact and enhance durability.

Sustainable Timber Practices

Embracing sustainability within timber framing involves utilizing responsibly sourced wood, reducing waste, and optimizing material usage. Australian Standards increasingly encourage the use of certified timber, ensuring forests are managed for long-term health.

Innovations include engineered wood products like laminated veneer lumber (LVL) and glued laminated timber (glulam), offering superior strength and dimensional stability. These materials minimize reliance on old-growth forests and reduce timber defects.

Furthermore, design strategies focusing on material efficiency and minimizing environmental impact are becoming integral to modern timber construction practices.

Resources and Further Information

Accessing Australian Standards documents and utilizing online span table calculators are vital for accurate bearer and joist design and compliance.

Accessing Australian Standards Documents

Obtaining the relevant Australian Standards documents, such as AS 1684-2006, is crucial for compliant construction. Standards Australia (standards.org.au) is the primary source for purchasing these documents in PDF format.

Alternatively, some libraries and building industry associations may provide access to standards. Free downloads of span tables, extracted from AS 1684, are available online, offering guidance for bearer and joist spans for various loads.

However, always verify the currency and applicability of any freely available information against the official, paid standard.

Online Span Table Calculators

Several online calculators simplify determining safe spans for bearers and joists, referencing Australian Standards like AS 1684. These tools typically require inputting timber species, grade (e.g., Stress Grade 5), joist dimensions, and anticipated loads.

Hyspan offers accessible span tables and potentially calculators, aiding in floor joist selection for balconies, decks, and internal floors. However, always cross-reference calculator results with official span tables and consider professional engineering advice.

Remember, calculators are aids, not replacements for thorough design.

Understanding Design Actions

Design actions, including dead, live, and wind loads (AS/NZS 1174), are critical for calculating appropriate bearer and joist spans according to standards.

Dead Loads, Live Loads, and Wind Loads

Dead loads encompass the weight of the structure itself – bearers, joists, flooring, and roofing – consistently applied. Live loads represent variable weights, like furniture, occupants, and stored items, changing over time.

Wind loads, as defined by AS/NZS 1174, are external forces acting on the structure, demanding careful consideration, especially for decks and balconies. Accurate calculation of these loads is paramount for determining safe spans using Hyspan tables and ensuring structural stability, adhering to Australian Standards.

Australia

csiro total wellbeing diet: complete recipe collection pdf

CSIRO Total Wellbeing Diet: Complete Recipe Collection ⎯ An Overview

This comprehensive collection, boasting over 400 recipes, empowers individuals to embrace a scientifically-backed, healthy eating plan for sustained weight management and wellbeing.

The diet’s popularity stems from its proven success, having aided over 500,000 Australians in achieving their health goals through a balanced nutritional approach.

What is the CSIRO Total Wellbeing Diet?

The CSIRO Total Wellbeing Diet is a scientifically formulated eating plan developed by Australia’s national science agency, CSIRO. It’s designed to facilitate weight loss, promote lasting healthy eating habits, and improve overall health. This isn’t a restrictive fad diet, but rather a sustainable approach rooted in nutritional science.

The diet has demonstrably inspired thousands of Australians, with over 500,000 having already benefited from its principles. Central to its success is a focus on high protein intake, low glycemic index (GI) carbohydrates, and abundant vegetables. The Complete Recipe Collection, containing over 400 recipes, serves as a practical tool to implement this dietary approach.

It’s a nutritionally balanced plan, aiming to keep you feeling fuller for longer, reducing cravings, and supporting long-term weight management. The diet emphasizes real food and practical meal solutions, making it accessible and achievable for everyday life.

The Core Principles of the Diet

The CSIRO Total Wellbeing Diet revolves around three fundamental principles: high protein intake, low GI carbohydrate consumption, and a significant emphasis on vegetables and fiber. These elements work synergistically to promote satiety, regulate blood sugar levels, and support healthy weight management.

High protein is crucial for preserving muscle mass during weight loss and increasing feelings of fullness. Low GI carbohydrates provide a sustained release of energy, preventing energy crashes and reducing cravings. The diet champions a diverse range of vegetables, providing essential nutrients and fiber for optimal health.

The Complete Recipe Collection embodies these principles, offering over 400 nutritionally balanced meals. It’s a plan designed for long-term sustainability, not a quick fix, fostering healthy eating patterns for lasting wellbeing.

The Role of the Recipe Collection

The CSIRO Total Wellbeing Diet: Complete Recipe Collection serves as the practical cornerstone for implementing the diet’s principles. It eliminates the guesswork of meal planning, providing a vast resource of over 400 recipes tailored to the program’s nutritional guidelines.

This collection isn’t merely a list of recipes; it’s a comprehensive guide to adopting a sustainable, healthy lifestyle. It ensures individuals always have access to delicious and appropriate meal options, regardless of the time of day or dietary preferences.

By offering such a substantial volume of recipes, the collection promotes variety and prevents dietary monotony, crucial for long-term adherence. It empowers users to confidently navigate the diet and achieve their wellbeing goals;

Understanding the Recipe Collection

This extensive resource features a diverse range of recipes, categorized by meal type, designed to support the CSIRO diet’s principles and long-term success.

Number of Recipes Included

The CSIRO Total Wellbeing Diet: Complete Recipe Collection is remarkably comprehensive, offering a substantial number of culinary options to support long-term adherence to the program. Multiple sources consistently highlight that this single volume contains over 400 CSIRO-developed recipes.

This extensive quantity ensures variety and prevents dietary monotony, a common challenge in weight loss journeys. Having such a large repertoire of recipes allows individuals to continually discover new meals and maintain engagement with the diet. The sheer volume of choices caters to diverse tastes and preferences, making it easier to find dishes that are both enjoyable and aligned with the diet’s nutritional guidelines.

Furthermore, the availability of over 400 recipes provides ample opportunity for meal planning and customization, empowering users to create a sustainable and satisfying eating pattern.

Recipe Categories and Meal Types

The CSIRO Total Wellbeing Diet: Complete Recipe Collection doesn’t limit itself to a single meal; it provides recipes spanning the entire day, ensuring comprehensive dietary support. The collection encompasses a wide array of recipes suitable for breakfast, lunch, and dinner, catering to all mealtime needs.

Beyond simply categorizing by meal, the recipes are designed to fit seamlessly into the diet’s overall framework. This means options are available for various dietary preferences and needs within the program’s guidelines. The breadth of the collection allows for flexible meal planning and prevents the feeling of restriction.

Users can expect to find diverse options within each category, promoting variety and making it easier to maintain a long-term, healthy eating pattern, with over 400 recipes available.

Nutritional Focus: High Protein, Low GI

The CSIRO Total Wellbeing Diet centers around a specific nutritional philosophy, and the Complete Recipe Collection is meticulously designed to reflect this. A core tenet of the diet is a focus on high-protein intake, crucial for satiety and preserving lean muscle mass during weight loss. Recipes prioritize lean protein sources to support these goals.

Equally important is the emphasis on low GI (Glycemic Index) carbohydrates. This approach helps regulate blood sugar levels, preventing energy crashes and reducing cravings. The collection features recipes utilizing low GI carbohydrate sources, promoting stable energy throughout the day.

This combination of high protein and low GI carbohydrates forms the foundation of the diet’s effectiveness, making the over 400 recipes a powerful tool for achieving sustainable weight management.

Key Dietary Components

The CSIRO diet prioritizes high protein, low GI carbohydrates, and abundant vegetables, forming a nutritional powerhouse for weight loss and lasting health improvements.

Importance of High Protein Intake

High protein intake is a cornerstone of the CSIRO Total Wellbeing Diet, playing a crucial role in achieving and maintaining a healthy weight. Protein promotes a feeling of fullness, or satiety, which naturally leads to reduced calorie consumption throughout the day.

This increased satiety helps individuals manage cravings and avoid overeating, supporting long-term dietary adherence. Furthermore, protein is essential for preserving lean muscle mass during weight loss, ensuring that the weight lost is primarily fat.

The diet’s recipes are strategically designed to incorporate substantial protein sources, contributing to metabolic health and overall wellbeing. By prioritizing protein, the CSIRO diet facilitates sustainable weight management and improved body composition.

The Role of Low GI Carbohydrates

Low Glycemic Index (GI) carbohydrates are fundamental to the CSIRO Total Wellbeing Diet’s effectiveness. These carbohydrates are digested and absorbed more slowly, resulting in a gradual rise in blood sugar levels. This sustained energy release prevents the energy spikes and crashes associated with high-GI foods.

By stabilizing blood sugar, low-GI carbohydrates help control appetite, reduce cravings, and improve insulin sensitivity. The diet emphasizes incorporating sources like whole grains, legumes, and non-starchy vegetables.

This approach supports consistent energy levels and promotes fat burning. The recipe collection prioritizes these carbohydrate choices, ensuring meals contribute to long-term weight management and overall metabolic health, fostering a balanced and sustainable eating pattern.

Emphasis on Vegetables and Fiber

The CSIRO Total Wellbeing Diet places significant emphasis on abundant vegetable consumption and a high fiber intake. Vegetables are nutrient-dense, low in calories, and contribute to feelings of fullness, aiding in weight management. Fiber, both soluble and insoluble, plays a crucial role in digestive health and satiety.

High-fiber foods slow digestion, further stabilizing blood sugar levels and promoting a prolonged sense of fullness. The recipe collection is designed to incorporate a wide variety of vegetables into every meal, ensuring adequate fiber intake.

This focus supports a healthy gut microbiome and overall wellbeing, making it a cornerstone of the diet’s long-term success and sustainable eating habits.

Recipe Highlights & Examples

The extensive collection features diverse, mouth-watering recipes for breakfast, lunch, and dinner, all adhering to the diet’s high-protein, low-GI principles for optimal results.

Breakfast Recipe Examples

The CSIRO Total Wellbeing Diet’s recipe collection shines with diverse breakfast options designed to kickstart your metabolism and keep you feeling full and energized throughout the morning. Expect to find recipes emphasizing protein and fiber, crucial for satiety and blood sugar control.

Examples include variations of scrambled eggs with added vegetables like spinach and mushrooms, providing a protein-packed start. Greek yogurt parfaits layered with berries and a sprinkle of nuts offer a delightful and nutritious alternative. Oatmeal, prepared with water or unsweetened almond milk and topped with seeds and a small amount of fruit, is another staple.

Furthermore, the collection includes recipes for protein smoothies, easily customizable with different fruits, vegetables, and protein powders. These breakfasts are not only quick and convenient but also align perfectly with the diet’s core principles, setting a positive tone for the day and supporting long-term weight management.

Lunch Recipe Examples

The CSIRO Total Wellbeing Diet recipe collection provides a wealth of satisfying lunch options, carefully crafted to maintain energy levels and prevent afternoon cravings. These recipes prioritize lean protein, non-starchy vegetables, and healthy fats, ensuring a balanced and nutritious midday meal.

Expect to discover recipes for chicken and salad combinations, utilizing grilled or baked chicken breast with a generous serving of mixed greens and a light vinaigrette. Salmon paired with steamed vegetables like broccoli and asparagus is another excellent choice, offering omega-3 fatty acids and essential nutrients. Lentil soups and salads provide a plant-based protein boost and are rich in fiber.

The collection also features recipes for wraps filled with lean meats, vegetables, and hummus, offering a convenient and portable lunch option. These lunches are designed to be both delicious and supportive of the diet’s weight management goals.

Dinner Recipe Examples

The CSIRO Total Wellbeing Diet’s dinner recipes focus on creating flavorful and satisfying meals that support long-term weight management. These recipes emphasize lean protein sources, abundant vegetables, and controlled portions of low GI carbohydrates, ensuring a balanced and nutritious evening meal.

You’ll find options like baked fish with roasted vegetables – think salmon, cod, or barramundi paired with broccoli, sweet potatoes, and Brussels sprouts. Chicken stir-fries utilizing lean chicken breast and a variety of colorful vegetables are also prominent, served with a small portion of brown rice or quinoa.

Lean beef or turkey mince-based dishes, such as shepherd’s pie with a cauliflower mash topping, provide hearty and satisfying options. The recipes are designed to be relatively quick and easy to prepare, fitting seamlessly into busy lifestyles.

Accessing the Recipe Collection

The complete recipe collection is readily available as a PDF, and can be purchased in physical form through retailers like Booktopia and Amazon Australia.

Furthermore, budget-friendly recipe options are accessible, promoting inclusivity and making healthy eating attainable for everyone.

Availability of the PDF Version

While a dedicated, officially released PDF version of the entire 400+ recipe collection isn’t broadly advertised as a standalone free download, access points exist. The Internet Archive offers a digitized version of the “CSIRO Total Wellbeing Diet Recipes on a Budget” which contains over 135 budget-friendly recipes, available for free download, borrowing, and streaming.

However, for the complete collection of over 400 recipes, purchasing the physical book remains the primary method of access. Following purchase, some users may choose to create their own PDF version through scanning or digital book conversion methods. It’s important to respect copyright restrictions when doing so.

Keep an eye on the CSIRO website and associated promotional materials, as limited-time PDF offers or bundled digital content may occasionally become available.

Purchasing Options (Booktopia, Amazon)

The CSIRO Total Wellbeing Diet: Complete Recipe Collection is readily available for purchase through several major retailers. Booktopia lists the book (ISBN 9780670078530) as a convenient option for Australian buyers, often with competitive pricing and shipping rates. Amazon.com.au also carries the book, providing another accessible avenue for purchase, alongside customer reviews and potential bundle deals.

Both platforms typically offer both physical copies and, depending on regional availability, may offer digital versions compatible with Kindle or other e-reader devices. Checking both retailers is advisable to compare prices, shipping costs, and estimated delivery times.


Occasionally, promotional discounts or sales events may be available, offering opportunities to acquire the recipe collection at a reduced price.

Free Resources and Budget-Friendly Options

While the Complete Recipe Collection is a paid resource, CSIRO offers avenues for accessing budget-friendly options and supplementary free materials. The Internet Archive provides access to “CSIRO Total Wellbeing Diet Recipes on a Budget,” featuring over 135 new, cost-conscious recipes from the program, available for free download, borrowing, or streaming.

This resource allows individuals to explore the diet’s principles without the full investment of the complete collection. Furthermore, exploring the CSIRO website and associated social media channels may reveal occasional free recipe samples or introductory materials.

Focusing on seasonal produce and utilizing affordable protein sources can also contribute to a budget-friendly implementation of the diet’s principles.

Diet Success & Long-Term Maintenance

The CSIRO diet has demonstrably helped over 500,000 Australians achieve weight loss and improved health, fostering sustainable habits for lasting wellbeing.

Weight Loss Results & Statistics

The CSIRO Total Wellbeing Diet has a strong track record of success, evidenced by its impact on over 500,000 Australians. This scientifically-proven program isn’t just about quick fixes; it’s designed for sustainable weight management and overall health improvement.

While specific individual results vary, the diet consistently demonstrates positive outcomes. Participants often report significant weight loss, improved energy levels, and a greater ability to maintain a healthy lifestyle long-term. The emphasis on high protein, low GI carbohydrates, and abundant vegetables contributes to increased satiety, reducing cravings and promoting mindful eating.

The availability of over 400 recipes within the Complete Recipe Collection further supports adherence, providing a diverse range of meal options to prevent dietary boredom and ensure nutritional balance. This comprehensive approach, combined with the diet’s scientific foundation, makes it a reliable choice for those seeking lasting weight loss and wellbeing.

Developing Sustainable Eating Habits

The CSIRO Total Wellbeing Diet isn’t merely a weight loss plan; it’s a framework for cultivating lasting, healthy eating habits. The Complete Recipe Collection, with its over 400 recipes, plays a crucial role in this process by offering variety and convenience.

The diet’s focus on high-protein, low GI foods promotes satiety, naturally reducing cravings and overeating. This, coupled with the emphasis on vegetables and fiber, encourages mindful eating and portion control. By providing a nutritionally balanced and satisfying approach, the diet minimizes feelings of deprivation often associated with restrictive diets.

The program’s long-term success hinges on its ability to integrate seamlessly into daily life. The extensive recipe options ensure individuals can consistently enjoy delicious, healthy meals, fostering a sustainable relationship with food and promoting ongoing wellbeing.

The Scientific Basis of the Diet

The CSIRO Total Wellbeing Diet is firmly rooted in scientific research, distinguishing it from many fad diets. Developed by leading CSIRO scientists, the program leverages decades of nutritional expertise to deliver effective and sustainable results. The core principles – high protein, low GI carbohydrates, and abundant vegetables – are based on proven physiological effects.

High protein intake promotes satiety and preserves lean muscle mass during weight loss. Low GI carbohydrates stabilize blood sugar levels, preventing energy crashes and reducing cravings. The emphasis on vegetables and fiber supports digestive health and provides essential nutrients.

The Complete Recipe Collection translates these scientific principles into practical, delicious meals, ensuring adherence and long-term success. This evidence-based approach has inspired over 500,000 Australians to improve their health.

PreviousNext

You Want To Have Your Favorite Car?

We have a big list of modern & classic cars in both used and new categories.