Manuals

ge electric range with air fryer manual

GE Electric Range with Air Fryer Manual: Article Plan (02/07/2026)

This manual details operation for GE Profile smart ranges‚ including air fryer features‚ safety‚ troubleshooting‚ warranty details‚ and recent GE company updates.

GE Profile ranges offer innovative cooking solutions‚ featuring integrated air fryer technology for healthier‚ crispier results without preheating‚ enhancing convenience and culinary possibilities.

Overview of GE Profile Smart Ranges

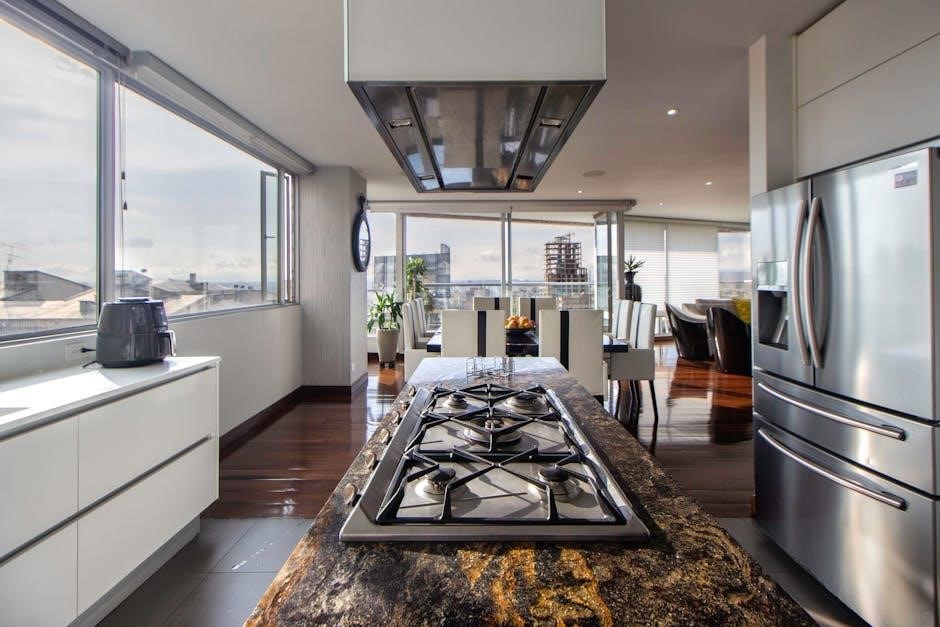
GE Profile Smart Ranges represent a pinnacle of modern kitchen technology‚ seamlessly blending professional-grade performance with intuitive smart features. These electric ranges boast advanced convection systems‚ ensuring even baking and roasting. The integration of Wi-Fi connectivity allows for remote control and monitoring via the SmartHQ app‚ offering unparalleled convenience.

Models like the PB965YPFS feature a double oven configuration‚ maximizing cooking capacity and flexibility. Precise temperature controls and pre-programmed cooking cycles simplify meal preparation. The sleek‚ contemporary design complements any kitchen aesthetic‚ while durable construction guarantees long-lasting reliability. Smart features include voice control compatibility and automatic software updates.

Benefits of Air Fryer Integration

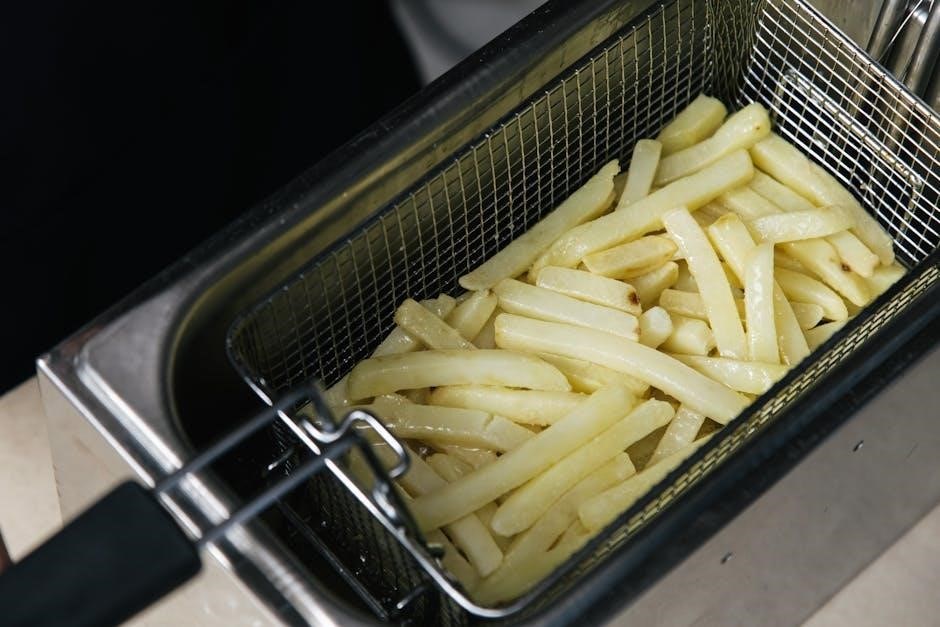
Integrating an air fryer directly into your GE electric range offers numerous advantages. It eliminates the need for a separate countertop appliance‚ saving valuable kitchen space. Air frying utilizes rapid air circulation to cook foods with little to no oil‚ promoting healthier eating habits. The “no preheat” function on many models speeds up cooking times‚ providing convenience for busy lifestyles.

Achieve crispy‚ golden-brown results for favorites like french fries‚ chicken wings‚ and vegetables. The air fry mode often operates at higher temperatures‚ ensuring optimal texture and flavor. It’s a versatile cooking method suitable for a wide range of dishes‚ simplifying meal preparation.

Target Audience for this Manual

This manual is designed for all owners of GE electric ranges equipped with an integrated air fryer function‚ specifically the GE Profile smart range series like the PB965YPFS. It caters to both experienced cooks and those new to air frying technology. The content is geared towards individuals seeking to understand and maximize the features of their appliance‚ ensuring safe and efficient operation.

We aim to assist users in troubleshooting common issues and accessing warranty information. This guide also benefits those interested in the recent GE company restructuring and accessing support resources.

Safety Precautions

Prioritize safety with proper electrical connections‚ ventilation‚ and adherence to general guidelines to prevent hazards while operating your GE electric range.

General Safety Guidelines

Always supervise the range when in operation‚ especially around children. Never leave packaging materials inside or around the appliance‚ as they pose a fire risk. Avoid using harsh abrasives or scouring pads on the cooktop or oven interior‚ potentially causing damage.

Ensure the range is properly installed and grounded by a qualified technician. Do not attempt self-repair; contact GE Appliances for service. Be cautious when opening the oven door‚ as hot steam may escape.

Never use the oven for storage. Regularly inspect the power cord for damage and replace if necessary. Keep flammable materials away from the range’s vicinity. Follow all warnings and instructions detailed within this manual for safe operation.

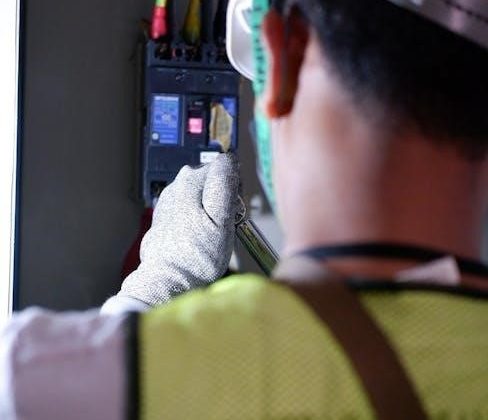
Electrical Safety Information

This range requires a dedicated 240V electrical circuit‚ properly grounded according to local codes. Never use extension cords or adapters‚ as they can overheat and cause a fire hazard. Ensure the voltage matches the appliance rating plate.

If the power cord is damaged‚ it must be replaced by a qualified technician to avoid electrical shock. Disconnect the range from the power supply before cleaning or performing maintenance.

Do not attempt to repair electrical components yourself. Contact GE Appliances authorized service for any electrical issues. Improper grounding can result in a risk of electric shock. Always follow established electrical safety practices when operating this appliance.

Proper Ventilation Requirements

Adequate ventilation is crucial when using your GE electric range‚ especially during air frying. Ensure the kitchen has a functioning range hood venting to the outside to remove smoke‚ steam‚ and odors.

Air frying can produce more odors than conventional baking‚ so proper ventilation is even more important. Maintain sufficient airflow around the range; do not block vents.

Poor ventilation can lead to moisture buildup‚ potentially damaging surrounding cabinetry and creating a slip hazard. Always operate the range in a well-ventilated area for optimal performance and safety.

Range Features and Components

This section details the control panel‚ oven rack positions‚ and burner types found on your GE electric range‚ enhancing your cooking experience.

Control Panel Overview

The GE Profile range control panel offers intuitive operation. It features a digital display showcasing cooking modes‚ temperatures‚ and timer settings. Touch controls allow easy selection of functions like Bake‚ Roast‚ Air Fry‚ and Convection. Dedicated buttons provide quick access to frequently used features.

The panel also includes options for self-cleaning‚ delay start‚ and Sabbath mode. Smart ranges connect to Wi-Fi for remote control via the SmartHQ app. Understanding each button and display element ensures optimal range utilization and a seamless cooking process. Explore the panel to unlock the full potential of your GE appliance.

Oven Rack Positions and Usage

Proper oven rack placement is crucial for optimal cooking results. GE ranges typically feature multiple rack positions‚ numbered for easy reference. For baking and roasting‚ the middle position is generally recommended for even heat distribution.

When using the Air Fry function‚ position the rack in the upper third of the oven for best results‚ ensuring proper airflow around the food. Lower rack positions are suitable for larger items or when broiling. Avoid overcrowding racks to allow for consistent cooking. Refer to recipes for specific rack position guidance.

Burner Types and Settings

GE electric ranges utilize various burner types‚ including standard coil burners and smooth-top radiant burners. Each burner offers adjustable heat settings‚ typically ranging from low to high‚ indicated by numerical levels or descriptive terms.

Understanding these settings is key to precise cooking. Lower settings are ideal for simmering‚ while higher settings are best for boiling or searing. Smooth-top burners provide even heat distribution‚ while coil burners may have hot spots. Always match the burner size to the cookware for efficiency and safety.

Using the Air Fryer Function

This section guides users through selecting Air Fry mode‚ optimal temperatures‚ cooking times‚ and provides a helpful guide for various food types.

Selecting Air Fry Mode

To initiate air frying‚ locate the “Air Fry” option on your GE range’s control panel. On double oven models‚ this function is typically available in the upper oven only. Simply press the “Air Fry” button to activate the mode.


Some models may require a brief preheating period‚ although many GE ranges boast a “No Preheat” Air Fry function for added convenience. The control panel will indicate when the oven has reached the appropriate temperature. Ensure the air fry basket or tray is correctly positioned within the oven cavity before adding food. Refer to your specific model’s display for detailed instructions and any unique prompts.

Recommended Air Fry Temperatures and Times

Optimal air frying relies on precise settings; Generally‚ 375°F to 400°F (190°C to 200°C) yields excellent results for most foods. French fries typically require 400°F for 15-20 minutes‚ flipping halfway through. Chicken wings benefit from 375°F for 20-25 minutes‚ ensuring crispiness.

Vegetables usually cook at 380°F for 10-15 minutes. Always consult specific recipes for tailored guidance. These are starting points; adjust times based on food quantity and desired level of crispness. Regularly check food during cooking to prevent burning‚ and utilize a meat thermometer for safe internal temperatures.

Air Fry Cooking Guide (Food Types)

For crispy results‚ consider these guidelines. Chicken pieces (wings‚ tenders) thrive at 380°F (190°C) for 20-25 minutes. Frozen french fries achieve golden perfection at 400°F (200°C) in 15-20 minutes. Vegetables like broccoli and Brussels sprouts require 375°F (190°C) for 10-12 minutes.

Fish fillets benefit from 390°F (200°C) for 8-10 minutes. Smaller items‚ like mozzarella sticks‚ cook quickly at 350°F (175°C) in 6-8 minutes. Remember to lightly oil food for enhanced crisping and avoid overcrowding the air fry basket for even cooking.

Oven Operation

This section covers baking‚ roasting‚ and convection modes‚ alongside detailed instructions for utilizing the self-cleaning cycle for optimal oven maintenance and performance.

Baking and Roasting Modes

Baking mode is ideal for evenly cooked cakes‚ cookies‚ and casseroles‚ utilizing consistent heat distribution throughout the oven cavity. For roasting meats and poultry‚ the dedicated roasting mode provides higher temperatures to achieve crispy exteriors and juicy interiors.

Adjust rack positions based on the recipe; lower racks are best for browning the bottom‚ while higher racks promote top browning. Preheating is crucial for accurate baking results‚ ensuring the oven reaches the set temperature before food is introduced. Remember to always use oven-safe cookware and follow recommended cooking times for optimal outcomes. Experiment with different settings to personalize your cooking experience!

Convection Cooking Explained

Convection cooking utilizes a fan to circulate hot air within the oven‚ resulting in faster and more even cooking compared to traditional baking. This consistent temperature eliminates hot spots‚ ideal for baking multiple items simultaneously or achieving uniform browning.

Reduce cooking temperatures by 25°F when using convection‚ and check for doneness slightly earlier than the recipe suggests. Convection is particularly effective for roasting meats‚ as it creates a crispy exterior while maintaining a moist interior. Ensure proper air circulation by avoiding overcrowding the oven racks for best results.

Self-Cleaning Cycle Instructions

The self-cleaning cycle utilizes high temperatures to burn off food residue within the oven. Before initiating‚ remove all racks‚ cookware‚ and any loose debris. Ensure the oven door can lock securely. Select the desired cleaning cycle length – light‚ medium‚ or heavy – based on soil level.

The door will automatically lock during the cycle and remain locked until the oven cools. Avoid opening the door manually. A burning odor is normal during operation; ensure adequate ventilation. Once complete‚ allow the oven to cool completely before wiping away any remaining ash.

Troubleshooting Common Issues

This section provides solutions for problems like air fryer malfunctions‚ control panel errors‚ and inaccurate oven temperatures‚ ensuring optimal range performance and safety.

Air Fryer Not Heating

If the air fryer isn’t heating‚ first verify the control panel is correctly set to ‘Air Fry’ mode and the desired temperature is selected. Ensure the oven door is fully closed‚ as a safety interlock prevents operation when ajar.

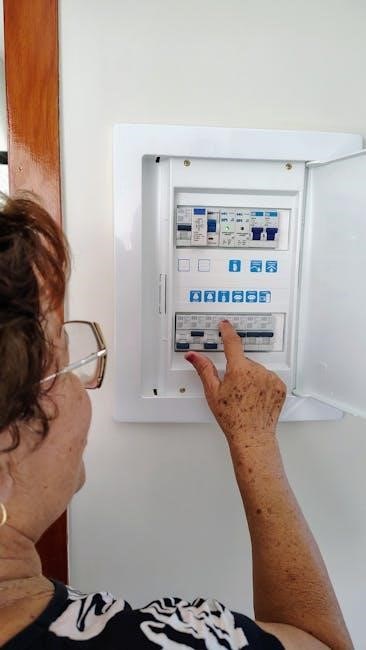
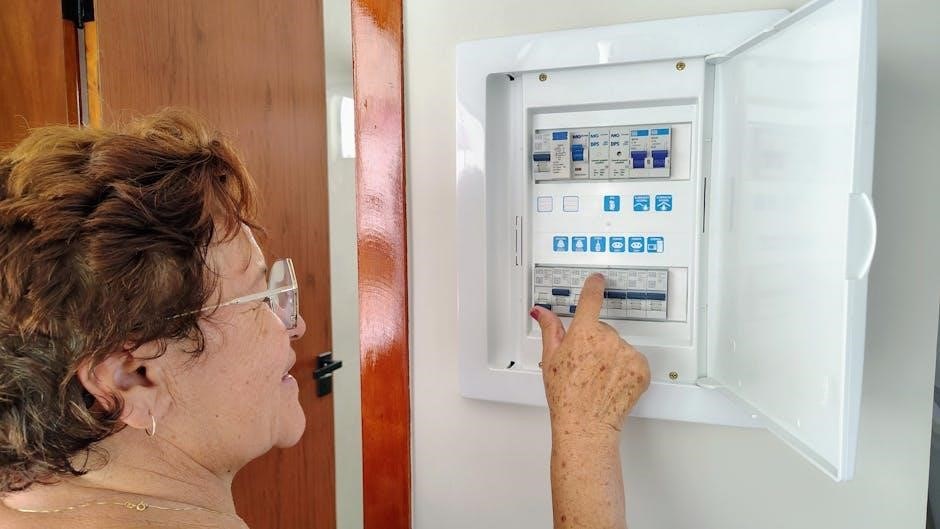
Check the household circuit breaker or fuse box to confirm adequate power supply to the range. A tripped breaker or blown fuse will halt heating. If these checks don’t resolve the issue‚ reset the oven by turning off the power for several minutes‚ then restoring it.

If the problem persists‚ contact GE Appliances support for further assistance‚ potentially indicating a heating element or control board malfunction requiring professional repair;

Control Panel Malfunctions

If the control panel becomes unresponsive‚ attempt a soft reset by briefly disconnecting the range’s power supply – either at the breaker or by unplugging it – for approximately one minute. This can often resolve minor software glitches.

Verify that the control lock feature isn’t activated‚ as this will disable button functionality. If the display is blank or showing error codes‚ consult the troubleshooting section of this manual for specific code definitions.

Persistent control panel issues may indicate a more serious electronic component failure‚ necessitating service from a qualified GE Appliances technician.

Oven Temperature Inaccuracies

If baked goods are consistently undercooked or overcooked‚ or if a separate oven thermometer displays a temperature differing significantly from the control panel setting‚ calibration may be required. Many GE ranges offer a temperature calibration feature accessible through the control panel settings.

Ensure the oven door is sealing correctly; a faulty seal allows heat to escape. Avoid frequently opening the oven door during baking‚ as this disrupts temperature stability.

If calibration doesn’t resolve the issue‚ contact GE Appliances for service‚ as a faulty temperature sensor may be present.

Warranty Information

GE Appliances provides a limited warranty for electric ovens‚ covering manufacturing defects in materials and workmanship for a specified period; details are included.

GE Appliances Electric Oven Limited Warranty Details

The GE Appliances Electric Oven Limited Warranty offers coverage for one year from the original purchase date‚ encompassing defects in materials and workmanship. This warranty extends to parts and labor costs incurred for repairs performed by authorized service providers.

Specifically‚ GE will repair or replace‚ at its discretion‚ any defective part. The warranty excludes damage resulting from misuse‚ accidents‚ improper installation‚ or alterations.

Furthermore‚ the warranty is void if the appliance is used commercially or subjected to conditions outside of normal household operation. Proof of purchase is required to validate any warranty claim.

For complete details and specific exclusions‚ please refer to the full warranty document included with your GE Profile range or available on the GE Appliances website.

How to Submit a Warranty Claim

To initiate a warranty claim for your GE Profile electric range‚ first gather your model number‚ serial number‚ and original purchase date. You can find these details on the appliance itself or your purchase receipt.

Next‚ visit the GE Appliances website and navigate to the support section. Locate the warranty claim submission form and complete all required fields accurately.

Alternatively‚ you can contact GE Appliances customer service directly via phone to file a claim. Be prepared to provide the necessary appliance information and a detailed description of the issue.

Retain a copy of your claim submission and any associated documentation for your records. GE will then contact you to arrange for service.

GE Company Updates & Resources

GE has undergone significant changes‚ spinning off into GE Aerospace‚ GE Vernova‚ and GE HealthCare; access investor relations and support on their individual websites.

GE Spin-off Information (Aerospace‚ Vernova‚ Healthcare)

General Electric has strategically transformed‚ resulting in three independent‚ publicly traded companies. GE Aerospace focuses on aviation‚ while GE Vernova concentrates on the energy sector‚ encompassing renewable and power technologies. GE HealthCare is dedicated to medical imaging and healthcare solutions.

These separations aim to unlock greater value by allowing each business to focus on its specific market and innovation. Customers may find updated support resources and information on the standalone websites for GE Aerospace (geaerospace.com)‚ GE Vernova (gevernova.com)‚ and GE HealthCare (gehealthcare.com). This restructuring doesn’t directly impact appliance warranties‚ but directs inquiries to the appropriate entity.

Accessing GE Investor Relations

For shareholders and potential investors‚ GE provides comprehensive financial information and investor services. Access the latest GE Annual Report‚ Quarterly Earnings reports‚ and SEC filings through the investor relations section of GE’s website. This includes details on company performance‚ stock information‚ and corporate governance.

Following the spin-offs‚ investor relations are now segmented. GE Aerospace (geaerospace.com)‚ GE Vernova (gevernova.com)‚ and GE HealthCare (gehealthcare.com) each maintain their dedicated investor relations portals. These sites offer specific financial data and updates relevant to each independent company‚ ensuring transparency and informed investment decisions.

Finding Support and FAQs on GE.com

GE’s website offers extensive support resources for appliance owners‚ including frequently asked questions (FAQs) addressing common issues with electric ranges and air fryer functionality. Users can find troubleshooting guides‚ user manuals‚ and how-to videos to assist with operation and maintenance.

Due to the recent company restructuring‚ support access is now directed to the appropriate company website. For GE Profile ranges‚ visit the GE Appliances website. For inquiries related to GE Aerospace‚ GE Vernova‚ or GE HealthCare‚ navigate to their respective websites (geaerospace.com‚ gevernova.com‚ gehealthcare.com) for specialized support.

Guide

money guide pro vs emoney

MoneyGuidePro vs. eMoney: A Comprehensive Comparison

MoneyGuidePro and eMoney are leading financial planning software solutions, each catering to different advisor preferences and firm structures.
Over 110,000 advisors utilize MoneyGuidePro, while eMoney boasts a popular client portal, attracting a growing user base seeking detailed financial analysis.

Overview of Financial Planning Software Landscape

The financial planning software market is currently dominated by a few key players, with MoneyGuidePro, eMoney, and increasingly, RightCapital, leading the charge. Historically, advisors have gravitated towards either goals-based planning, exemplified by MoneyGuidePro, or cash flow-based methodologies, favored by eMoney and RightCapital.

This divergence reflects differing philosophical approaches to financial advice. The landscape is evolving, with RightCapital gaining significant traction, adopted by approximately 78% of a network of advisors, while eMoney holds 16% and MoneyGuidePro a smaller 4%. This shift indicates a growing preference for cash flow projections. The competitive environment pushes vendors to innovate, enhancing features and user experiences to attract and retain advisors.

Market Share and Adoption Rates

Market share distribution reveals a dynamic shift in financial planning software adoption. As of recent data, MoneyGuidePro maintains a substantial user base exceeding 110,000 advisors and 1.5 million client portal users. However, eMoney is steadily gaining ground, attracting advisors with its robust analytical tools.

Notably, RightCapital has experienced significant growth, becoming the preferred choice for approximately 78% of advisors within a specific network. This leaves eMoney with around 16% and MoneyGuidePro with only 4%. These figures highlight a clear trend towards cash flow-based planning, as both eMoney and RightCapital prioritize this methodology, contrasting with MoneyGuidePro’s goals-based approach.

User Satisfaction Scores (2021-2026)

User satisfaction trends demonstrate evolving preferences among financial advisors. The Kitces Report, analyzing data from 2021 to 2025, reveals a notable shift in ratings. RightCapital experienced consistent growth, achieving an impressive 8.7 out of 10 in 2025, up from 8.6 in 2021.

Conversely, MoneyGuidePro’s satisfaction score declined from 8.0 in 2022 to 7.9 in 2025, marking the lowest rating among the three major players. While specific 2026 data is pending, this downward trend suggests advisors are increasingly seeking alternatives. eMoney’s satisfaction scores haven’t been explicitly detailed in the provided information, but the rising popularity of RightCapital indicates a competitive landscape.

MoneyGuidePro: Core Features and Functionality

MoneyGuidePro excels with its goals-based financial planning methodology, serving over 110,000 advisors and 1.5 million clients through its integrated portal.

Goals-Based Financial Planning Methodology

MoneyGuidePro’s core strength lies in its goals-based planning approach. This methodology centers around identifying and prioritizing a client’s life goals – retirement, education funding, major purchases – and then building a financial plan to achieve them. Unlike eMoney’s cash flow focus, MoneyGuidePro emphasizes the “why” behind the numbers, fostering deeper client engagement.

The software facilitates scenario planning, allowing advisors to illustrate the impact of various life events and market conditions on goal attainment. This approach is particularly appealing to firms seeking a holistic planning experience, and it has resonated with advisors who prefer a more intuitive, less data-intensive planning process. However, some advisors find this methodology less suited for highly complex financial situations.

Client Portal Capabilities & Usage

MoneyGuidePro boasts an integrated client portal utilized by 1.5 million clients, facilitating collaboration and transparency. Advisors can securely share financial plans, track progress towards goals, and communicate directly with clients. While functional, the portal’s features are often considered less extensive than eMoney’s offering.


eMoney’s client portal has proven immensely popular with advisors, offering a more robust and visually appealing experience. It allows for greater customization and provides clients with a comprehensive view of their financial life. This popularity has been a key differentiator for eMoney, particularly for firms prioritizing client engagement and digital accessibility.

Integration with Existing Systems

MoneyGuidePro’s strength lies in its ability to function effectively as a standalone technology. This characteristic has resonated with enterprise firms already possessing established client portals and CRM systems, avoiding integration complexities. Advisors appreciate the flexibility to maintain their existing workflows without significant disruption.

eMoney, while offering integration capabilities, often requires more extensive setup and configuration to connect with other financial planning tools. This can be a drawback for firms seeking a seamless, out-of-the-box solution. However, its robust API allows for customized integrations, catering to firms with specific technological needs and resources.

eMoney: Core Features and Functionality

eMoney excels with its cash flow-based planning and robust financial analysis tools, providing detailed input control and assumptions for a comprehensive client view.

Cash Flow-Based Financial Planning Methodology

eMoney’s core strength lies in its cash flow-based planning methodology, offering a granular view of a client’s financial life. This approach meticulously details income, expenses, assets, and liabilities, projecting future financial scenarios with precision. Unlike MoneyGuidePro’s goals-based system, eMoney prioritizes understanding the movement of money over simply achieving predefined objectives.

This detailed methodology allows advisors to stress-test plans against various economic conditions and life events. The software provides users with a clear view of all inputs and assumptions, offering greater control than alternatives like RightCapital. This depth of analysis is particularly valuable for clients with complex financial situations, enabling advisors to create highly customized and realistic financial plans.

Robust Financial Analysis Tools

eMoney distinguishes itself with exceptionally robust financial analysis tools, empowering advisors to conduct in-depth examinations of client finances. These tools facilitate comprehensive scenario planning, tax projections, and retirement income analysis, going beyond basic projections. The software’s capabilities allow for detailed modeling of complex financial strategies, including estate planning and insurance needs.

Compared to MoneyGuidePro, eMoney offers a greater degree of customization and control over assumptions, enabling advisors to tailor plans to individual client circumstances. This granular level of analysis is particularly beneficial when addressing intricate financial situations, providing a clear and actionable roadmap for achieving long-term financial security.

Client Portal Popularity and Features

eMoney’s client portal has gained significant traction and popularity among financial advisors, serving over 1.5 million clients. This portal facilitates secure document sharing, collaborative planning, and real-time progress tracking, enhancing client engagement and transparency. Advisors appreciate its ability to foster stronger client relationships through consistent communication and accessibility.

While MoneyGuidePro also offers an integrated portal, eMoney’s has proven more appealing to a broader range of advisors. MoneyGuidePro found success with enterprise firms already possessing client portals, but eMoney’s portal’s features and user experience have driven its widespread adoption, becoming a key differentiator in the competitive financial planning software landscape.

Detailed Comparison: MoneyGuidePro vs. eMoney

MoneyGuidePro utilizes a goals-based approach, while eMoney focuses on cash flow analysis. eMoney offers detailed input control, but has a complex interface and higher cost.

User Interface Complexity

MoneyGuidePro generally presents a more streamlined and intuitive user interface, favored by advisors seeking efficiency and ease of navigation. However, this simplicity can sometimes limit the depth of customization available. Conversely, eMoney is recognized for its robust functionality, but this comes at the cost of increased complexity.

The detailed input and assumption control within eMoney necessitate a steeper learning curve for advisors. While offering granular control, the interface can feel overwhelming for those accustomed to simpler systems. This complexity is a trade-off; advisors gain powerful analytical capabilities, but require more time and training to fully utilize the software’s potential. Ultimately, the preferred interface depends on the advisor’s technical proficiency and desired level of control.

Pricing Structures and Cost Analysis

eMoney typically carries a higher price tag compared to MoneyGuidePro, reflecting its more comprehensive feature set and detailed analytical tools. The increased cost is often justified for firms requiring in-depth financial modeling and extensive customization options. MoneyGuidePro, positioned as a more accessible solution, offers competitive pricing, making it attractive to smaller firms or those prioritizing simplicity.

However, a direct cost comparison is challenging due to varying subscription models and add-on features. While eMoney’s robust functionality justifies the investment for some, others may find MoneyGuidePro’s streamlined approach a more cost-effective solution, particularly if complex analysis isn’t a primary need.

Cash Flow vs. Goals-Based Planning: Which is Better?

The core difference lies in methodology: eMoney and increasingly RightCapital utilize cash flow-based planning, projecting future finances based on income and expenses. This approach provides a granular view of financial sustainability. MoneyGuidePro champions goals-based planning, focusing on defining and achieving specific life objectives, like retirement or education funding.

Neither is inherently “better”; the ideal choice depends on advisor and client preference. Cash flow excels at illustrating long-term viability, while goals-based planning offers motivational clarity. Recent trends show a preference for cash flow tools, with 78% of network members adopting RightCapital, versus 16% using eMoney and only 4% MoneyGuide.

Strengths of MoneyGuidePro

MoneyGuidePro excels as a standalone technology, finding success with enterprise firms already possessing established client portals and preferring goals-based planning.

Suitability for Enterprise Firms

MoneyGuidePro’s strength lies in its ability to integrate seamlessly within larger, established financial institutions – enterprise firms – that often already have robust, proprietary client portals in place. Unlike eMoney, which offers a highly popular and comprehensive client portal of its own, MoneyGuidePro functions exceptionally well as a standalone technology.

This characteristic makes it an attractive option for firms hesitant to replace existing systems or desiring to maintain complete control over their client-facing interfaces. The focus on being a standalone solution allows enterprise firms to leverage MoneyGuidePro’s planning capabilities without disrupting their current technological infrastructure, streamlining workflows and minimizing implementation challenges. This flexibility is a key differentiator.

Focus on Standalone Technology

MoneyGuidePro distinguishes itself by prioritizing functionality as a standalone financial planning tool, rather than heavily emphasizing an integrated client portal experience. This strategic approach has proven particularly successful with enterprise firms already possessing established client portals and comprehensive technology stacks.

According to Tony Leal, co-CEO and chief technology officer of MoneyGuidePro, this focus has been a key driver of their success. The software’s design allows firms to seamlessly incorporate its planning capabilities into their existing workflows without the need to overhaul their current systems. This contrasts with eMoney, where the client portal is a central feature, potentially requiring more significant integration efforts.

Strengths of eMoney

eMoney excels in providing detailed input and assumption control, alongside robust financial analysis tools, offering a clear view of all financial data for advisors.

Detailed Input and Assumption Control

eMoney distinguishes itself through exceptionally detailed input capabilities and granular control over underlying assumptions within financial plans. Unlike some competitors, eMoney allows advisors to meticulously customize every facet of a client’s financial picture, ensuring accuracy and reflecting unique circumstances.

This level of control extends to cash flow projections, investment returns, and various economic scenarios. Advisors can thoroughly vet and adjust assumptions, fostering confidence in the plan’s reliability. The software’s robust tools facilitate complex financial analysis, providing a clearer, more comprehensive view than alternatives like RightCapital, which offers less granular control.

However, this depth of functionality comes with a steeper learning curve and potentially higher implementation costs, demanding a significant time investment from advisors to fully leverage its capabilities.

Complex Financial Analysis Capabilities

eMoney excels in providing advisors with robust tools for conducting intricate financial analyses, surpassing the capabilities of many competing platforms. Its detailed cash flow modeling allows for sophisticated scenario planning, stress-testing portfolios against market volatility, and evaluating the impact of various financial decisions.

The software’s ability to fully flesh out financial details, offering a clear view of all inputs and assumptions, empowers advisors to deliver highly personalized and insightful recommendations. This contrasts with simpler planning approaches, enabling a deeper understanding of a client’s financial landscape.

eMoney’s analytical power is particularly valuable for high-net-worth individuals and families with complex financial situations, demanding a comprehensive and nuanced planning process.

Recent Trends and Developments (2024-2026)

RightCapital is gaining traction, with 78% network adoption, challenging MoneyGuidePro and eMoney. The 2025 Kitces Report shows declining MoneyGuidePro satisfaction scores.

The Rise of RightCapital as an Alternative

RightCapital has emerged as a significant contender in the financial planning software arena, rapidly gaining popularity among advisors. Current data indicates a substantial 78% adoption rate within a specific network, surpassing both MoneyGuidePro (approximately 4%) and eMoney (around 16%). This shift suggests a growing preference for cash flow-based planning methodologies, which RightCapital and eMoney primarily utilize, contrasting with MoneyGuidePro’s goals-based approach.

The increasing appeal of RightCapital can be attributed to its comprehensive features and competitive pricing. Advisors are actively exploring alternatives, driven by factors like user experience and the evolving needs of their clientele. This trend highlights a dynamic market where innovation and adaptability are crucial for sustained success.

Impact of Kitces Report Findings

The Kitces Report, released in March 2025, provides valuable insights into financial planner satisfaction with leading software platforms. Notably, RightCapital’s overall user satisfaction score experienced positive growth, increasing from 8;6 in 2021 to 8.7 out of 10. Conversely, MoneyGuidePro’s rating demonstrated a decline, falling from 8.0 in 2022 to 7.9 out of 10 – the lowest among the major players.

These findings suggest a potential shift in advisor preferences, with RightCapital gaining ground in terms of user experience and perceived value. The report underscores the importance of continuous improvement and adaptation for software providers like eMoney and MoneyGuidePro to maintain advisor loyalty and market share.

Choosing the Right Software for Your Practice

Financial advisors should consider firm size, planning methodology (cash flow vs. goals-based), and client portal needs when selecting between MoneyGuidePro and eMoney.

Considerations for Financial Advisors

Financial advisors face a crucial decision when choosing between MoneyGuidePro and eMoney. Enterprise firms often favor MoneyGuidePro’s standalone technology, integrating it with existing client portals. However, eMoney’s integrated portal is immensely popular, offering a comprehensive client experience.

The preferred planning methodology is also key. MoneyGuidePro utilizes a goals-based approach, while eMoney and RightCapital employ cash flow-based planning. Recent trends show a growing preference for cash flow tools, with 78% of network members adopting RightCapital, 16% using eMoney, and only 4% choosing MoneyGuide.

Finally, consider user satisfaction. While MoneyGuidePro historically held a strong position, RightCapital’s satisfaction score has risen to 8.7/10, surpassing MoneyGuidePro’s 7.9/10 in 2025, according to the Kitces Report.

United Kingdom

south park the stick of truth trophy guide

Embark on a hilarious quest! This guide details the 51 trophies (or 50 on some platforms) within South Park: The Stick of Truth, offering a comprehensive roadmap for completion.

Expect a medium difficulty experience, potentially taking 15-25 hours, with 42 bronze, 5 silver, 3 gold, and a coveted platinum trophy awaiting dedicated players.

Overview of Trophies

A grand collection awaits! South Park: The Stick of Truth boasts a substantial trophy list, comprised of 39 regular achievements and trophies, alongside 11 cleverly hidden ones, culminating in the prestigious platinum trophy. The total count reaches 51 trophies on PlayStation consoles (PS3/PS4) and 50 on other platforms.

Players can anticipate a moderate challenge, generally rated around a 4/10 in difficulty; Completionists should allocate approximately 15 to 25 hours to unlock all achievements. Careful planning and utilizing guides are highly recommended, especially considering the presence of missable trophies and collectibles scattered throughout South Park. Prepare for a rewarding, yet potentially time-consuming, journey!

Difficulty and Completion Time

Prepare for a moderately challenging adventure! South Park: The Stick of Truth’s trophy list is generally considered to be of medium difficulty, scoring around a 4 out of 10 on most difficulty scales. This suggests a balanced experience, offering challenges without being overly frustrating for most players.

Expect to dedicate between 15 and 25 hours to achieve 100% trophy completion. This timeframe accounts for thorough exploration, combat encounters, and potentially multiple playthroughs for specific achievements. Strategic planning and utilizing available guides will significantly streamline the process, especially regarding missable content and the “For the Hoarder” trophy.

Bronze Trophies ― Early Game

Begin your journey! These initial bronze trophies are easily attainable during the first few hours, focusing on story progression and familiarizing yourself with South Park.

New Kid on the Block

Achieving this trophy is straightforward! It’s awarded immediately upon completing the introductory prologue of the game. This initial segment serves as a tutorial, guiding you through the basic mechanics of combat and exploration within the wonderfully crude world of South Park.

You’ll create your character, a newcomer to town, and quickly become embroiled in the escalating conflict between the humans and the elves. Don’t worry about complex strategies here; simply follow the on-screen prompts and enjoy the humorous dialogue. This trophy is a guaranteed early acquisition, setting the stage for your epic adventure to recover the Stick of Truth!

It’s essentially a “welcome to the game” achievement, requiring minimal effort and serving as a delightful introduction to the quirky charm of South Park: The Stick of Truth.

Welcome to South Park

This trophy unlocks after a brief introduction to the town! Following the prologue, you’ll officially be welcomed to South Park after a cutscene with Stan, Kyle, Cartman, and Kenny. This signifies your character’s integration into the core narrative and the beginning of your quest.

It’s a story-driven achievement, meaning it will unlock automatically as you progress through the main storyline. No specific actions are required beyond simply playing the game and experiencing the initial interactions with the iconic South Park residents.

Consider it a marker of your journey’s commencement, a signal that you’re now fully immersed in the chaotic and hilarious world of the show. It’s another easily obtainable trophy early in the game, building momentum towards platinum completion!

The Spark of Rebellion

Initiate the conflict! This trophy is awarded upon completing the quest “The Spark of Rebellion,” a pivotal moment in the game’s narrative. You’ll be tasked with forming an alliance and beginning your fight against the authority figures of South Park.

The quest involves several steps, including gathering allies and preparing for the escalating conflict. It’s a straightforward, story-driven achievement that unlocks naturally as you progress through the main storyline. Expect some light combat and dialogue choices during this quest.

Successfully completing this quest signifies your commitment to the rebellion and sets the stage for the larger battles to come. It’s another easily attainable trophy, contributing to your overall progress towards 100% completion.

Super Best Friends Forever

Assemble the ultimate team! The “Super Best Friends Forever” trophy is unlocked by recruiting all four of your potential buddies – Stan, Kyle, Kenny, and Cartman – to join your party. This is a crucial step in strengthening your combat abilities and experiencing the full scope of the game’s narrative.

Each buddy offers unique skills and abilities, making them invaluable assets in battle. Recruiting them involves completing their individual side quests and building a strong relationship with each character.

Ensure you prioritize these quests to unlock this trophy efficiently. It’s a relatively simple achievement, but requires exploration and interaction with the core cast of South Park.

You’ve Been Jeffed!

Prepare for a bizarre encounter! The “You’ve Been Jeffed!” trophy is awarded for completing the incredibly strange and memorable questline involving the character of Jeff. This quest is known for its surreal humor and unexpected twists, perfectly capturing the essence of South Park’s comedic style.

To unlock this trophy, you must fully engage with Jeff’s storyline, which involves a series of increasingly absurd tasks and interactions. Be prepared for a truly unique and unforgettable gaming experience!

This trophy is unmissable as it’s part of the main story progression, ensuring you won’t overlook this peculiar chapter in your adventure.

Parkeologist

Become a master explorer! The “Parkeologist” trophy challenges you to uncover all the hidden garages scattered throughout the town of South Park. These garages contain valuable items, intriguing secrets, and contribute to the game’s immersive world.

Exploration is key; diligently search every corner of the map, paying close attention to seemingly inaccessible areas. Some garages are cleverly concealed, requiring a keen eye and a bit of investigation to locate.

This trophy is considered missable, so prioritize thorough exploration to ensure you don’t leave any garage undiscovered. Completing this task unlocks a rewarding sense of accomplishment!

Garage Hunter

Unearth South Park’s secrets! The “Garage Hunter” trophy is intrinsically linked to the “Parkeologist” achievement, demanding players locate every single garage hidden within the game’s expansive world. These aren’t just static locations; they’re pockets of South Park’s quirky charm.

Successful completion requires meticulous exploration, venturing down every alleyway and scrutinizing every neighborhood. Don’t overlook seemingly dead ends or areas that appear off-limits – a garage might be lurking nearby!

Remember, this is a missable trophy, so diligent searching is crucial. Finding all garages unlocks a satisfying reward and contributes to 100% game completion.

Bronze Trophies ⎼ Mid-Game Progression

Progress deepens the adventure! These bronze trophies mark significant story beats, requiring players to engage with key characters and pivotal moments in South Park.

Truth to Power

A fragrant achievement awaits! This trophy demands a rather…unconventional form of protest. You must strategically deploy your potent gaseous abilities – farting – upon four prominent figures within South Park’s chaotic landscape.

Specifically, the targets are the exasperated Mayor, the religiously zealous Father Maxi, the perpetually stressed Principal Vic, and the surprisingly vulnerable Prime Minister. Successfully “blasting” each of these individuals with your unique superpower will unlock this amusing bronze trophy.

Remember to equip appropriate abilities and ensure you have the necessary “fuel” for these aromatic assaults. It’s a core part of the game’s humor and a memorable step towards completion!

Respect My Authoritah!

Channel your inner Cartman! This bronze trophy is earned during a pivotal moment in the storyline, directly involving the infamous Eric Cartman and his elaborate schemes. You’ll need to successfully navigate a specific scenario where Cartman is asserting his dominance and demanding obedience.

The achievement hinges on completing a series of actions that demonstrate your willingness to follow Cartman’s often-absurd orders. Expect a healthy dose of manipulation and potentially questionable morality as you play along with his plans.

Successfully fulfilling his demands will earn you this trophy, solidifying your temporary allegiance to the most ruthless fourth-grader in South Park.

Canadian Intervention

Oh, Canada! This bronze trophy is awarded during a particularly memorable and hilarious sequence involving a Canadian intervention in the escalating conflict. Prepare for a satirical take on international relations and the stereotypes surrounding our neighbors to the north.

To unlock this achievement, you must progress through the story until the Canadian forces arrive in South Park. The trophy is earned by completing the objectives presented during this intervention, which will likely involve interacting with Canadian characters and participating in a unique battle scenario.

Embrace the absurdity and enjoy the ride – Canada is here to help (or maybe not)!

The Grand Wizard

All hail the Grand Wizard! This bronze trophy is unlocked as you progress through the main storyline, specifically during your encounters with the mysterious and powerful Grand Wizard. Expect a bizarre and comical confrontation as you unravel the secrets behind his influence in South Park.

To obtain this achievement, you must advance the narrative until you reach the point where you directly challenge the Grand Wizard. The trophy will automatically unlock upon completing the associated questline and overcoming the challenges he presents.

Prepare for a truly unique and unforgettable battle – the fate of South Park rests in your hands!

A Little Respect

Show some respect! This bronze trophy is awarded for completing a specific questline involving the infamous Officer Barbrady. You’ll need to navigate a humorous situation and ultimately earn his begrudging respect, a feat not easily achieved in the town of South Park.

The achievement unlocks after successfully completing the quest where you assist Officer Barbrady, likely involving a comical investigation or resolving a peculiar incident. Be prepared for absurd dialogue and a uniquely South Park-style interaction with the law enforcement official.

Remember, a little respect goes a long way, even in this chaotic world!

Stand By Me

Buddy up for success! This bronze trophy is earned by having at least one companion accompany you during every single one of your battles throughout the game. Maintaining a loyal friend by your side is crucial for unlocking this achievement.

Strategic buddy selection is key, as different companions offer unique abilities and advantages in combat. Don’t venture into battle alone; always ensure you have a friend backing you up. This encourages utilizing the game’s buddy system effectively.

Remember, teamwork makes the dream work – and unlocks a trophy!

Fast Times at Ridgeland High

Relive a classic parody! This bronze trophy is awarded for successfully completing the entire Ridgeland High sequence. This section is a hilarious homage to the iconic 80s film, Fast Times at Ridgeland High, and features unique gameplay elements.

Navigating the social dynamics and challenges within the high school setting is essential. Expect quirky characters, amusing dialogue, and a memorable storyline. Pay attention to the objectives and engage with the environment to progress.

Successfully finishing this portion of the game unlocks this trophy, celebrating your triumph over high school hijinks!

Silver Trophies ― Challenging Achievements

Prepare for tougher trials! These five silver trophies demand skill and dedication, requiring strategic combat and thorough exploration to unlock their rewarding challenges.

For the Hoarder

A test of restraint! This trophy presents a unique challenge: complete the entire game without selling a single item to any vendor. It demands meticulous inventory management and careful consideration of what you carry.

Players must resist the temptation to offload unwanted gear for quick cash, as even one sale will invalidate the achievement. Prioritize storage upgrades and strategically utilize companions to maximize carrying capacity.

Planning is crucial; avoid picking up unnecessary items and focus on essential equipment for battles and quests. Remember, For the Hoarder is a missable trophy requiring unwavering dedication throughout your playthrough!

Master Tactician

Strategic combat prowess is key! To unlock this Silver trophy, you must successfully execute 15 perfectly timed button prompts during combat encounters. These prompts appear during special attacks and defensive maneuvers.

Timing is absolutely critical; hitting the button at the precise moment maximizes damage output and effectiveness. Pay close attention to the on-screen cues and practice your reflexes to consistently land these prompts.

Don’t rush! Focus on accuracy over speed. Master Tactician encourages players to engage with the combat system and master its intricacies for a rewarding achievement.

Stick Savior

A triumphant victory awaits! This Silver trophy is awarded upon defeating Princess Kenny and successfully recovering the legendary Stick of Truth. This marks a pivotal moment in the game’s narrative, signifying your progress as the New Kid.

Prepare for a challenging boss battle requiring strategic use of your abilities and companions. It’s recommended to begin the fight with Stan as your initial buddy, leveraging his strengths to gain an early advantage.

Stick Savior is a straightforward, yet satisfying achievement, representing a significant milestone in your quest to save South Park!

The Fellowship

Gather your allies! This Silver trophy is unlocked by having all four of your potential buddies – Stan, Kyle, Kenny, and Cartman – in your active party simultaneously. It requires careful party management throughout the game.

You won’t achieve this naturally through story progression; strategic planning and potentially some backtracking are necessary. Ensure you’ve completed the respective quests to unlock each character as a companion before attempting this.

The Fellowship represents the power of friendship and teamwork, essential themes within South Park: The Stick of Truth, and a rewarding achievement for dedicated players!

Ultimate Warrior

Become a combat master! This Silver trophy is awarded for reaching level 12 with all four of your companions: Stan, Kyle, Kenny, and Cartman. It demands significant time investment and strategic combat engagement throughout the entire game.

Focus on completing side quests and engaging in optional battles to efficiently level up your party members. Utilizing effective combat strategies and exploiting enemy weaknesses will accelerate the process.


Ultimate Warrior signifies complete mastery of the game’s combat system and a testament to your dedication. Prepare for a lengthy grind, but the reward is well worth the effort!

Gold Trophies ⎼ End-Game Challenges

Prepare for the final trials! These rare Gold trophies demand exceptional skill and dedication, testing your mastery of South Park: The Stick of Truth’s core mechanics.

The Stick of Truth

A pivotal moment arrives! This Gold trophy, “The Stick of Truth,” is awarded upon successfully completing the game’s main storyline. It signifies your triumph over the ultimate antagonist and the recovery of the legendary Stick itself.

The culmination of your journey, this achievement requires defeating Princess Kenny in a climactic battle. Strategic buddy selection is crucial; consider initiating combat with Stan as your first companion for optimal results.

Successfully navigating this final encounter and witnessing the game’s ending will unlock this prestigious Gold trophy, solidifying your status as a true hero of South Park!

Hero of South Park

Celebrate your epic victory! The “Hero of South Park” Gold trophy is unlocked immediately after achieving “The Stick of Truth.” It represents the complete fulfillment of your destiny as the New Kid and savior of the town.

This trophy isn’t tied to any specific action beyond finishing the main questline. It’s a testament to your dedication, strategic combat skills, and ability to navigate the bizarre world of South Park.

Enjoy the accolades! This Gold trophy signifies the end of your adventure, but also your legendary status amongst the residents of this quirky Colorado town.

Butters’ Bottom Bitch

A truly…unique achievement! The “Butters’ Bottom Bitch” Gold trophy is awarded for completing a very specific, and somewhat disturbing, side quest involving Butters Stotch. Prepare for an unforgettable, and potentially unsettling, experience.

This quest is easily missable, so ensure you thoroughly explore South Park and engage with all available side content. It requires a certain level of dedication to the…less savory aspects of the game’s humor.

Successfully completing this quest unlocks the Gold trophy, solidifying your place as a true connoisseur of South Park’s outrageous and often inappropriate storylines.

Platinum Trophy

Congratulations, true champion! The “Platinum Stick” trophy signifies 100% completion, demanding dedication to unlock all 51 trophies within this hilarious RPG adventure.

Platinum Stick

Achieving Platinum Glory: The “Platinum Stick” trophy represents the ultimate accomplishment in South Park: The Stick of Truth, a testament to your unwavering dedication and mastery of the game’s quirky challenges. It’s awarded upon unlocking every other trophy, demanding a complete playthrough and thorough exploration of South Park.

This isn’t merely about finishing the main story; you’ll need to diligently collect items, complete side quests, and master the combat system. Be prepared for a journey of roughly 15-25 hours, navigating the town and battling foes alongside Stan, Kyle, Cartman, and Kenny.

Successfully obtaining this platinum trophy proves you are a true hero of South Park, worthy of wielding the Stick of Truth itself!

Hidden Trophies

Uncover Secret Achievements! South Park: The Stick of Truth features 11 elusive hidden trophies, adding extra challenge and rewarding curious players with unique accolades.

Achievement Unlocked: Seriously?

A peculiar challenge awaits! This hidden trophy is awarded for simply using the “Seriously?” dialogue option during a conversation with Butters. It’s a surprisingly easy achievement to miss, given its reliance on a specific, fleeting dialogue choice.

Players must actively seek out opportunities to engage with Butters and select this particular response. The timing is crucial, as the option isn’t always available. It’s recommended to exhaust all dialogue options with Butters throughout the game to ensure you don’t overlook this simple, yet easily missed, trophy. Don’t underestimate the power of a well-timed “Seriously?”.

Achievement Unlocked: No More Mr. Nice Guy

Embrace your darker side! This hidden trophy is unlocked by choosing the “Asshole” dialogue option a total of 20 times throughout the game. It encourages players to lean into the more abrasive and cynical side of their created character.

While seemingly straightforward, it requires conscious effort to consistently select the rude response. It’s easy to forget and fall into more polite interactions. Keep a mental tally, or even a physical one, to track your progress. Don’t hesitate to be deliberately unpleasant – the platinum trophy demands it! A little rudeness goes a long way.

Achievement Unlocked: The Coon and Friends

Join the superhero squad! This hidden achievement is earned by completing all of the Coon and Friends side quests. These missions involve assisting Cartman, Butters, and Token in their crime-fighting endeavors throughout South Park.

Be diligent in accepting and finishing each quest as it becomes available, as some may be missable if you progress too far in the main storyline. These side quests offer a humorous diversion and provide valuable experience. Remember to fully explore the areas associated with Coon and Friends to ensure no tasks are overlooked. Prepare for superheroic silliness!

Missable Trophies & Collectibles

Careful exploration is key! Garage exploration is vital, and avoid selling items for “For the Hoarder” to ensure 100% completion and trophy success.

Importance of Garage Exploration

Garages are crucial for completion! Thoroughly exploring every garage scattered throughout South Park is absolutely essential for achieving 100% game completion and unlocking the “Parkeologist” trophy. These hidden areas contain valuable collectibles, items, and sometimes trigger important story events that can be easily missed if overlooked.

Don’t rush through these areas; meticulously search each garage, checking corners and interacting with objects. Missing even a single garage can prevent trophy progression. Remember to revisit areas as new abilities are unlocked, potentially revealing previously inaccessible garages. Prioritize garage hunting alongside main story objectives to streamline the process and avoid backtracking later in the game.

Avoiding Item Sales for “For the Hoarder”

Hoarding is key to victory! The “For the Hoarder” trophy demands unwavering dedication – you must complete the entire game without selling a single item to any vendor. This requires diligent inventory management and a strategic approach to acquiring resources. Resist the temptation to clear space by selling unwanted gear, as this will immediately void the trophy.

Utilize storage options, like your inventory and companion inventories, to maximize carrying capacity. Focus on obtaining items through quest rewards and exploration rather than relying on purchasing them. Careful planning and resourcefulness are paramount to successfully earning this challenging, yet rewarding, achievement.

Manuals

ge ptac manual

GE PTAC Manual: A Comprehensive Guide

This comprehensive guide details GE PTAC units, encompassing installation, operation, troubleshooting, and service—including manuals for GE Corometrics 170 and Amana PTAC catalogs.

GE PTAC (Packaged Terminal Air Conditioner) units represent a robust and versatile heating and cooling solution, widely utilized in hospitality, healthcare, and multi-family residential settings. These self-contained systems offer both cooling and heating capabilities within a single unit, simplifying installation and maintenance. Understanding the core functionalities and components of GE PTACs is crucial for effective operation and troubleshooting.

This introduction will lay the groundwork for a deeper dive into GE PTAC technology, covering essential aspects like model identification – locating the mini manual and serial number – and the fundamental operational modes. We’ll explore the benefits of GE Zoneline series, referencing available resources like owner’s manuals and technical service documentation (AZ45E07DA series). Proper understanding ensures optimal performance and longevity of these units;

Understanding PTAC Technology

PTAC technology centers around a self-contained system integrating all heating and cooling components into a single unit, installed through a wall sleeve. Unlike central HVAC systems, PTACs offer zoned climate control, allowing independent temperature regulation for each room. Core components include a compressor, evaporator coil, condenser coil, expansion valve, and a reversing valve for heat pump operation.

GE PTAC units, particularly the Zoneline series, leverage reverse cycle heat pump technology for efficient heating. This process reverses the refrigeration cycle, extracting heat from the outside air even in cooler temperatures. Error codes, like F1 indicating room temperature sensor issues, provide diagnostic information. Understanding these fundamentals is vital for effective troubleshooting and maintenance, referencing resources like the AZ45E07DA technical service manual.

GE Zoneline Series Overview

GE’s Zoneline series, including Generation III (2800 & 3800), provides reliable, efficient climate control solutions, detailed in available service manuals and catalogs.

Zoneline Generation III Models (2800 & 3800 Series)

The GE Zoneline Generation III, encompassing the 2800 and 3800 series, represents a significant advancement in packaged terminal air conditioning technology. These models are widely recognized for their robust performance and enhanced features, detailed within dedicated service manuals. Accessing the correct documentation, like the GE Zoneline Generation III PTAC Air Conditioner Service Manual, is crucial for effective maintenance and repair.

These units offer improved energy efficiency and quieter operation compared to previous generations. Troubleshooting guides within the manuals specifically address common issues, including compressor diagnostics and error code interpretations – for example, understanding an F1 error related to the room temperature sensor. Furthermore, the manuals provide detailed instructions for converting operation between PTAC and PTHP modes, often requiring a specific service part (PN WP76X21320). Proper understanding of these models relies heavily on utilizing the available technical resources.

Key Features and Benefits of GE PTACs

GE PTAC units deliver numerous benefits, prominently featuring reliable cooling and heating capabilities for individual room control. A key advantage lies in their adaptability, functioning effectively as both Packaged Terminal Air Conditioners (PTAC) and Packaged Terminal Heat Pumps (PTHP) with a simple conversion process detailed in service documentation.

These units boast user-friendly controls, often with a mini-manual conveniently located on the unit itself, aiding in quick operation and troubleshooting. The robust design ensures longevity, while features like reverse cycle heat pump operation enhance energy efficiency. Access to comprehensive manuals, including those for the AZ45E07DA series, is vital for maximizing performance and addressing potential issues; Furthermore, readily available service parts, like PN WP76X21320, simplify maintenance and repair, ensuring continued comfort and operational efficiency.

Installation Procedures

Proper installation requires a compatible GE metal sleeve and adherence to electrical requirements, ensuring safe and efficient operation of the PTAC unit.

Wall Sleeve Compatibility (GE Metal Sleeve)

Ensuring proper wall sleeve compatibility is crucial for optimal GE PTAC unit performance and longevity. The GE metal wall sleeve is specifically designed for seamless integration with GE packaged terminal air conditioners. Importantly, the GE metal sleeve demonstrates interchangeability with GREE wall sleeves, offering flexibility during installation or replacement scenarios.

However, utilizing non-compatible sleeves can lead to reduced efficiency, increased noise levels, and potential air leakage, compromising the unit’s heating and cooling capabilities. Always verify the sleeve’s specifications and ensure it aligns with the PTAC model’s requirements. Correct sleeve installation provides a secure and airtight seal, maximizing the unit’s operational effectiveness and minimizing energy waste. Prioritize using the designated GE metal sleeve for guaranteed compatibility and performance.

Electrical Connections and Requirements

Proper electrical connections are paramount for safe and efficient GE PTAC operation. Before commencing any electrical work, always disconnect power at the breaker to prevent electrical shock. GE PTAC units typically require dedicated electrical circuits, adhering to local and national electrical codes. Voltage and amperage requirements vary depending on the specific model; consult the unit’s technical specifications and service manual – like the AZ45E07DA series details – for precise information.

Ensure the wiring gauge is appropriate for the amperage draw to avoid overheating and potential fire hazards. Grounding the unit correctly is essential for safety. Incorrect wiring or inadequate electrical supply can damage the unit and void the warranty. If unsure, always engage a qualified electrician to perform the electrical connections and verify compliance with all applicable regulations.

Operation and Control

GE PTAC operation involves locating the mini manual, identifying the model/serial number, and utilizing cooling, heating, and fan modes for optimal comfort.

Mini Manual Location & Model/Serial Number Identification

Locating the mini manual is crucial for quick reference regarding GE PTAC operation and troubleshooting. According to available documentation, the mini manual is conveniently situated on the bottom of the unit’s pan, providing easily accessible guidance for users.

Identifying the model and serial number is equally important for accessing detailed information, service records, and compatible parts. These identifiers are essential when contacting customer support or ordering replacement components. The precise location of the model and serial number can be found on page 9 of relevant documentation, ensuring accurate identification for all AZ4500 and AZ6500 series units. Proper identification streamlines maintenance and repair processes, guaranteeing the longevity and efficient performance of your GE PTAC system.

Cooling, Heating, and Fan Modes

GE PTAC units offer versatile operation through distinct cooling, heating, and fan modes, catering to diverse climate control needs. In cooling mode, the compressor activates to remove heat from the room, providing refreshing relief during warmer periods. Conversely, heating mode utilizes reverse cycle heat pump technology – detailed in service documentation – to efficiently warm the space.

The fan mode circulates air without temperature alteration, ideal for ventilation and air distribution. Once the compressor engages in cooling for both AZ4500 and AZ6500 series, optimal performance is achieved. Understanding these modes allows users to customize their environment for maximum comfort and energy efficiency, ensuring the GE PTAC system operates effectively in any season.

Troubleshooting Common Issues

Common issues include error code F1, indicating room temperature sensor problems, and compressor diagnostics, requiring service or part replacement (PN WP76X21320).

Error Codes: F1 ⎻ Room Temperature Sensor Issues

The F1 error code on GE PTAC units signals a problem with the room temperature sensor, specifically an open or short-circuited condition. This disrupts the unit’s ability to accurately read the room’s temperature, impacting both cooling and heating performance. Troubleshooting begins with verifying the sensor’s wiring connections, ensuring they are secure and free from corrosion.

If connections are sound, the sensor itself must be tested for continuity using a multimeter. A lack of continuity confirms a faulty sensor requiring replacement. Proper sensor function is crucial for the PTAC’s control system to operate efficiently. Ignoring this error can lead to inconsistent temperatures, increased energy consumption, and potential damage to other components. Always disconnect power before inspecting or replacing the sensor, and refer to the technical service manual for specific model instructions.

Compressor Operation and Diagnostics

GE PTAC compressor diagnostics involve understanding its role in the cooling cycle and recognizing potential failure signs. Upon activation in cooling mode, the compressor should initiate within a reasonable timeframe. Unusual noises, such as clicking or humming without starting, indicate potential issues. Checking the electrical supply to the compressor is a primary diagnostic step, verifying correct voltage and amperage.

Further investigation includes assessing the compressor’s start and run capacitors, as well as the overload protector. A failed capacitor or protector will prevent the compressor from operating. If the compressor runs intermittently or fails to maintain adequate cooling, refrigerant levels should be checked. Always consult the technical service manual for specific troubleshooting procedures and safety precautions before working with the compressor or refrigerant system.

Service and Maintenance

Regular maintenance and service, including reverse cycle heat pump operation checks, are crucial for GE PTAC units; service parts like PN WP76X21320 are often needed.

Reverse Cycle Heat Pump Operation

GE PTAC units, particularly the 6100 Series, utilize a unique reverse cycle heat pump operation designed to deliver consistent and comfortable room temperatures. This system efficiently transfers heat, providing both cooling and heating capabilities within a single unit. Understanding this operation is vital for effective troubleshooting and maintenance.

The reverse cycle functionality allows the unit to extract heat from the outside air, even in cooler temperatures, and transfer it indoors for heating. Conversely, it removes heat from the indoor air and expels it outside for cooling. Proper operation relies on the integrity of components like the compressor, reversing valve, and various sensors.

When service is required to optimize heat pump performance, it’s essential to consult the technical manuals and adhere to GE’s recommended procedures. Ensuring the system operates correctly maximizes energy efficiency and extends the lifespan of the PTAC unit.

Ordering Service Parts (e.g., PN WP76X21320)

Maintaining a GE PTAC unit often requires replacing worn or damaged components. Accurate part identification is crucial for successful repairs. GE utilizes specific part numbers, such as PN WP76X21320, to ensure compatibility and proper functionality. This part number, and others, can be found within the detailed technical service manuals for specific GE Zoneline models.

When a Zoneline unit needs to operate solely as a PTAC or PTHP, ordering service part PN WP76X21320 is a necessary step. Always unplug the unit before installing any replacement parts. Reliable suppliers specializing in GE appliance parts are recommended to guarantee authenticity and quality.

Referencing the unit’s model and serial number when ordering parts is essential. Proper part selection prevents compatibility issues and ensures the PTAC system operates efficiently and safely. Detailed parts lists are available in the service documentation.

Technical Specifications

Technical details for GE PTAC units, like the AZ45E07DA series, are found in dedicated service manuals, outlining operation modes and compressor diagnostics.


AZ45E07DA Series Technical Service Manual Details

The GE AZ45E07DA Series Technical Service Manual is a crucial resource for technicians servicing this specific PTAC model; It provides in-depth information regarding component locations, wiring diagrams, and detailed troubleshooting procedures. This manual assists in diagnosing issues ranging from compressor malfunctions to sensor failures, ensuring efficient repairs.

Key sections cover electrical connections, refrigerant charging, and the interpretation of error codes – notably, the F1 code indicating room temperature sensor problems. The manual also details the reverse cycle heat pump operation, a core function of GE PTAC technology. Furthermore, it lists essential service parts, including part number WP76X21320, used for specific operational adjustments. Accessing this manual is vital for maintaining optimal performance and extending the lifespan of the AZ45E07DA unit.

PTAC vs. PTHP Operation Modes

GE Zoneline units offer flexibility in operation, functioning as either Packaged Terminal Air Conditioners (PTAC) or Packaged Terminal Heat Pumps (PTHP). Understanding the distinction is crucial for proper installation and troubleshooting. If exclusive PTAC or PTHP operation is required, a specific service part – PN WP76X21320 – must be ordered and installed.

This modification alters the unit’s functionality, locking it into the desired mode. The choice between PTAC and PTHP impacts heating efficiency; PTHPs utilize a reverse cycle heat pump for more energy-efficient heating compared to the electric resistance heating found in standard PTAC units. Technicians should verify the intended operation mode during service calls and ensure the correct configuration is maintained, referencing the technical manual for detailed instructions and compatibility information.

Resources and Documentation

Access GE Corometrics 170 service manuals, Amana PTAC catalogs, and GE Zoneline Generation III manuals online for comprehensive support and repair guidance.

GE Corometrics 170 Service Manual Information

The GE Corometrics 170 Service Manual is a substantial document, spanning 248 pages, offering detailed insights into the functionality and repair procedures for related GE equipment. While not directly focused solely on PTAC units, it provides valuable foundational knowledge applicable to understanding GE’s broader engineering principles and component designs. This resource is particularly useful for technicians familiar with GE’s product lines and seeking in-depth technical specifications.

Gujarat Technological University references this manual, highlighting its relevance within educational and professional contexts. Although primarily geared towards a different product category, the manual’s detailed schematics and troubleshooting guides can aid in diagnosing complex issues within GE PTAC systems. Accessing this documentation can supplement other PTAC-specific resources, offering a more holistic understanding of GE’s technological approach to climate control solutions.

Amana PTAC Catalog Availability

The Amana PTAC catalog, comprising 24 pages, serves as a crucial resource for understanding the range of packaged terminal air conditioning units offered by Amana, a brand often associated with GE in terms of technology and distribution networks. This catalog details specifications, features, and model variations, assisting in selecting the appropriate unit for specific applications. While a direct GE publication, its availability is pertinent when considering broader PTAC options.

Currently, the Amana PTAC catalog is available in PDF format, offering convenient access to product information. Plano, Texas, is noted as a location related to this catalog, potentially indicating a distribution or support center. Accessing this catalog alongside GE’s own documentation provides a comprehensive overview of the PTAC market, enabling informed decisions regarding purchase, installation, and maintenance of these essential climate control systems.

PDF

u9 soccer practice plans pdf

U9 Soccer Practice Plans: A Comprehensive Guide

Discover readily available U9 soccer practice plans in PDF format from resources like Soccer Coach Weekly. These plans offer structured drills and game ideas.

Understanding the U9 Age Group

U9 players‚ typically aged 8-9‚ are at a crucial developmental stage. Cognitively‚ they’re transitioning from purely play-based learning to understanding basic tactical concepts. Emotionally‚ fostering a fun and supportive environment is paramount‚ as self-esteem and a love for the game are being established.

Physically‚ U9s are developing fundamental movement skills – running‚ jumping‚ and turning – but their coordination and strength are still maturing. Practice plans should reflect this‚ focusing on activities that enhance these skills without excessive pressure.

PDF resources‚ like those found on Soccer Coach Weekly‚ often cater to this age group by providing age-appropriate drills. These plans acknowledge the need for short‚ engaging sessions with frequent breaks. Understanding these developmental characteristics is key to creating effective and enjoyable U9 soccer experiences. Remember to prioritize skill development over complex tactics at this stage.

Physical Development Considerations for U9 Players

U9 players exhibit significant physical variability. While developing fundamental movement skills like running‚ jumping‚ and turning‚ their coordination and strength are still maturing. Practice plans‚ often available as PDF downloads‚ should prioritize activities that enhance these skills gradually. Avoid overemphasis on strenuous exercises or prolonged high-intensity drills.

Focus on building a foundation of agility‚ balance‚ and coordination. Drills should incorporate changes of direction‚ light resistance work (using bodyweight)‚ and plenty of opportunities for active recovery. Consider shorter session durations with frequent breaks to prevent fatigue and minimize the risk of injury.

PDF resources from sites like Soccer Coach Weekly often include warm-up routines specifically designed for this age group‚ emphasizing dynamic stretching and movement preparation. Remember‚ physical development at U9 is about building a base‚ not peak performance. Prioritize fun and engagement to foster a positive relationship with physical activity.

Cognitive and Emotional Development in U9 Soccer

U9 players are developing crucial cognitive skills like understanding simple tactical concepts and following multi-step instructions. Practice plans‚ frequently found as PDF documents‚ should reflect this by incorporating clear‚ concise explanations and demonstrations. Keep drills simple and focus on one or two key learning objectives per session.

Emotionally‚ these players are beginning to understand teamwork and sportsmanship‚ but still require significant encouragement and positive reinforcement. PDF resources often suggest incorporating games that emphasize cooperation and fair play. Avoid overly competitive environments that can lead to frustration or anxiety.

Foster a growth mindset by praising effort and improvement rather than solely focusing on results. Remember that at this age‚ the primary goal is to develop a love for the game. Practice plans should prioritize fun‚ engagement‚ and building confidence‚ creating a positive emotional experience for all players.

Essential Components of a U9 Soccer Practice

U9 practice plans‚ often available as PDF downloads‚ typically include warm-ups‚ skill development‚ small-sided games‚ and a cool-down period for balanced training.

Warm-up Activities (10-15 minutes)

Effective warm-ups for U9 players‚ frequently detailed in U9 soccer practice plans PDF guides‚ are crucial for injury prevention and preparing young athletes for more intense activity. Begin with light cardio‚ such as jogging or skipping‚ for 2-3 minutes to elevate heart rates.

Dynamic stretching should follow‚ incorporating movements like leg swings‚ arm circles‚ and torso twists. These exercises improve flexibility and range of motion. Include fun‚ game-like warm-up activities‚ like ‘Red Light‚ Green Light’ or ‘Animal Walks’ (bear crawls‚ crab walks) to engage players and build enthusiasm.

A key element is ball familiarization. Simple dribbling exercises within a confined space‚ or passing in pairs‚ help players connect with the ball early in the session. These warm-ups should gradually increase intensity‚ mirroring the demands of the upcoming drills and games‚ as outlined in many downloadable practice plans.

Skill Development Drills (20-25 minutes)

Skill development drills‚ often comprehensively outlined in U9 soccer practice plans PDF resources‚ should focus on fundamental techniques. Dribbling drills‚ like ‘Cone Weaving’ (as suggested by available resources)‚ enhance ball control and agility. Players navigate a course of cones‚ emphasizing close touches and changes of direction.

Passing drills‚ such as ‘Partner Passing’‚ build accuracy and technique. Encourage players to use the inside of their foot and focus on target selection. Shooting drills‚ like ‘Target Practice’‚ improve shooting form and precision. Set up targets (cones‚ goals) and have players shoot from various distances.

First touch control drills‚ involving receiving and turning‚ are vital. Players practice receiving a pass and quickly turning to face a new direction. These drills should be fun‚ engaging‚ and progressively challenging‚ mirroring the structure found in detailed practice plans.

Small-Sided Games (20-30 minutes)

Small-sided games are crucial for applying skills learned during drills‚ and many U9 soccer practice plans PDF emphasize their importance. Begin with 3v3 games‚ focusing on passing‚ movement‚ and quick decision-making. The limited space encourages frequent touches and involvement for each player.

Progress to 4v4 games‚ introducing basic tactical concepts like creating space and supporting teammates. These games allow for more complex passing combinations and defensive positioning. A scrimmage with modified rules‚ often detailed in practice plans‚ further encourages creativity and game understanding.

Modifications might include limiting touches‚ requiring a certain number of passes before shooting‚ or emphasizing specific skills. These games should be fun‚ competitive‚ and provide opportunities for players to experiment and learn in a game-like environment‚ mirroring the structure found in comprehensive practice plans.

Cool-down and Stretching (5-10 minutes)

Cool-down and stretching are vital components often included in U9 soccer practice plans PDF resources. Begin with light jogging or walking for 2-3 minutes to gradually lower heart rates. This prevents dizziness and aids in muscle recovery.

Follow with static stretches‚ holding each stretch for 15-20 seconds. Focus on major muscle groups used during practice – hamstrings‚ quadriceps‚ calves‚ and groin. Emphasize proper form to avoid injury. Dynamic stretches‚ like leg swings‚ can also be incorporated.

Many practice plans suggest making stretching fun by turning it into a game or incorporating animal walks. This encourages participation and reinforces the importance of flexibility. A proper cool-down minimizes muscle soreness and prepares players for future training sessions‚ as detailed in available PDF guides.

Specific Drills for U9 Soccer

U9 soccer practice plans PDF often detail drills like cone weaving for dribbling‚ partner passing exercises‚ target shooting‚ and first-touch control activities.

Dribbling Drills: Cone Weaving

Cone weaving is a fundamental dribbling drill frequently found within U9 soccer practice plans PDF resources. This drill enhances a player’s close control‚ agility‚ and ability to change direction with the ball. Typically‚ cones are arranged in a line or a more complex pattern‚ and players dribble through them‚ focusing on keeping the ball close to their feet.

Variations include timing the drill to encourage speed‚ challenging players to use only their weaker foot‚ or incorporating different dribbling techniques like inside/outside cuts. Coaches often emphasize maintaining a low center of gravity and keeping their head up to scan the field‚ even while focusing on the immediate task of navigating the cones.

Many downloadable practice plans detail specific cone arrangements and progressions‚ starting with simple straight lines and gradually increasing the difficulty. The goal is to build confidence and competence in ball manipulation‚ a crucial skill for young soccer players.

Passing Drills: Partner Passing

Partner passing is a cornerstone of U9 soccer practice plans‚ often detailed in available PDF resources. This drill focuses on developing fundamental passing technique‚ accuracy‚ and receiving skills. Players pair up and practice passing the ball back and forth‚ initially focusing on simple‚ short passes using the inside of the foot.

Progressions involve increasing the distance between partners‚ introducing different passing surfaces (e.g.‚ laces for longer passes)‚ and incorporating movement before and after the pass. Coaches emphasize the importance of a firm ankle‚ a follow-through towards the target‚ and a controlled first touch when receiving the ball.

Many practice plans suggest variations like one-touch passing‚ passing while moving‚ or adding a defender to create a more game-like scenario. The drill aims to build a foundation for more complex passing combinations and improve players’ ability to connect with teammates effectively.

Shooting Drills: Target Practice

Target practice is a frequently included shooting drill within U9 soccer practice plans‚ often found detailed in downloadable PDF guides. This drill introduces young players to the basics of shooting with accuracy and power. Players aim at designated targets – cones‚ markers‚ or sections of the goal – to encourage precision.

Coaches emphasize proper shooting technique: planting foot beside the ball‚ leaning over the ball‚ striking with the laces‚ and following through towards the target. Initial drills focus on stationary shooting‚ gradually progressing to shooting after a dribble or pass. Variations include limiting touches before shooting or introducing a goalkeeper.

Practice plans often suggest using different sized targets to adjust the difficulty. The goal is to build confidence in shooting‚ develop muscle memory for proper technique‚ and improve players’ ability to place the ball effectively. It’s a fun and engaging way to work on a crucial soccer skill.

First Touch Control Drills: Receiving and Turning

Receiving and turning drills are fundamental components of U9 soccer practice plans‚ frequently detailed within downloadable PDF resources. These drills focus on developing a player’s ability to control the ball upon reception and quickly change direction to create passing or shooting opportunities.

Drills typically involve a coach or partner passing the ball to the player‚ who must control it with various body parts – inside of the foot‚ outside of the foot‚ thigh‚ or chest – and then execute a turn‚ either simple or more complex‚ to face a new direction. Emphasis is placed on cushioning the ball’s impact and maintaining possession.

Progressions include adding defenders‚ limiting touches‚ or requiring a pass after the turn. These drills build coordination‚ spatial awareness‚ and the confidence to handle the ball under pressure. Mastering first touch is crucial for effective play at this age group‚ and practice plans prioritize its development.

Small-Sided Game Variations

PDF practice plans often include 3v3‚ 4v4 games‚ and modified scrimmages. These variations enhance tactical understanding‚ movement‚ and creativity for U9 players.

3v3 Games: Focus on Passing and Movement

3v3 games are a cornerstone of U9 development‚ frequently detailed within U9 soccer practice plans available as PDF downloads. These small-sided games prioritize fundamental skills in a dynamic environment. The limited space compels players to make quick decisions‚ enhancing their passing accuracy and off-ball movement.

Coaches utilizing these plans emphasize short‚ quick passes to maintain possession and create scoring opportunities. Players learn to support teammates‚ offer passing lanes‚ and anticipate movement. 3v3 encourages constant engagement‚ maximizing touches on the ball and fostering individual skill refinement.

Many PDF resources suggest incorporating directional play or specific objectives (e.g.‚ a certain number of passes before shooting) to further refine skills. This format builds confidence‚ promotes teamwork‚ and lays a solid foundation for more complex tactical concepts as players progress.

4v4 Games: Introducing Basic Tactical Concepts

4v4 games‚ often outlined in comprehensive U9 soccer practice plans found as PDF resources‚ represent a crucial step towards introducing basic tactical awareness. This format expands upon 3v3‚ demanding more sophisticated decision-making and positional understanding. Players begin to grasp concepts like creating width‚ supporting the attack‚ and recognizing defensive responsibilities.

PDF plans frequently suggest incorporating simple objectives‚ such as maintaining possession within a defined zone or completing a set number of passes before attempting a shot. This encourages players to think beyond individual skill and consider the collective team goal.

Coaches can use 4v4 to subtly introduce the idea of creating passing triangles and exploiting space. The increased player count necessitates better communication and anticipation‚ fostering a more organized and tactical approach to the game‚ preparing them for larger team dynamics.

Scrimmage with Modified Rules: Encouraging Creativity

Scrimmages‚ detailed within many U9 soccer practice plans available as PDF downloads‚ are vital for applying learned skills in a game-like environment. However‚ modifying rules at this age is key to fostering creativity and minimizing tactical rigidity. PDF resources often suggest rules like mandatory passing before shooting‚ or limiting the number of touches per player.

These modifications encourage players to explore different passing combinations and develop their vision. Removing strict positional constraints allows for more fluid movement and experimentation. Coaches can also implement “bonus point” systems for creative plays‚ rewarding risk-taking and imaginative solutions.

The goal isn’t necessarily winning‚ but rather providing a safe space for players to express themselves and make decisions independently. PDF plans emphasize positive reinforcement and constructive feedback‚ nurturing a love for the game and building confidence in their abilities.

Practice Plan Examples

Explore detailed U9 soccer practice plans in PDF format‚ showcasing dribbling‚ passing‚ shooting‚ and game applications. These plans offer structured training sessions.


Practice Plan 1: Dribbling and Passing Focus

Session Overview: This 60-minute practice centers on foundational dribbling skills and accurate passing techniques for U9 players. Utilizing readily available U9 soccer practice plans in PDF format‚ coaches can easily implement a structured session.

Warm-up (10 minutes): Begin with light jogging and dynamic stretching‚ focusing on leg muscles. Incorporate a simple tag game to enhance agility and spatial awareness.

Dribbling Drills (20 minutes): Implement cone weaving drills‚ encouraging players to use both feet and maintain close control of the ball. Progress to dribbling in a designated area‚ avoiding defenders (passive at first).

Passing Drills (20 minutes): Partner passing exercises focusing on inside-of-the-foot passes. Emphasize accuracy and proper technique. Introduce a passing square drill‚ requiring quick passing and movement.

Cool-down (10 minutes): Static stretching‚ holding each stretch for 20-30 seconds. Review key learning points from the session‚ reinforcing dribbling and passing fundamentals. Accessing PDF resources streamlines planning.

Practice Plan 2: Shooting and Game Application

Session Overview: This 60-minute practice focuses on shooting technique and applying learned skills within a small-sided game. Coaches can leverage U9 soccer practice plans available in PDF format for a well-structured session.

Warm-up (10 minutes): Dynamic stretching‚ including leg swings and torso twists. A quick passing drill to activate muscles and improve touch.

Shooting Drills (20 minutes): Target practice‚ encouraging players to aim for specific areas of the goal. Introduce shooting after a dribble or pass. Focus on proper foot placement and follow-through.

Small-Sided Game (20 minutes): A 3v3 or 4v4 game with a focus on shooting opportunities. Encourage players to dribble‚ pass‚ and shoot. Modify rules to promote shooting (e.g.‚ bonus points for shots on target).

Cool-down (10 minutes): Static stretching‚ holding each stretch. Recap the importance of shooting technique and game application. Utilizing PDF plans ensures consistent coaching points.

Practice Plan 3: Skill Combination and Small-Sided Play

Session Focus: This 60-minute practice integrates dribbling‚ passing‚ and shooting within a game context. Coaches can find detailed U9 soccer practice plans in PDF format to guide the session effectively.

Warm-up (10 minutes): Cone weaving drill to improve dribbling agility. Partner passing with a focus on accuracy and receiving technique.

Skill Combination Drill (20 minutes): Players dribble through cones‚ pass to a partner‚ and then make a run to receive a return pass for a shot on goal. Emphasize quick transitions and decision-making.

Small-Sided Game (20 minutes): A 4v4 game with modified rules to encourage skill combination. For example‚ require a pass before a shot. Focus on creating passing lanes and supporting teammates.

Cool-down (10 minutes): Light jogging and static stretching. Review the importance of combining skills for effective play. PDF resources offer consistent drill progressions.

Resources for U9 Soccer Coaches

Access numerous U9 soccer practice plans in PDF format online‚ including those from Soccer Coach Weekly‚ to enhance coaching effectiveness and player development.

Online Resources for Drills and Games

Numerous online platforms provide a wealth of resources for U9 soccer coaches seeking drills and game ideas‚ often available as downloadable PDF documents. Soccer Coach Weekly is a prominent source‚ offering free downloads of practice plans and individual drills tailored for this age group. These resources frequently include detailed diagrams and step-by-step instructions‚ making implementation straightforward.

Beyond Soccer Coach Weekly‚ a general internet search for “U9 soccer drills PDF” yields a variety of options‚ though verifying the source’s credibility is crucial. Websites dedicated to soccer training often host collections of drills categorized by skill focus – dribbling‚ passing‚ shooting‚ and first touch control – many in easily accessible PDF format. Be mindful of copyright restrictions and ensure responsible use of downloaded materials.

Furthermore‚ exploring online forums and communities for soccer coaches can uncover shared practice plans and drill variations. While these may not always be formally presented as PDFs‚ they offer valuable insights and collaborative learning opportunities. Remember to adapt drills to suit your team’s specific needs and abilities.

PDF Downloads of Practice Plans

Accessing comprehensive U9 soccer practice plans in PDF format streamlines preparation for coaches. Soccer Coach Weekly stands out as a key resource‚ providing downloadable plans encompassing warm-ups‚ skill development‚ small-sided games‚ and cool-downs. These PDFs typically detail drill setups‚ coaching points‚ and progressions‚ offering a structured approach to training sessions.

A focused online search for “U9 soccer practice plan PDF” reveals additional options‚ though evaluating the source’s quality is essential. Many soccer training websites offer free or premium PDF downloads‚ categorized by session focus – dribbling & passing‚ shooting‚ or game application. These plans often include diagrams illustrating player positioning and movement.

When utilizing PDF practice plans‚ consider adapting them to your team’s skill level and available resources. Don’t hesitate to modify drills or adjust timings to optimize the session. Always prioritize player safety and enjoyment while implementing the plan. Remember to check for updates or newer versions of the PDFs periodically.

Coaching Certification and Development

Enhancing coaching expertise is crucial for effective U9 soccer training‚ even when utilizing readily available PDF practice plans. While PDFs offer session outlines‚ formal coaching certifications provide a deeper understanding of child development‚ skill progression‚ and safe training practices.

Organizations like US Soccer offer coaching courses tailored to youth levels‚ covering topics beyond drill execution – including tactical awareness‚ player motivation‚ and long-term athlete development. These courses often emphasize age-appropriate training methodologies‚ ensuring U9 players receive a positive and beneficial experience.

Continual professional development is vital. Regularly attending coaching clinics‚ workshops‚ and online webinars keeps coaches abreast of the latest techniques and best practices. Utilizing PDF practice plans alongside ongoing education creates a well-rounded coaching approach. Remember‚ a certified coach can effectively adapt any PDF plan to maximize player growth and enjoyment.

Guide

rieker shoe size guide

Rieker Shoe Size Guide: A Comprehensive Overview (Updated February 7‚ 2026)

Rieker shoes‚ manufactured in EU sizes‚ generally offer dependable length sizing. This guide provides detailed conversions for US and UK sizes‚ aiding a perfect fit.

Understanding Rieker Sizing

Rieker shoes are renowned for blending comfort and style‚ but navigating their sizing can be tricky due to their European origins. Unlike standard US sizing‚ Rieker primarily manufactures in EU sizes‚ necessitating accurate conversion for optimal fit. It’s crucial to remember that sizing isn’t always consistent across brands‚ and Rieker is no exception.

Generally‚ Rieker’s length sizing is considered fairly reliable. However‚ width and style variations can influence how a shoe feels. Understanding your foot shape and considering sock thickness are vital components of achieving the right fit. This guide aims to demystify Rieker sizing‚ providing comprehensive charts and tips to help you confidently select your perfect pair. Remember to always prioritize accurate foot measurements and consult conversion charts before making a purchase‚ especially when shopping online.

Rieker also offers a sister brand‚ Remonte‚ which shares similar sizing characteristics. Therefore‚ the information provided here is applicable to both brands‚ ensuring a consistent and informed shopping experience.

Rieker Size Runs: General Considerations

Rieker size runs typically align closely with standard European sizing‚ but subtle variations exist. It’s important to acknowledge that individual styles within the Rieker collection may fit slightly differently. Some models might run a half-size larger or smaller‚ so checking specific product reviews is advisable.

A general rule of thumb is that Rieker shoes tend to offer a comfortable‚ slightly wider fit‚ accommodating a broader range of foot shapes. However‚ this isn’t universal‚ and certain styles‚ like pointed-toe boots‚ may have a narrower toe box. When in doubt‚ it’s often recommended to size up rather than down‚ especially if you’re between sizes.

Considering the brand’s European origin‚ relying solely on your US shoe size isn’t sufficient. Utilizing the provided EU conversion charts is essential for accurate selection. Furthermore‚ remember that Remonte‚ Rieker’s sister brand‚ shares similar sizing tendencies‚ making these considerations applicable across both lines.

EU vs. US vs. UK Shoe Sizes – Rieker Specifics

Rieker primarily utilizes European (EU) sizing‚ necessitating conversion for customers accustomed to US or UK standards. Direct conversions aren’t always precise‚ as sizing systems differ subtly. A US women’s size 7.5 generally corresponds to an EU size 40 and a UK size 6.5‚ while a US men’s size 10 equates to EU 43 and UK 9.

However‚ these are approximations. Variations can occur‚ particularly with men’s sizes. It’s crucial to consult a detailed conversion chart‚ as provided within this guide‚ for the most accurate match. Remember that width also plays a role; Rieker doesn’t extensively offer width variations‚ so length is paramount.

Understanding these nuances is vital for online purchases. Always prioritize the EU size when available‚ and cross-reference with the charts. Given Sonny Jurgensen’s passing on February 6‚ 2026‚ taking a moment for precision feels appropriate – a well-fitted shoe is a comfort!

Women’s Rieker Shoe Size Chart

Rieker women’s shoes require careful consideration of sizing‚ as EU measurements are standard. This chart provides a comprehensive overview for converting US and UK sizes to their EU equivalents‚ ensuring a comfortable fit. A US size 6 typically translates to a EU 39‚ while a US 8 corresponds to a EU 41. UK sizes follow a similar pattern‚ with a UK 4 equating to a EU 37 and a UK 6 to a EU 40.

However‚ individual foot shapes and style variations can influence the ideal size. It’s always recommended to measure your feet accurately before purchasing. Remember‚ the passing of Sonny Jurgensen on February 6th reminds us to appreciate comfort in all aspects of life‚ including footwear!


Refer to the detailed conversion tables below for precise measurements. Consider reading customer reviews for specific style feedback regarding sizing accuracy.

Converting US Women’s Sizes to EU Sizes

Accurately converting your US women’s shoe size to EU sizing is crucial when purchasing Rieker footwear. Generally‚ a US size 7.5 corresponds to a EU size 40‚ while a US 8.5 translates to a EU 41. For a US size 9‚ you’ll typically need a EU 42. A US 10 equates to a EU 43‚ and a US 10.5 fits into a EU 44. Finally‚ a US 11.5 is generally a EU 45.

However‚ these are approximate conversions. Slight variations can occur depending on the specific Rieker style. It’s important to remember the recent passing of Sonny Jurgensen‚ a legend who understood the importance of a good fit – both on and off the field!

Always consult the full size chart and consider customer feedback for the most accurate sizing information. Measuring your feet is highly recommended for optimal results.

Converting UK Women’s Sizes to EU Sizes

For UK customers‚ converting your shoe size to the European (EU) standard is essential for a comfortable Rieker fit. A UK size 3.5 typically corresponds to a EU size 36‚ while a UK 4 equates to a EU 37. Moving up‚ a UK size 5 translates to a EU 38‚ and a UK 6 fits a EU 39.

A UK 6.5 is generally a EU 40‚ a UK 7.5 is a EU 41‚ and a UK 8 corresponds to a EU 42. For those needing a UK 9‚ a EU 43 is the appropriate size. It’s a somber moment with the recent passing of Sonny Jurgensen‚ but finding the right fit remains important!

Remember these are guidelines; variations exist. Always check the specific Rieker style’s size chart and read customer reviews for more precise sizing advice. Measuring your feet remains the best practice for accuracy.

Men’s Rieker Shoe Size Chart

Navigating Rieker sizing for men requires understanding the EU-based system and its correlation to US and UK sizes. A US men’s size 7.5 generally aligns with a EU size 40 and a UK size 6.5. Stepping up‚ a US 8.5 typically corresponds to a EU 41 and a UK 7.5‚ offering a comfortable fit for many.

For a US size 9‚ look for a EU 42 and a UK 8. A US 10 translates to a EU 43 and a UK 9‚ while a US 10;5 is usually a EU 44 and a UK 9.5. Finally‚ a US 11.5 generally equates to a EU 45. It’s a sad day with the loss of Sonny Jurgensen‚ but proper footwear is still key!

These conversions serve as a starting point. Individual Rieker styles may vary‚ so consulting specific size charts and customer feedback is highly recommended for optimal fit and comfort.

Converting US Men’s Sizes to EU Sizes

Accurately converting US men’s shoe sizes to Rieker’s EU sizing is crucial for a comfortable fit. Generally‚ a US size 7 translates to a EU size 40‚ providing a solid starting point. Moving up‚ a US 8 corresponds to a EU 41‚ while a US 8.5 typically aligns with a EU 41-42 – a slight overlap to consider.

For those wearing a US 9‚ a EU 42 is usually the best match. A US 10 generally equates to a EU 43‚ and a US 11 corresponds to a EU 44. Larger sizes follow this pattern: a US 12 is typically a EU 45‚ and a US 13 often translates to a EU 46.

Remember‚ these are approximate conversions. Given the recent passing of Sonny Jurgensen‚ a moment of reflection is needed‚ but finding the right shoe size remains important. Always check specific product details‚ as variations can occur between Rieker styles.

Converting UK Men’s Sizes to EU Sizes

For UK customers seeking the perfect Rieker fit‚ understanding the conversion to EU sizing is essential. A UK size 6 typically corresponds to a EU size 40‚ offering a comfortable starting point for many. Moving upwards‚ a UK 6.5 generally aligns with a EU 40-41‚ acknowledging potential slight variations.

A UK 7 usually equates to a EU 41‚ while a UK 8 typically translates to a EU 42. For those wearing a UK 9‚ a EU 43 is generally the ideal match. Larger sizes follow a similar pattern: a UK 10 corresponds to a EU 44‚ and a UK 11 often equates to a EU 45.

It’s worth noting that‚ amidst recent news like the passing of Sonny Jurgensen‚ focusing on practical matters like shoe fit remains important. These conversions are approximate; always consult the specific product details on the Rieker website or retailer‚ as slight differences can occur between styles.

Rieker Shoe Widths: Available Options

Rieker shoes predominantly cater to a standard width foot‚ representing the most common fit for a majority of customers. While not consistently offered across all styles‚ Rieker does occasionally introduce models in wider width options‚ specifically designed for those requiring extra room.

Currently‚ dedicated wide-fit ranges are not extensively publicized‚ meaning availability can vary significantly depending on the retailer and specific shoe model. It’s advisable to check individual product descriptions for width specifications. Customers with broader feet may find success by sizing up a half or full size‚ but this isn’t a guaranteed solution.

Considering recent events‚ like the news surrounding Sonny Jurgensen‚ taking time for personal comfort‚ such as proper shoe fit‚ is valuable. Exploring Rieker Remonte styles might reveal wider options‚ as this sub-brand sometimes features broader designs. Always prioritize trying shoes on‚ if possible‚ to ensure optimal comfort and support.

Factors Affecting Rieker Shoe Fit

Achieving the perfect Rieker shoe fit extends beyond simply selecting the correct size. Individual foot shape plays a crucial role; those with wider feet may find standard widths constricting‚ while narrower feet might experience slippage. Understanding your arch type – high‚ medium‚ or low – also influences comfort and support.

Sock thickness significantly impacts fit. Wearing thicker socks necessitates considering a half-size larger to accommodate the added volume. Conversely‚ thinner socks may require a slightly smaller size. Remember‚ Rieker sizing is based on European standards‚ so conversions aren’t always precise.

Recent news‚ like the passing of Sonny Jurgensen‚ reminds us of appreciating comfort. Like choosing the right equipment for peak performance‚ proper shoe fit enhances daily life. Variations in Rieker styles – boots versus sandals‚ for example – can also affect how a shoe fits‚ so consider style-specific sizing advice.

Foot Shape and Rieker Shoes

Rieker shoes‚ while generally accommodating‚ benefit from consideration of individual foot shapes. Those with wider feet often find the standard Rieker width restrictive‚ potentially leading to discomfort and pressure points. Exploring options within the Rieker Remonte line‚ known for broader fits‚ could be beneficial.

Conversely‚ individuals with narrow feet may experience excessive movement within the shoe‚ reducing stability and support. Utilizing thicker insoles or opting for styles with adjustable straps can help secure a snugger fit. Understanding your foot’s unique contours – high instep‚ prominent bunions – is vital.

Recent events‚ like celebrating Sonny Jurgensen’s life‚ highlight the importance of comfort and a good fit. Just as athletes require tailored equipment‚ your feet deserve shoes that complement their natural shape. A professional fitting can accurately assess your foot’s dimensions and recommend appropriate Rieker styles.

Socks and Rieker Shoe Fit

The impact of sock thickness on Rieker shoe fit is significant. When measuring your feet for Rieker shoes‚ always wear the type of socks you intend to wear with them regularly. Thin dress socks will necessitate a different size compared to thick winter socks or athletic socks.

Consider the material of your socks as well. Cotton socks absorb moisture‚ potentially causing your feet to swell slightly during wear‚ impacting the fit. Synthetic materials offer better moisture-wicking properties‚ maintaining a more consistent fit.

Remembering the recent passing of Sonny Jurgensen reminds us of the importance of comfort‚ even in performance. A properly fitted shoe‚ accounting for sock thickness‚ prevents blisters and discomfort. Allow for approximately a thumb’s width of space between your longest toe and the shoe’s end when wearing socks. Prioritize a snug‚ but not constricting‚ fit for optimal comfort and support.

Rieker Shoe Styles and Sizing Variations

Rieker offers a diverse range of footwear‚ and sizing can subtly vary between styles. Boots‚ for example‚ may accommodate thicker socks and require a slightly larger size compared to lightweight sandals or slip-ons. Closed-toe shoes generally offer a more consistent fit across styles.

Pay close attention to the shoe’s construction. Styles with pointed toes may feel smaller than those with rounded toes‚ even if they share the same EU size. Consider reading customer reviews specific to the style you’re interested in‚ as they often provide valuable insights into sizing accuracy.

The recent news regarding Sonny Jurgensen highlights the importance of a comfortable fit for peak performance. Just as athletes need well-fitted gear‚ choosing the correct Rieker size ensures all-day comfort. When in doubt‚ it’s often advisable to size up‚ especially with styles known for a narrower fit.

Tips for Measuring Your Feet for Rieker Shoes

Accurate foot measurement is crucial for selecting the correct Rieker size. Measure both feet‚ as sizes can differ. Do this at the end of the day when your feet are at their largest‚ after activity. Wear the socks you intend to wear with your Rieker shoes during measurement.

Place a piece of paper against a wall and stand on it‚ heel against the wall. Trace your foot carefully. Measure the length from the heel to the longest toe in centimeters or inches. Repeat for the other foot and use the larger measurement.

Compare your measurement to the Rieker size chart. Remember‚ conversions can vary slightly. Considering the recent passing of Sonny Jurgensen‚ a legend known for his precision‚ accuracy in sizing is equally important for comfort and performance. Don’t solely rely on your usual shoe size; always measure!

Online Rieker Shoe Size Resources & Tools

Several online resources can assist in determining your ideal Rieker shoe size. Many retailers offering Rieker footwear provide size charts directly on their websites‚ converting US‚ UK‚ and EU measurements. These charts often include specific Rieker sizing information‚ acknowledging potential variations.

Dedicated shoe size conversion websites offer comprehensive tools‚ allowing you to input your measurements and receive accurate Rieker size recommendations. Some sites even feature printable foot measuring guides for a more precise assessment. Remember the recent news regarding Sonny Jurgensen – precision matters‚ and that extends to shoe fit!

The official Rieker website may also offer sizing guidance. Utilize these resources in conjunction with the tips for measuring your feet to ensure a comfortable and well-fitting pair of Rieker shoes.

Rieker Remonte Size Conversion Details

Rieker and Remonte‚ both brands under the same umbrella‚ generally share consistent sizing. However‚ understanding the nuances between US‚ EU‚ and UK conversions is crucial for a comfortable fit. As of February 7‚ 2026‚ the standard conversions remain relatively stable‚ but individual styles can vary.

Here’s a general guide: a US size 7.5 typically corresponds to a EU size 40 and a UK size 6.5. Moving up‚ a US 8.5 equates to EU 41 and UK 7.5. Sizes 9‚ 10‚ and 10.5 translate to EU 42‚ 43‚ and 44 respectively‚ with UK sizes of 8‚ 9‚ and 9.5. Remember the passing of Sonny Jurgensen – a perfect fit is always important!

Always consult specific retailer charts‚ as slight discrepancies can occur. Remonte‚ known for its comfort footwear‚ often adheres closely to these conversions. Prioritize accurate foot measurement for the best results when choosing between Rieker and Remonte styles.

Rieker Brand Size Guide – Official Information

Rieker’s official sizing information‚ updated as of February 7‚ 2026‚ emphasizes the use of European (EU) sizing as the standard. While conversions to US and UK sizes are provided‚ Rieker recommends referencing the EU size whenever possible for the most accurate fit. The brand acknowledges that individual foot shapes and sock thickness can influence the ideal size.

According to the official guide‚ a UK size 3.5 corresponds to a EU size 36‚ 4 to 37‚ 5 to 38‚ 6 to 39‚ 6.5 to 40‚ 7.5 to 41‚ 8 to 42‚ and 9 to 43. It’s important to note the passing of Sonny Jurgensen‚ a reminder to focus on comfort.

Rieker advises customers to measure their feet accurately and compare the measurements to their size chart. They also suggest considering the specific style of shoe‚ as some designs may run slightly larger or smaller. Always prioritize comfort and allow for a small amount of wiggle room.

Dealing with Size Discrepancies in Rieker Shoes

Despite utilizing standardized sizing‚ discrepancies can occasionally occur with Rieker shoes. These can stem from variations in manufacturing‚ differing foot shapes‚ or even the specific shoe style. If your initial size feels off‚ don’t hesitate to explore a half-size up or down. Remember the recent passing of Sonny Jurgensen while prioritizing your comfort.

Rieker generally offers a generous return and exchange policy‚ facilitating size adjustments. Before initiating a return‚ double-check the size chart and consider trying the shoes on with the socks you intend to wear. If the issue isn’t simply a size difference‚ but a width concern‚ explore available width options.

Customer reviews can provide valuable insights into potential sizing quirks for specific models. If you’re unsure‚ contacting Rieker’s customer support for personalized guidance is always recommended. Prioritize a comfortable fit to fully enjoy your Rieker footwear.

Rieker Shoe Return and Exchange Policies

Rieker generally prioritizes customer satisfaction‚ offering a relatively straightforward return and exchange process. Policies can vary slightly depending on the retailer from which you purchased the shoes‚ so always check their specific terms first. Typically‚ unworn shoes with original tags attached are eligible for return within a specified timeframe – often 30 days.

Exchanges are usually permitted for a different size or color‚ subject to availability. Some retailers may offer free return shipping‚ while others require the customer to cover the cost. It’s wise to retain your proof of purchase for a smooth process‚ especially considering recent events like the passing of Sonny Jurgensen.

Before initiating a return or exchange‚ familiarize yourself with the retailer’s online portal or contact their customer service for detailed instructions. Understanding the policy upfront will save you time and ensure a hassle-free experience with your Rieker footwear.

Customer Reviews: Rieker Sizing Feedback

Rieker sizing consistently receives mixed feedback from customers‚ highlighting the importance of careful consideration before purchasing. Many reviewers confirm the brand’s length sizing is generally accurate‚ aligning with EU standards. However‚ a recurring theme is that Rieker shoes can run slightly narrow‚ particularly for those with wider feet.

Several customers recommend ordering a half size up‚ especially if you’re between sizes or prefer a more comfortable fit. Others suggest considering the specific style‚ as some designs appear to fit truer to size than others. Recent discussions‚ even amidst news like Sonny Jurgensen’s passing‚ emphasize the need to consult size charts.

Overall‚ the consensus is that Rieker offers good value‚ but a proactive approach to sizing – including measuring your feet and reading reviews – is crucial for a successful purchase. Prioritize understanding your foot shape and sock thickness.

Where to Find More Information About Rieker Shoes

Beyond this comprehensive guide‚ several resources offer valuable insights into Rieker shoes and their sizing. The official Rieker website is a primary source‚ providing brand-specific size charts for both men and women‚ detailing EU‚ US‚ and UK conversions. Retailers stocking Rieker footwear often include customer reviews‚ offering real-world feedback on fit and sizing accuracy.

Footwear-focused websites and blogs frequently publish articles and guides dedicated to Rieker sizing‚ often incorporating user experiences and detailed comparisons. Social media platforms and online forums dedicated to shoe enthusiasts can also provide helpful discussions and recommendations.

Remember to cross-reference information from multiple sources‚ especially considering recent events like the passing of Sonny Jurgensen haven’t impacted sizing information. Prioritize official Rieker resources and verified customer reviews for the most reliable guidance.

Manuals

dri eaz 1200 dehumidifier manual

Dri-Eaz 1200 Dehumidifier Manual: A Comprehensive Guide

This manual details the Dri-Eaz 1200 (Model F203-A) and similar 115-volt DrizAir units (2000, 2400).
It covers safety, operation, maintenance, and troubleshooting for optimal performance.

The Dri-Eaz 1200 DrizAir dehumidifier is a professional-grade unit designed for effective moisture removal in various restoration and maintenance applications. This model, along with its counterparts – the 2000 and 2400 – represents a reliable solution for water damage mitigation, flood control, and maintaining optimal humidity levels.

This dehumidifier utilizes a refrigerant-based system to efficiently extract moisture from the air. It’s engineered for durability and ease of use, making it a valuable asset for professionals and discerning homeowners alike. The 1200 model specifically is noted for its compact size and portability, while still delivering substantial dehumidification capacity.


This manual provides comprehensive instructions for safe operation, routine maintenance, and troubleshooting, ensuring the longevity and peak performance of your Dri-Eaz 1200.

Safety Precautions & Warnings

WARNING: To prevent fire and electric shock, always ensure the unit is properly electrically grounded. Never operate with a damaged power cord – inspect for fraying or cuts before each use. Unplug the dehumidifier before performing any maintenance or cleaning. Do not use extension cords.

This appliance is not intended for use by persons (including children) with reduced physical, sensory, or mental capabilities, or lack of experience and knowledge, unless supervised. Keep children and pets away during operation. Avoid operating in areas where flammable liquids or gases are present.

Electric Shock Hazard: Do not expose electrical components to water. If the unit gets wet, disconnect power immediately and consult a qualified technician. Always read and save these instructions for future reference.

Electrical Grounding Requirements

This Dri-Eaz 1200 dehumidifier must be electrically grounded to minimize the risk of electric shock. The unit is equipped with a three-prong plug that must be inserted directly into a matching, grounded outlet. Do not use adapter plugs or remove the grounding prong.

If a grounding outlet is unavailable, a qualified electrician should install one. Improper grounding can result in a hazardous voltage during an electrical fault. Ensure the electrical circuit is capable of handling the dehumidifier’s power requirements to avoid overheating and potential fire hazards.

Warning: Never defeat the purpose of the grounding plug. Regularly inspect the power cord and grounding connection for damage. Discontinue use if any damage is detected.

Unpacking and Initial Inspection

Upon receiving your Dri-Eaz 1200 dehumidifier, carefully unpack all components and verify that everything listed on the packing slip is present. Inspect the unit for any visible damage that may have occurred during shipping, such as dents, scratches, or broken parts.

Immediately report any damage to the carrier and Dri-Eaz Products, Inc. Before operating the unit, thoroughly inspect the power cord for fraying, cuts, or other signs of damage. Do not use the dehumidifier if the cord is compromised.

Carefully remove all packing materials from around and inside the unit, including any protective films or ties. Ensure the air inlet and outlet are clear of obstructions.

Component Identification

The Dri-Eaz 1200 dehumidifier consists of several key components essential for its operation. These include the robust housing, designed for durability, and the integrated carry handle for portability. Locate the water tank, crucial for collecting moisture, and understand its removal process for emptying.

Identify the control panel, which governs the unit’s settings, and the power cord with its three-prong plug – essential for proper electrical grounding. The unit utilizes a 3M High Air-Flow filter, vital for maintaining air quality and protecting internal components.

Familiarize yourself with the location of the air inlet and outlet, ensuring they remain unobstructed during operation; Understanding these components will aid in effective use and maintenance.

Power Cord Inspection

Prior to each use, a thorough inspection of the power cord is absolutely critical for safety. Carefully examine the entire length of the cord for any signs of damage, including fraying, cuts, or exposed wiring. Pay close attention to the connection points where the cord enters the unit and the plug itself.

A damaged power cord presents a serious electric shock hazard and must not be used. If any damage is detected, immediately discontinue use and do not attempt to repair the cord yourself. Contact a qualified technician or your local authorized distributor for replacement.

Always ensure the three-prong plug is intact and functioning correctly, as it’s vital for proper grounding.

Filter Location and Type (3M High Air-Flow)

The Dri-Eaz 1200 utilizes a 3M High Air-Flow filter, designed to efficiently capture dust and particulate matter, protecting internal components and maintaining optimal performance. This filter is strategically located within the unit to maximize airflow and filtration effectiveness.

Regular inspection and maintenance of the filter are crucial. A clean filter ensures proper dehumidification and prevents strain on the unit’s motor. Vacuuming the filter as needed will remove accumulated debris, extending its lifespan.

Always operate the dehumidifier with a clean filter installed. This simple step safeguards the internal components from dust buildup and contributes to the longevity of your Dri-Eaz 1200.

Operating Instructions

Before operating your Dri-Eaz 1200, ensure the unit is properly grounded and positioned in the desired location. Avoid obstructions around the air inlets and outlets for efficient airflow. Connect the unit to a grounded electrical outlet, verifying the voltage matches the specifications.

To power on, simply switch the unit on. The control panel allows for humidity level adjustments. Select your desired setting based on the room’s conditions and your specific needs. Monitor the water tank level regularly, as the unit will automatically shut off when full.

Consistent monitoring and adjustment will optimize performance.

Initial Setup and Placement

Upon unboxing your Dri-Eaz 1200, carefully inspect the unit for any shipping damage. Position the dehumidifier on a stable, level surface, ensuring adequate space around all sides – at least 12 inches – for optimal airflow. Avoid placing it near walls or furniture that could restrict ventilation.

The ideal placement is in a central location within the affected area. Ensure the power cord reaches a grounded electrical outlet without being stretched or a tripping hazard. Avoid areas with excessive dust or extreme temperatures. Proper placement maximizes dehumidification efficiency and protects the unit.

Powering On and Basic Operation

Before powering on, confirm the water tank is correctly positioned and empty. Plug the Dri-Eaz 1200 into a grounded 115-volt outlet. Press the power button to initiate operation; a light indicator will confirm activation. Initially, set the humidity control to a mid-range setting – around 50-60% – for general use.

The unit will automatically begin extracting moisture from the air. Monitor the humidity level using a hygrometer for precise control. Adjust the setting as needed to achieve the desired humidity. The dehumidifier will cycle on and off to maintain the selected humidity level, ensuring efficient and consistent performance.

Humidity Control Settings

The Dri-Eaz 1200 features adjustable humidity control, allowing precise moisture removal. Lower settings (e.g., 30-40%) are ideal for aggressive drying after water damage, while higher settings (50-60%) suit general moisture control. Continuously running the unit, bypassing humidity control, maximizes moisture extraction.

Experiment to find the optimal setting for your environment. Consider ambient temperature and humidity levels when adjusting. Lower temperatures require lower settings for effective dehumidification. Regularly monitor humidity with a separate hygrometer to verify the unit’s performance and fine-tune the control for desired results. Proper humidity control prevents over-drying and energy waste.

Maintenance and Filter Care

Regular maintenance ensures optimal performance and extends the life of your Dri-Eaz 1200 dehumidifier. Crucially, the 3M High Air-Flow filter requires periodic inspection and cleaning. A dirty filter restricts airflow, reducing dehumidification efficiency and potentially damaging internal components.

Vacuum the filter as needed to remove dust and debris. Avoid using water or detergents, as these can damage the filter material. Replace the filter according to the recommended schedule (see ‘Filter Replacement Schedule’). Internal component dust removal should be performed periodically, ensuring proper ventilation and preventing overheating. Consistent filter care is vital for reliable operation.

Filter Cleaning Procedures

To clean the Dri-Eaz 1200’s 3M High Air-Flow filter, begin by safely disconnecting the unit from the power source; Carefully remove the filter, noting its orientation for correct reinstallation. Utilize a vacuum cleaner with a brush attachment to gently remove accumulated dust and particulate matter.

Avoid applying excessive pressure, which could damage the filter media. Do not wash the filter with water or cleaning solutions, as this will compromise its effectiveness. Inspect the filter for any tears or damage; replace if necessary. A clean filter ensures optimal airflow and dehumidification performance. Reinstall the filter securely before resuming operation.

Filter Replacement Schedule

Maintaining a clean filter is crucial for the Dri-Eaz 1200’s efficiency. While regular cleaning extends filter life, eventual replacement is necessary. The recommended replacement schedule depends on operating conditions and dust exposure.

For typical use, replace the 3M High Air-Flow filter every 6-12 months. In dusty environments, or with frequent use, shorten this interval to 3-6 months. Reduced airflow or diminished dehumidification capacity are indicators of a clogged or degraded filter requiring immediate replacement. Always use a genuine Dri-Eaz replacement filter to ensure proper fit and performance. Consistent filter changes protect internal components and maintain optimal operation.

Internal Component Dust Removal

Periodically removing dust from internal components enhances the Dri-Eaz 1200’s longevity and performance. Before attempting this, always disconnect the unit from the power source to prevent electric shock. Use a vacuum cleaner with a brush attachment to gently remove dust accumulation from the coils and fan blades.

Avoid using water or solvents for cleaning internal parts. Focus on areas where dust visibly collects. This process should be performed annually, or more frequently in particularly dusty environments. Careful dust removal ensures efficient airflow and heat exchange, maintaining optimal dehumidification. Inspect wiring for damage during cleaning and address any concerns promptly.

Troubleshooting Common Issues

If the Dri-Eaz 1200 fails to power on, verify the power cord is securely connected to a grounded outlet. Check the circuit breaker or fuse box for tripped breakers or blown fuses. For insufficient dehumidification, ensure the air filter is clean and the room isn’t excessively large for the unit’s capacity.

Unusual noises often indicate a loose component or obstruction. Immediately disconnect power and inspect the fan blades for debris. If problems persist, contact authorized service personnel. Never attempt to disassemble or repair internal components yourself. Prioritize safety and consult the manual before any troubleshooting steps.

Unit Not Powering On

If your Dri-Eaz 1200 isn’t powering on, the first step is to confirm the unit is properly plugged into a functioning, grounded electrical outlet. Inspect the power cord meticulously for any signs of damage – fraying, cuts, or exposed wires – and do not operate if damage is found.

Next, check your circuit breaker or fuse box to ensure the circuit hasn’t tripped or the fuse hasn’t blown. Reset the breaker or replace the fuse if necessary. If the issue persists, contact a qualified electrician or authorized Dri-Eaz distributor for assistance. Never attempt to repair the unit yourself.

Insufficient Dehumidification

If the Dri-Eaz 1200 isn’t removing moisture effectively, several factors could be at play; First, verify the air filter is clean; a clogged filter restricts airflow, reducing dehumidification capacity. Regularly inspect and clean or replace the 3M High Air-Flow filter as needed.

Ensure the unit is appropriately sized for the space and that all doors and windows are closed to minimize outside air infiltration. Check the humidity control settings – a setting too low might not activate the compressor. Also, confirm the water tank isn’t full, as this will halt operation. If problems continue, consider ambient temperature and humidity levels.

Unusual Noises During Operation

Hearing strange sounds from your Dri-Eaz 1200 can indicate a few potential issues. A rattling noise might suggest something is loose within the unit, requiring inspection. Humming could be normal compressor operation, but excessive humming warrants attention. Clicking sounds may relate to the defrost cycle, which is a normal function.

If you detect grinding or scraping noises, immediately power off the dehumidifier. This could signify internal component damage. Ensure the unit is placed on a level surface to prevent vibrations. Regularly check for obstructions around the fan. If the noise persists after these checks, contact a qualified technician for repair or consult Dri-Eaz support.

Technical Specifications

The Dri-Eaz 1200 dehumidifier, along with the 2000 and 2400 models, operates on a standard 115-volt power supply. Specific voltage and amperage requirements are detailed on the unit’s nameplate; always verify compatibility before operation. This unit is designed for effective moisture removal in various environments.

Regarding performance, the 1200 boasts a substantial dehumidification capacity, capable of removing a significant amount of moisture per day. The water tank capacity allows for extended operation before needing emptying. Precise specifications vary slightly between models, so refer to the product label for exact figures. These specifications ensure efficient and reliable performance.

Voltage and Power Requirements

The Dri-Eaz 1200, alongside the 2000 and 2400 models, is specifically designed for use with a 115-volt electrical supply. It’s crucial to confirm your power source matches this requirement before connecting the unit to prevent damage or safety hazards. Always check the nameplate on the dehumidifier for precise amperage details.

Proper electrical grounding is essential for safe operation, as highlighted in the manual’s safety precautions. Utilizing a three-prong plug directly into a grounded outlet is mandatory. Avoid using extension cords if possible; if necessary, ensure they are heavy-duty and properly grounded. Failure to adhere to these guidelines could result in electric shock.

Dehumidification Capacity

The Dri-Eaz 1200 dehumidifier is engineered to effectively remove moisture from the air, making it suitable for various restoration and maintenance applications. While specific capacity varies based on temperature and humidity levels, it’s designed for moderate-sized spaces. The 2000 and 2400 models offer increased capacities for larger areas.

Understanding the unit’s capacity is vital for efficient operation. Factors like room size, ventilation, and initial humidity levels influence performance. Regularly monitoring humidity levels with a hygrometer helps determine if the unit is operating optimally. Proper airflow around the dehumidifier is also crucial for maximizing moisture removal.

Water Tank Capacity

The Dri-Eaz 1200 dehumidifier features an internal water tank designed to collect the moisture removed from the air during operation. While the exact capacity isn’t explicitly stated in readily available documentation, it’s sized to allow for extended run times before requiring emptying. Regularly checking and emptying the tank prevents automatic shut-off due to a full reservoir.

For continuous operation, a hose connection is available, allowing for direct drainage into a suitable drain. This eliminates the need for manual emptying and is ideal for long-term moisture removal projects. Always ensure the drain hose is properly secured to prevent leaks and maintain efficient operation of the unit.

Warranty Information

Dri-Eaz Products, Inc. provides a warranty on the DrizAir 1200 dehumidifier, protecting against manufacturing defects in materials and workmanship. Specific warranty terms, duration, and coverage details vary depending on the purchase date and region. It’s crucial to retain proof of purchase, such as the original receipt or invoice, to validate any warranty claims.

The warranty typically covers parts and labor for repairs performed by an authorized Dri-Eaz service center. Damage resulting from misuse, neglect, unauthorized modifications, or acts of nature is generally excluded. For complete warranty details, refer to the warranty card included with the unit or visit the Dri-Eaz website at www.dri-eaz.com.

Contacting Dri-Eaz Support

For assistance with your Dri-Eaz 1200 dehumidifier, several support options are available. The primary method is through the official Dri-Eaz website, www.dri-eaz.com, where you can find a comprehensive FAQ section, troubleshooting guides, and downloadable manuals. Direct contact can be made via phone during business hours to speak with a knowledgeable customer service representative.

Dri-Eaz Products, Inc. is located at 15180 Josh Wilson Road, Burlington, WA 98233, USA. Email support is also offered, providing a convenient way to submit inquiries and receive detailed responses. When contacting support, have your unit’s model number (F203-A) and serial number readily available to expedite the process and ensure accurate assistance.

Dri-Eaz 1200 vs. Other Models (2000, 2400)

The Dri-Eaz 1200, 2000, and 2400 are all 115-volt DrizAir dehumidifiers, sharing core functionality but differing in dehumidification capacity. The 1200 is suited for smaller spaces and quicker moisture removal, while the 2000 and 2400 are designed for larger areas and more substantial water damage restoration. Generally, higher numbers indicate greater performance.

All three models utilize similar operating principles and share common components, like the 3M High Air-Flow filter, simplifying maintenance across the range. However, the 2000 and 2400 models typically feature larger water tank capacities and potentially more robust construction for heavier-duty use. Choosing the right model depends on the scale of the dehumidification task.

Understanding the Control Panel

The Dri-Eaz 1200’s control panel is designed for intuitive operation, allowing users to easily manage humidity levels. While specific layouts may vary slightly between models (1200, 2000, 2400), core functions remain consistent. Typically, a power switch initiates operation, and humidity control settings allow adjustment of the desired moisture level.

Some models feature a simple dial or digital display for humidity selection, while others may include indicators for operational status, such as power on or tank full. Understanding these controls is crucial for efficient dehumidification. Refer to the detailed diagrams within this manual for precise component locations and function explanations. Proper use ensures optimal performance and extends the unit’s lifespan.

Proper Storage Procedures

To ensure the longevity of your Dri-Eaz 1200 dehumidifier (and other DrizAir models like 2000 & 2400), proper storage is essential when not in use. Before storing, thoroughly drain the water tank to prevent mold and bacterial growth. Clean the filter as outlined in the maintenance section of this manual.

Coil the power cord neatly and secure it to prevent damage. Store the unit in a clean, dry, and well-ventilated area, protected from extreme temperatures and direct sunlight. Covering the unit with a breathable cloth can help prevent dust accumulation. Regularly inspect the stored dehumidifier for any signs of damage or deterioration.

Disposal Considerations

Responsible disposal of your Dri-Eaz 1200 dehumidifier (and other DrizAir models) is crucial for environmental protection. Do not simply discard the unit with regular household waste. This appliance contains refrigerants and other components requiring specialized handling.

Contact your local waste management authority to determine appropriate disposal methods in your area. Many communities offer electronic waste (e-waste) recycling programs. Alternatively, Dri-Eaz Products, Inc. may offer take-back or recycling options – check their website (www.dri-eaz.com) for details. Ensure all refrigerants are properly recovered by a certified technician before disposal. Following these guidelines helps minimize environmental impact.

PreviousNext

You Want To Have Your Favorite Car?

We have a big list of modern & classic cars in both used and new categories.